Overview
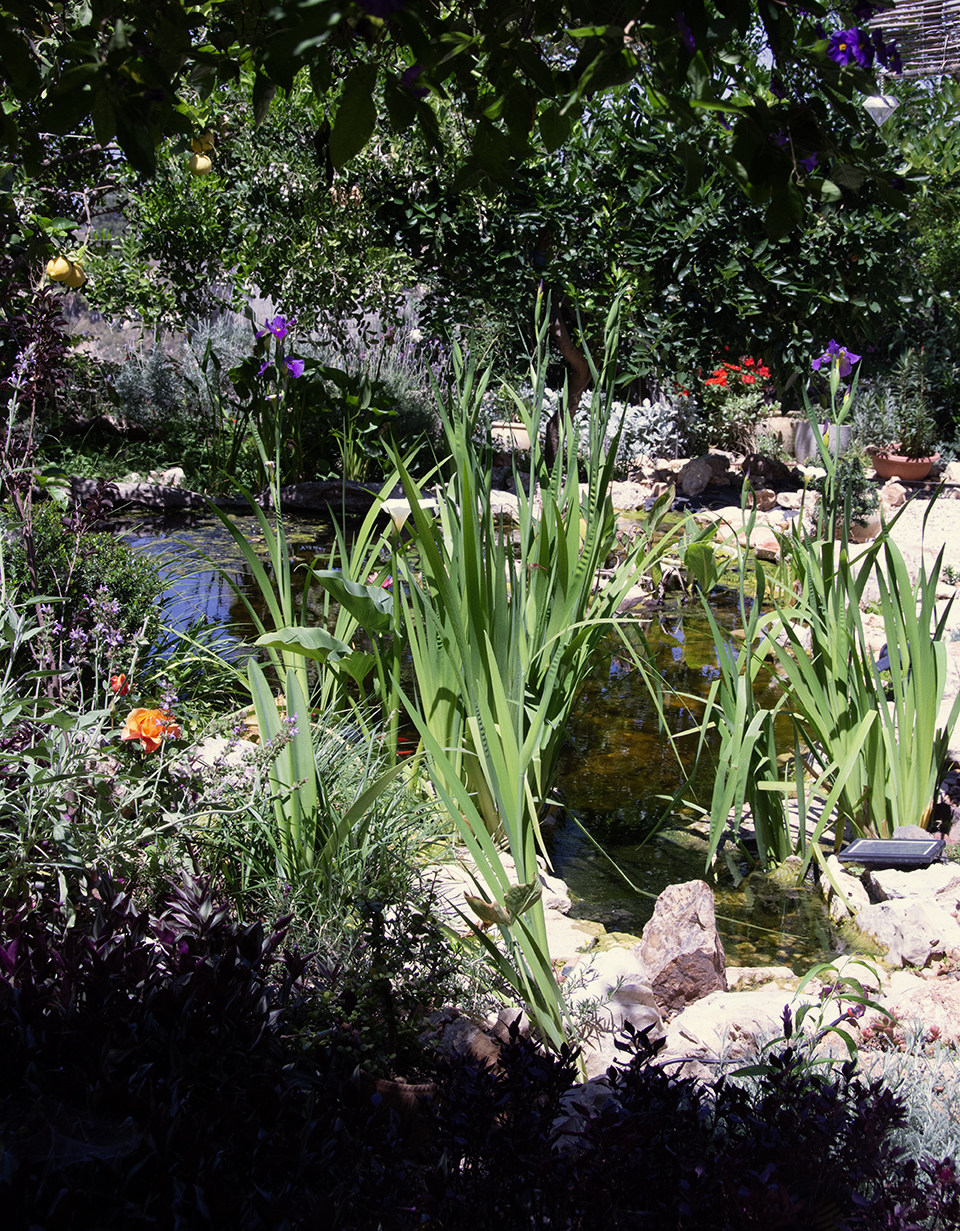
The pond holds about 12,500 liters with another 500 liters in a shallow planting zone and a 2 meter-long stream. Eventually, there will be a 1,000 liter bog at the head of the stream.
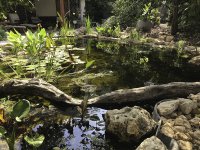
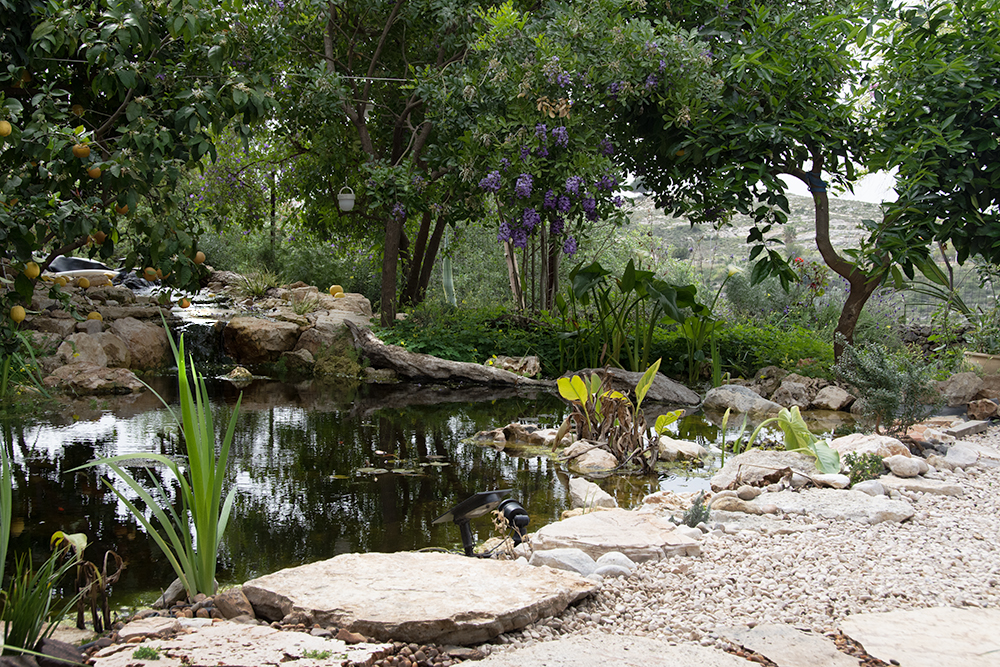
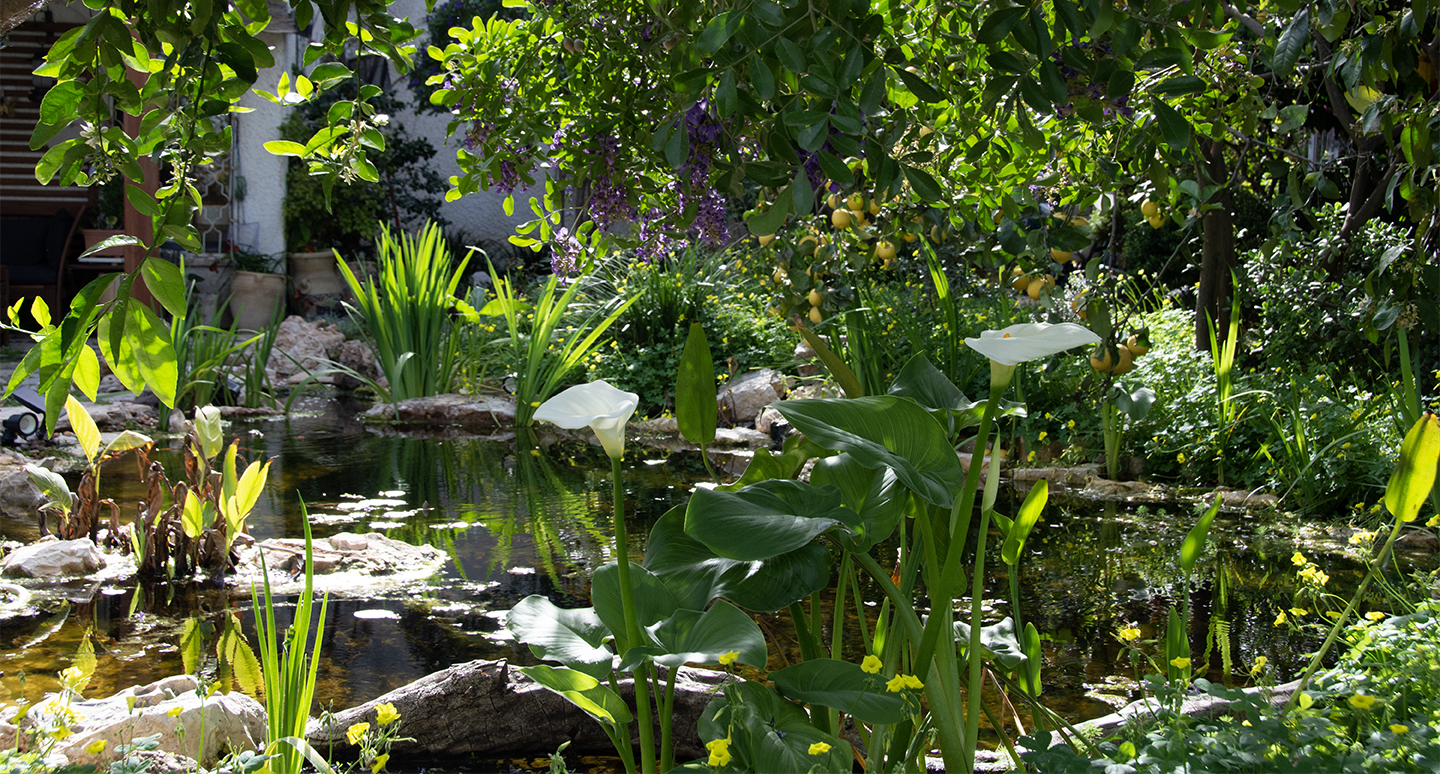
This view looks back toward the house from the west side of the pond, over the shallow planting zone. The log in the foreground is a huge olive branch that fell during a storm over 15 years ago.
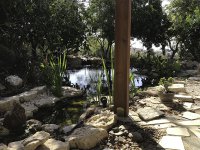
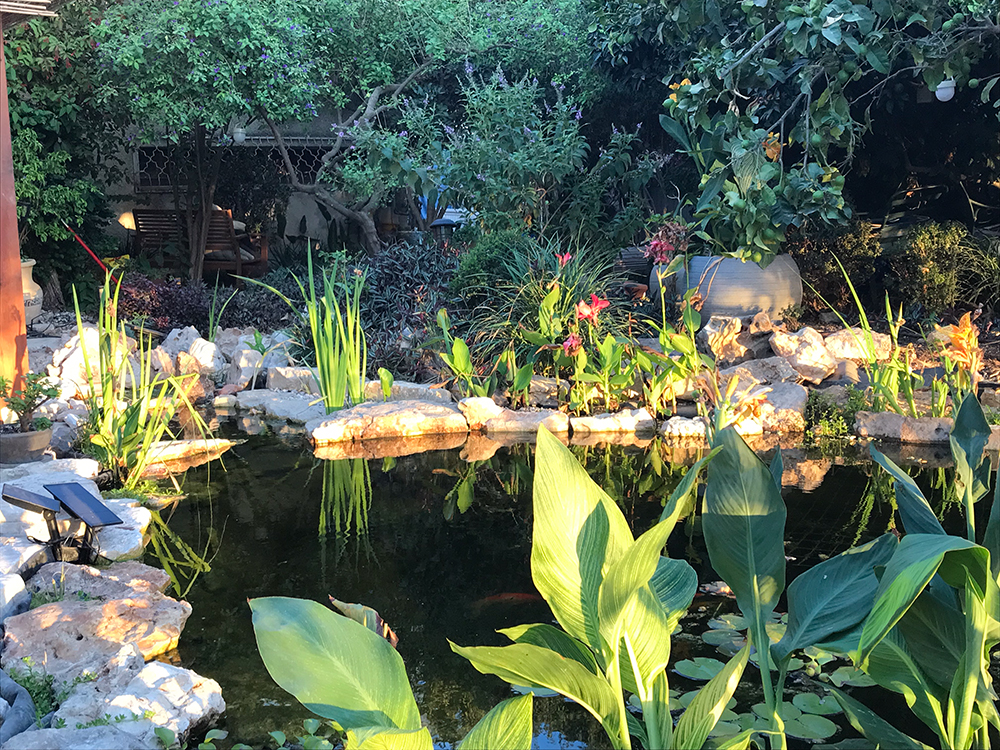
A view from the patio looking across the intake bay towards the falls and stream at the far end of the pond.
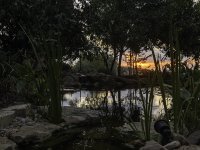
My favorite view of all: sunset over the pond at the end of a long day!
Planning and Construction
The pond was conceived soon after we bought our house in Alfei Menashe, a town at the edge of the Shomron hills. I dug down to about 20 cm and hit rock. It was clear that it would be a much bigger project than I had bargained for. I settled for digging a much smaller pond, which I intended to eventually use as a biological filter for The Big One. But when a wild dog punctured the liner, that smaller pond was drained (and the wild dog was domesticated, which is a whole 'nother story!)
And so, for over 15 years, we had this huge shallow hole in the middle of the yard, while an entire garden grew up around it: paths, stepping stones, fruit trees, and rock gardens. And there, smack in the middle of it all was a 4 meter by 5 meter hole...
And so things remained as the kids grew up and moved out to start their own families. After many adventures, I retired to start a publishing business with my husband. And then the pandemic hit... And suddenly doing something about that whopping big hole in the garden began to seem like a really good lockdown project!
Here is my initial plan for the pond.

The hole would be 5.5 meters by 6.5 meters, with an average depth of about 30 cm and a deeper zone about 90 cm deep.
The Dig - layers and layers of rock!
What I hadn't considered was just how hard it was going to be to dig through all that rock: layers and layers of sedimentary limestone, which splintered into gravel and various boulders. Quite a project for one 60 year-old grandma with a pickaxe!
And even before starting to dig, there were a few problems. First, the area where the stream was to go actually started out being the lowest part of the garden! My goal was to use spoil from the pond to build it up so that it would be about half a meter above the point where water enters the pond. And of course, that point itself also needed to be built up, as did the west side of the pond, which started out considerably lower than the east side...
So my first job was to pull the top soil off the pond and use it to build up the west side of the pond. Why top soil? Because this area would later be planted, and I wanted to preserve every cm of fertile soil for that. The subsoil would later go toward building up the stream bed in the southwest corner. In each of the photos that follow, you'll see the stream area gradually rising, until it's at the level of the retaining wall (which is now in danger of collapsing down the hillside due to the weight of soil, but that's a different issue).
I also had to straighten two trees that were threatening to fall into the pond using a come-along (manual winch). Once that was done, various paving slabs were dug out of the old pond and moved over to my staging area with the hand truck, and digging in earnest was ready to commence!

Now one problem I encountered early on is the soil...or rather, the lack of it! Once I'd dug down 20 cm, I met gravel. From there on down, it was all or nothing: there was no way to form shelves at all.
So while I was able to cut away the topsoil to allow the placement of edging stones, the shelves inside the pond would need to be built using cinderblock or something similar. Fortunately, in one of my construction dump sorties, I had scrounged some pieces of an old concrete pipe (visible in the photos above). These were used to prop up paving slabs around the deep zone to form shelves.
Not everyone was happy with the pond progress however... As I removed the first layer of stones, the wildlife living beneath the stones had to be rehomed. That included about one scorpion per rock...
And then I had a stroke of luck! A friend who is in construction loaned me his demolition hammer for a day. Yeeehawww!
The scorpions were not amused.

Sadly, I had to give the magical Makita demo hammer back to him the next day, but it was fun while it lasted!
And so things progressed... By the end of January, the stream area had risen to the top of the retaining wall and the entry point was nearly at the high water mark.
Ready for lining!
It took three more months, but by the end of March, the hole was finished, and ready for lining:

Large paver stones scrounged from a demolished building were used to prop up the walls in the deep zone, this was necessary because once I'd gone down to 60 cm I'd run out of soil; it was just rocks of all sizes. So rather than deal with millions of sharp edges, none of which could be pulled out without revealing yet more sharp bits, I decided to just line the walls all around with concrete pavers. Each paver is 45 cm on a side and 10 cm thick. I hammered out the sharp corners where they don't quite mesh, and then wrapped the tops and corners with extra underlayment over foam packing material.
Next, it was time to begin working on the intake bay. I bought a 100 square meter roll of cheap thin geotextile material to serve as a first layer. On top of that, I added a layer of sand, and on top of that, a layer of 400 gram heavy-duty geotextile. The reason I put it on top of the cheap geotextile was that if I put it down right over the ground, when the ground dries out during a sharav (desert heat that can sap the moisture out of the soil down to about 20cm) the ground could crack and I'd lose the sand. I got the idea to use the geotextile under the sand from an Aquascape build in Arizona, where they did something similar.
Installing the liner
The liner was delivered at the end of March: a great 11 meter long sand worm waiting to trip up (and possibly devour) the unwary patio pedestrian. Meanwhile, the underlayment was laid and 10 bags of sand were spread on the shelves and pond bottom.

Since .40 mil Fish-safe EPDM was extremely expensive, I opted for .60 mil roofing liner from a roofing company. This stuff comes with a layer of talcum powder that needs to be washed off before use, but was less than half the price of the Firestone pond liner.
Now the question was whether we—one rather out-of-shape-but-otherwise-admirable-computer-programmer and one granny-with-attitude—could somehow drag 300 kilos worth of 60 mil EPDM into the hole...
It took some doing! I would not recommend trying to lay a liner of this size with only two people. But somehow we managed it. In the end, I rigged up an old Ikea bookshelf ladder to serve as a ramp, plus some boards wrapped in underlayment. Working together, and with many choice words, we managed to drag the liner, inch-worm style, over to my home-made ramps. Once loaded onto the ends of the ramps, it was up to God and gravity to get the thing into the hole. We then spent over an hour tugging and straining at the various ends to align the thing just so, making sure to have plenty of excess at the waterfall end so as to allow for an overlap of the stream liner.
Here's what it looked like once the liner was in:

Now it was time to lay the overlay. But first, I had to find a source for 400 gram geotextile material, which I finally did. Much excitement ensued when it was time to offload the roll... Our house is one story below street level, so the most efficient way of getting this great heavy roll of 100 square meters of underlayment down into the front yard was... you guessed it...gravity! Yep, I seem to make more use of gravity in my builds than any other tool. A real downer, but I digress...
So I bellowed for His Honor the Cook, and together we tipped the roll over the railing of the sidewalk and allowed Newton's Laws to take over. In other words, we went ballistic... A good time was had by all, and nothing important was broken.
The Intake Bay
Once the liner was in and the overlay laid, and it was time to start rocking! But where to start? I opted to work on the intake bay first, as it sits right off the patio. Here is the intake bay all lined, overlayed, milk crates and trash can/ pump vault installed, ready for the next stage:

The "intake" bit of the intake bay was meant to incorporate one of the largest stones we had--a 300 kilogram behemah (lit. "cow") of a rock measuring 60 cm by 30 by 40, which would need to be maneuvered over the narrow land bridge dividing the intake bay from the pond.
Once more, His Honor the Cook was called into action. Together, using various ropes, cardboard, bits of underlayment, and a lot of brute force, we managed to drag the thing into place. It took us nearly two hours, and doubtless caused the neighbors to look up many interesting new words in the dictionary.
But eventually, it was done, and I could start picking out rocks for the intake bay. The goal was to make it look as if a thousand years of flash floods had eroded away the ground, leaving a small pooling area behind. This sort of terrain is common in many places in Israel, so I had some images to go on:

Rocking in
And then it was time to rock in the pond!

The rocks I used were what I call "roll-em" rocks -- rocks that are just at the limit of my ability to lift, but which I could roll into place on my own. The top row in the photo is mostly fairly flat rocks, which were braced with river rock behind them so they stand a bit more vertically. These would be about 10-15 cm below the water line. The top row, composed of rocks that would stick up above the water line, is composed of blockier rocks. I saved the better ones for that.
The waterfall
By the beginning of May I had finished most of the rocking in of the pond and it was time to start on the stream and waterfall.
The spillway stone is a lovely stone with an interesting saddle shape, but had I realized how very difficult it would be to match up the frame rocks, I would have gone with a simple block-shaped stone. A lesson for my next pond build!
Here's a view of the waterfall-in-progress:

And, since this pond is the centerpiece of an oriental style garden, the waterfall wasn't complete without a carp rock!

What's a carp rock, you ask? Well, in Chinese and Japanese gardens it's traditional to put a stone at the base of the waterfall that represents a carp striving to climb the waterfall. Legend has it that a carp that manages to reach the top is transformed into a dragon, a lovely symbol for the striving to overcome obstacles and reach one's full potential.
In the case of this particular carp, I had the rock picked out for this purpose long before the pond was dug, so it was quite a milestone to finally have it placed in the pond!

Filling the pond!
By the middle of May, it was time to fill the pond...

This was not the final fill, but just enough to clean out some of the accumulated debris and allow me to finally get an idea of where the water level was going to be, so that I could start setting stones on the shallow side of the pond. This also allowed me to see how much to reduce the edge to make my overflow and how much liner I'd have left over on the far side of the pond (answer to that last question: a lot!). That extra liner would eventually be used to create a shallow planting zone between the two trees at the far side of the pond.

With the water almost up to its final level, I was able to see where some of my edge stones didn't quite match in terms of shape or color, so I made more adjustments.
The Peninsula stones
My plan had included one or more stones on the near side of the pond, to create a peninsula. The first stone to be placed was the "turtle rock", a stone that I had set aside for this purpose many years before.
The other rocks for the peninsula were delivered right over the back fence directly into the garden! The way this happened is that there is a Bedouin fellow named Muhammad who comes with a tractor every spring to clear the brush and top growth in the vacant lot next door to make a fire break. When I heard his tractor, I ran down the slope and somehow managed to get his attention without getting run over.
Once he got over the shock of grannies popping up out of the bushes and asking him to scoop up rocks, he asked, "How many and what size do you want?"
"How much would you charge me for each rock?" I asked. And we were off and running!
In the end, we agreed on a price and got to work. We had some fun picking out a few rocks on the hillside, and I watched as Muhammad dug them out and maneuvered them into the shovel of this tractor. He made it look easy! Once back up to the level of the vacant lot, Muhammad maneuvered through the overgrown trees and got the shovel into our yard, dropping the rocks on our side so delicately that they barely even knocked together.
Here's a picture of the rocks, one of which is much bigger than it looks here:

Finishing the pond (er... no, who am I trying to kid)!
On the 21st of May, it was time to empty out the dirty water and refill the pond with its final fill.
I pumped all the filthy water from the initial fill into the garden and began filling.
Having the pond full was extremely helpful for adding the finishing touches. Not only could I see exactly where the edges were, I also found that moving heavy rocks around underwater was ever so much easier! Limestone is only about 2.5 times the density of water, so they weren't nearly as heavy once I got them into the pond. This made the work of rocking in the upper edges that much easier.
While the pond was filling, I foamed in the waterfall spill stone. I left the falls running for a couple of days in order to check levels and see where else needed to be foamed. Because I can't get waterfall foam here, I used construction polyurethane foam. Seems to do the job.
Here are a few pics:
The pond lit up by a little solar powered spotlight in the intake bay. This view is of the waterfall from the sitting area.

The foreground would eventually be covered by landscape fabric topped by pea gravel, while the edge would be topped by more rock.

I would eventually need to raise my "turtle rock" up by about 15 cm and add the other peninsula rocks, but the pond was beginning to look more polished.
Graveling issues
One thing I wasn't able to do before filling the pond was add all the gravel to the bottom and sides. I had bought six tones (!) of gravel for this, but because of the terrain, it was delivered to the front garden, and would need to be sent down to the back by means of a DIY "rock chute" made of plastic sewage pipes.
But worse still, the gravel couldn't be used as-is; I found that it was filled with sharp bits of flint. About 5% of each handful of gravel is flint or just very sharp gravel. So I needed to set up a screen to rinse and sort every bucket of gravel before putting it in the pond. This meant that putting in the gravel would be a project for the next year or two!
Edging
By the beginning of June, the pond was well on its way to completion. Here are some pics:
1. The western edge of the pond was planted with cannas and taro. Later on I added Cala lilies, which seem to do especially well in our climate.

2. The northern edge. I put down landscape fabric and began covered it with white pebbles. As a placeholder for the larger paving stones that would eventually complete the edge, I used some flagstone.

Finishing touches
By the end of June, I finally got the rocks for the peninsula set, including the turtle rock! For those who have followed the long drawn-out saga of this build, you'll remember that one of the first stones I pulled out of the hole while digging was a huge bit of limestone with a lot of character, aka the "turtle rock".
That rock had sat on the edge of my patio for some 20 years. During that time all kinds of things happened: the kids grew up and went into the army and got out of the army and got married and moved away. I quit my job and published a book and started a home business. I left my police unit and joined a reserve unit. In short, life happened, while the pond very definitively did not happen. And all that while, the turtle rock sat in the garden, getting tripped over, gardened around, and occasionally heaved out of the way.

And now, finally, the turtle rock was where I meant for it to go since the day I dug it up! Along side it are the two huge boulders that Muhammad the tractor driver brought me the day he cleared brush from the vacant lot. I wasn't sure I'd even be able to budge those two bruisers, but I was able to roll them out of the hole they were in and out to the path, where they could be eased on to the hand truck (one at a time, of course) and rolled around the pond to the shallow end. At that point, it was just a matter of dumping them right off the hand truck and into the water. Once in the pond, I was able to heft them around to where I wanted them.
From here on out, it's been mostly a matter of adding finishing touches. I still have plenty of gravel to add to the pond and the edges. The stream is still a work in progress. And then there's the bog still to be built. But overall the pond has added far more to the quality of our living space than I could have ever imagined!
Here are a few photos of the pond one year on:
And so, for over 15 years, we had this huge shallow hole in the middle of the yard, while an entire garden grew up around it: paths, stepping stones, fruit trees, and rock gardens. And there, smack in the middle of it all was a 4 meter by 5 meter hole...
And so things remained as the kids grew up and moved out to start their own families. After many adventures, I retired to start a publishing business with my husband. And then the pandemic hit... And suddenly doing something about that whopping big hole in the garden began to seem like a really good lockdown project!
Here is my initial plan for the pond.
The hole would be 5.5 meters by 6.5 meters, with an average depth of about 30 cm and a deeper zone about 90 cm deep.
The Dig - layers and layers of rock!
What I hadn't considered was just how hard it was going to be to dig through all that rock: layers and layers of sedimentary limestone, which splintered into gravel and various boulders. Quite a project for one 60 year-old grandma with a pickaxe!
And even before starting to dig, there were a few problems. First, the area where the stream was to go actually started out being the lowest part of the garden! My goal was to use spoil from the pond to build it up so that it would be about half a meter above the point where water enters the pond. And of course, that point itself also needed to be built up, as did the west side of the pond, which started out considerably lower than the east side...
So my first job was to pull the top soil off the pond and use it to build up the west side of the pond. Why top soil? Because this area would later be planted, and I wanted to preserve every cm of fertile soil for that. The subsoil would later go toward building up the stream bed in the southwest corner. In each of the photos that follow, you'll see the stream area gradually rising, until it's at the level of the retaining wall (which is now in danger of collapsing down the hillside due to the weight of soil, but that's a different issue).
I also had to straighten two trees that were threatening to fall into the pond using a come-along (manual winch). Once that was done, various paving slabs were dug out of the old pond and moved over to my staging area with the hand truck, and digging in earnest was ready to commence!
Now one problem I encountered early on is the soil...or rather, the lack of it! Once I'd dug down 20 cm, I met gravel. From there on down, it was all or nothing: there was no way to form shelves at all.
So while I was able to cut away the topsoil to allow the placement of edging stones, the shelves inside the pond would need to be built using cinderblock or something similar. Fortunately, in one of my construction dump sorties, I had scrounged some pieces of an old concrete pipe (visible in the photos above). These were used to prop up paving slabs around the deep zone to form shelves.
Not everyone was happy with the pond progress however... As I removed the first layer of stones, the wildlife living beneath the stones had to be rehomed. That included about one scorpion per rock...
And then I had a stroke of luck! A friend who is in construction loaned me his demolition hammer for a day. Yeeehawww!
The scorpions were not amused.
Sadly, I had to give the magical Makita demo hammer back to him the next day, but it was fun while it lasted!
And so things progressed... By the end of January, the stream area had risen to the top of the retaining wall and the entry point was nearly at the high water mark.
Ready for lining!
It took three more months, but by the end of March, the hole was finished, and ready for lining:
Large paver stones scrounged from a demolished building were used to prop up the walls in the deep zone, this was necessary because once I'd gone down to 60 cm I'd run out of soil; it was just rocks of all sizes. So rather than deal with millions of sharp edges, none of which could be pulled out without revealing yet more sharp bits, I decided to just line the walls all around with concrete pavers. Each paver is 45 cm on a side and 10 cm thick. I hammered out the sharp corners where they don't quite mesh, and then wrapped the tops and corners with extra underlayment over foam packing material.
Next, it was time to begin working on the intake bay. I bought a 100 square meter roll of cheap thin geotextile material to serve as a first layer. On top of that, I added a layer of sand, and on top of that, a layer of 400 gram heavy-duty geotextile. The reason I put it on top of the cheap geotextile was that if I put it down right over the ground, when the ground dries out during a sharav (desert heat that can sap the moisture out of the soil down to about 20cm) the ground could crack and I'd lose the sand. I got the idea to use the geotextile under the sand from an Aquascape build in Arizona, where they did something similar.
Installing the liner
The liner was delivered at the end of March: a great 11 meter long sand worm waiting to trip up (and possibly devour) the unwary patio pedestrian. Meanwhile, the underlayment was laid and 10 bags of sand were spread on the shelves and pond bottom.
Since .40 mil Fish-safe EPDM was extremely expensive, I opted for .60 mil roofing liner from a roofing company. This stuff comes with a layer of talcum powder that needs to be washed off before use, but was less than half the price of the Firestone pond liner.
Now the question was whether we—one rather out-of-shape-but-otherwise-admirable-computer-programmer and one granny-with-attitude—could somehow drag 300 kilos worth of 60 mil EPDM into the hole...
It took some doing! I would not recommend trying to lay a liner of this size with only two people. But somehow we managed it. In the end, I rigged up an old Ikea bookshelf ladder to serve as a ramp, plus some boards wrapped in underlayment. Working together, and with many choice words, we managed to drag the liner, inch-worm style, over to my home-made ramps. Once loaded onto the ends of the ramps, it was up to God and gravity to get the thing into the hole. We then spent over an hour tugging and straining at the various ends to align the thing just so, making sure to have plenty of excess at the waterfall end so as to allow for an overlap of the stream liner.
Here's what it looked like once the liner was in:
Now it was time to lay the overlay. But first, I had to find a source for 400 gram geotextile material, which I finally did. Much excitement ensued when it was time to offload the roll... Our house is one story below street level, so the most efficient way of getting this great heavy roll of 100 square meters of underlayment down into the front yard was... you guessed it...gravity! Yep, I seem to make more use of gravity in my builds than any other tool. A real downer, but I digress...
So I bellowed for His Honor the Cook, and together we tipped the roll over the railing of the sidewalk and allowed Newton's Laws to take over. In other words, we went ballistic... A good time was had by all, and nothing important was broken.
The Intake Bay
Once the liner was in and the overlay laid, and it was time to start rocking! But where to start? I opted to work on the intake bay first, as it sits right off the patio. Here is the intake bay all lined, overlayed, milk crates and trash can/ pump vault installed, ready for the next stage:
The "intake" bit of the intake bay was meant to incorporate one of the largest stones we had--a 300 kilogram behemah (lit. "cow") of a rock measuring 60 cm by 30 by 40, which would need to be maneuvered over the narrow land bridge dividing the intake bay from the pond.
Once more, His Honor the Cook was called into action. Together, using various ropes, cardboard, bits of underlayment, and a lot of brute force, we managed to drag the thing into place. It took us nearly two hours, and doubtless caused the neighbors to look up many interesting new words in the dictionary.
But eventually, it was done, and I could start picking out rocks for the intake bay. The goal was to make it look as if a thousand years of flash floods had eroded away the ground, leaving a small pooling area behind. This sort of terrain is common in many places in Israel, so I had some images to go on:
Rocking in
And then it was time to rock in the pond!
The rocks I used were what I call "roll-em" rocks -- rocks that are just at the limit of my ability to lift, but which I could roll into place on my own. The top row in the photo is mostly fairly flat rocks, which were braced with river rock behind them so they stand a bit more vertically. These would be about 10-15 cm below the water line. The top row, composed of rocks that would stick up above the water line, is composed of blockier rocks. I saved the better ones for that.
The waterfall
By the beginning of May I had finished most of the rocking in of the pond and it was time to start on the stream and waterfall.
The spillway stone is a lovely stone with an interesting saddle shape, but had I realized how very difficult it would be to match up the frame rocks, I would have gone with a simple block-shaped stone. A lesson for my next pond build!
Here's a view of the waterfall-in-progress:
And, since this pond is the centerpiece of an oriental style garden, the waterfall wasn't complete without a carp rock!
What's a carp rock, you ask? Well, in Chinese and Japanese gardens it's traditional to put a stone at the base of the waterfall that represents a carp striving to climb the waterfall. Legend has it that a carp that manages to reach the top is transformed into a dragon, a lovely symbol for the striving to overcome obstacles and reach one's full potential.
In the case of this particular carp, I had the rock picked out for this purpose long before the pond was dug, so it was quite a milestone to finally have it placed in the pond!
Filling the pond!
By the middle of May, it was time to fill the pond...
This was not the final fill, but just enough to clean out some of the accumulated debris and allow me to finally get an idea of where the water level was going to be, so that I could start setting stones on the shallow side of the pond. This also allowed me to see how much to reduce the edge to make my overflow and how much liner I'd have left over on the far side of the pond (answer to that last question: a lot!). That extra liner would eventually be used to create a shallow planting zone between the two trees at the far side of the pond.
With the water almost up to its final level, I was able to see where some of my edge stones didn't quite match in terms of shape or color, so I made more adjustments.
The Peninsula stones
My plan had included one or more stones on the near side of the pond, to create a peninsula. The first stone to be placed was the "turtle rock", a stone that I had set aside for this purpose many years before.
The other rocks for the peninsula were delivered right over the back fence directly into the garden! The way this happened is that there is a Bedouin fellow named Muhammad who comes with a tractor every spring to clear the brush and top growth in the vacant lot next door to make a fire break. When I heard his tractor, I ran down the slope and somehow managed to get his attention without getting run over.
Once he got over the shock of grannies popping up out of the bushes and asking him to scoop up rocks, he asked, "How many and what size do you want?"
"How much would you charge me for each rock?" I asked. And we were off and running!
In the end, we agreed on a price and got to work. We had some fun picking out a few rocks on the hillside, and I watched as Muhammad dug them out and maneuvered them into the shovel of this tractor. He made it look easy! Once back up to the level of the vacant lot, Muhammad maneuvered through the overgrown trees and got the shovel into our yard, dropping the rocks on our side so delicately that they barely even knocked together.
Here's a picture of the rocks, one of which is much bigger than it looks here:
Finishing the pond (er... no, who am I trying to kid)!
On the 21st of May, it was time to empty out the dirty water and refill the pond with its final fill.
I pumped all the filthy water from the initial fill into the garden and began filling.
Having the pond full was extremely helpful for adding the finishing touches. Not only could I see exactly where the edges were, I also found that moving heavy rocks around underwater was ever so much easier! Limestone is only about 2.5 times the density of water, so they weren't nearly as heavy once I got them into the pond. This made the work of rocking in the upper edges that much easier.
While the pond was filling, I foamed in the waterfall spill stone. I left the falls running for a couple of days in order to check levels and see where else needed to be foamed. Because I can't get waterfall foam here, I used construction polyurethane foam. Seems to do the job.
Here are a few pics:
The pond lit up by a little solar powered spotlight in the intake bay. This view is of the waterfall from the sitting area.
The foreground would eventually be covered by landscape fabric topped by pea gravel, while the edge would be topped by more rock.
I would eventually need to raise my "turtle rock" up by about 15 cm and add the other peninsula rocks, but the pond was beginning to look more polished.
Graveling issues
One thing I wasn't able to do before filling the pond was add all the gravel to the bottom and sides. I had bought six tones (!) of gravel for this, but because of the terrain, it was delivered to the front garden, and would need to be sent down to the back by means of a DIY "rock chute" made of plastic sewage pipes.
But worse still, the gravel couldn't be used as-is; I found that it was filled with sharp bits of flint. About 5% of each handful of gravel is flint or just very sharp gravel. So I needed to set up a screen to rinse and sort every bucket of gravel before putting it in the pond. This meant that putting in the gravel would be a project for the next year or two!
Edging
By the beginning of June, the pond was well on its way to completion. Here are some pics:
1. The western edge of the pond was planted with cannas and taro. Later on I added Cala lilies, which seem to do especially well in our climate.
2. The northern edge. I put down landscape fabric and began covered it with white pebbles. As a placeholder for the larger paving stones that would eventually complete the edge, I used some flagstone.
Finishing touches
By the end of June, I finally got the rocks for the peninsula set, including the turtle rock! For those who have followed the long drawn-out saga of this build, you'll remember that one of the first stones I pulled out of the hole while digging was a huge bit of limestone with a lot of character, aka the "turtle rock".
That rock had sat on the edge of my patio for some 20 years. During that time all kinds of things happened: the kids grew up and went into the army and got out of the army and got married and moved away. I quit my job and published a book and started a home business. I left my police unit and joined a reserve unit. In short, life happened, while the pond very definitively did not happen. And all that while, the turtle rock sat in the garden, getting tripped over, gardened around, and occasionally heaved out of the way.
And now, finally, the turtle rock was where I meant for it to go since the day I dug it up! Along side it are the two huge boulders that Muhammad the tractor driver brought me the day he cleared brush from the vacant lot. I wasn't sure I'd even be able to budge those two bruisers, but I was able to roll them out of the hole they were in and out to the path, where they could be eased on to the hand truck (one at a time, of course) and rolled around the pond to the shallow end. At that point, it was just a matter of dumping them right off the hand truck and into the water. Once in the pond, I was able to heft them around to where I wanted them.
From here on out, it's been mostly a matter of adding finishing touches. I still have plenty of gravel to add to the pond and the edges. The stream is still a work in progress. And then there's the bog still to be built. But overall the pond has added far more to the quality of our living space than I could have ever imagined!
Here are a few photos of the pond one year on:
Fish / Plant Stock
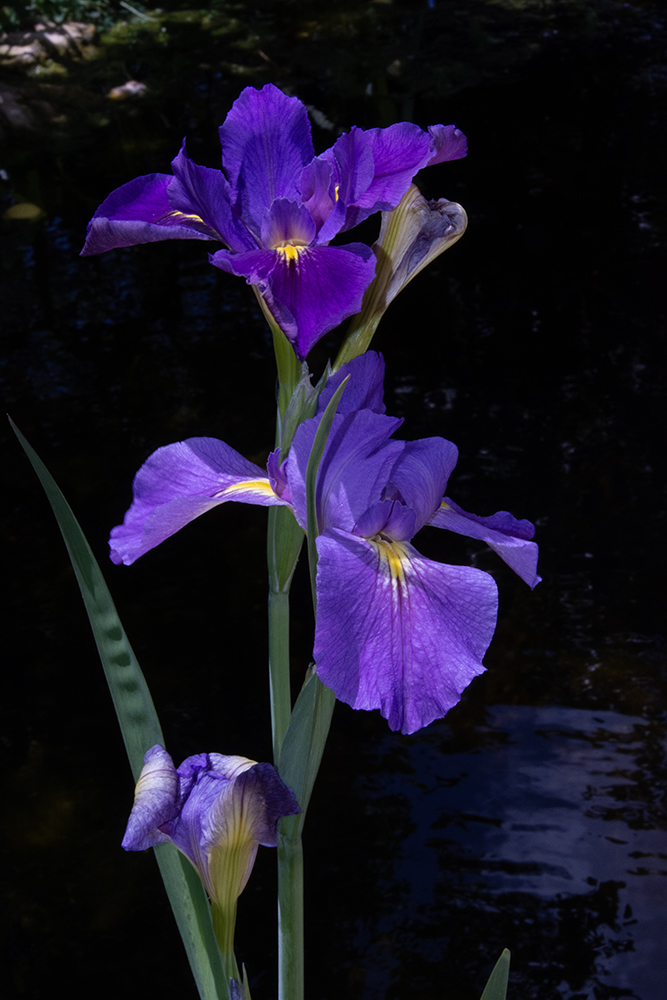
Planting includes Japanese Water Iris
Canna Indica
Calla lilies
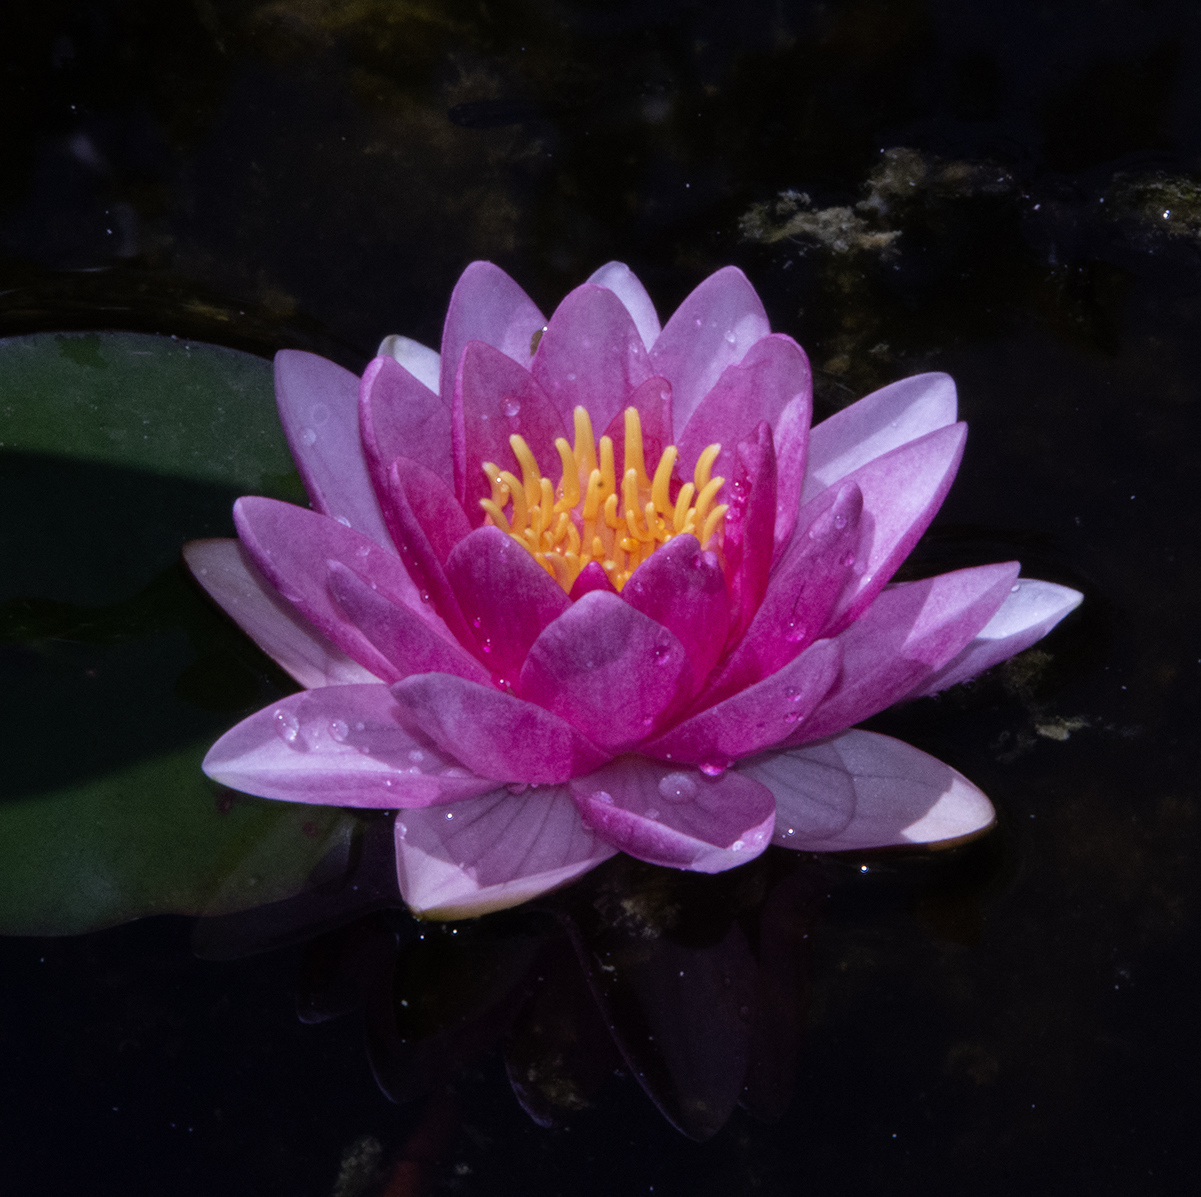
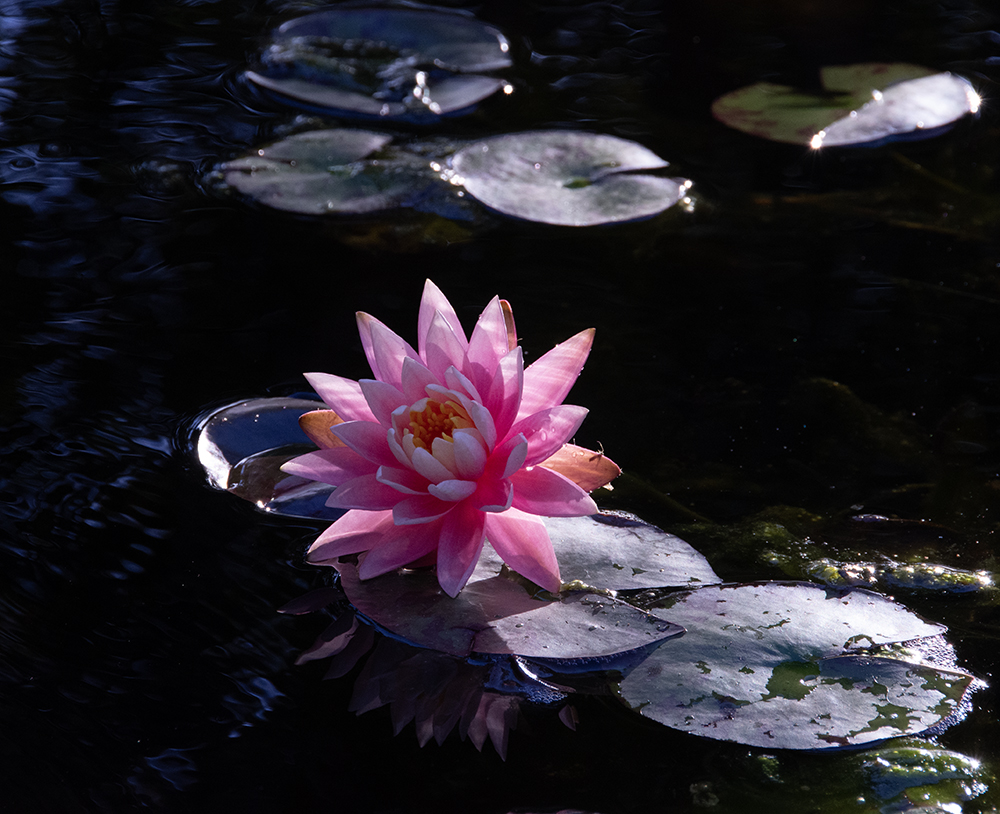
Water lilies
And a mishmash of other things

Canna Indica
Calla lilies
Water lilies
And a mishmash of other things
