


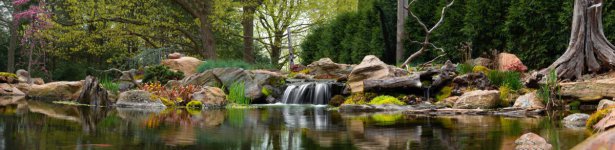
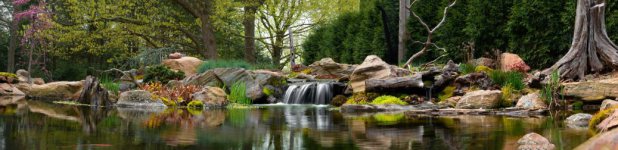
Overview
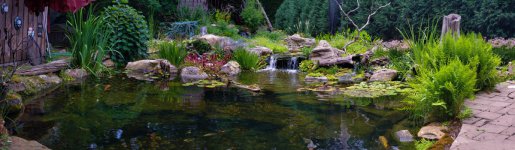
Touch of Serenity
This oasis started off with my wife asking if we could put a small water feature next to our patio off to one corner. Her father had Italian figurines spitting water, that was about as far from what I had in mind. So, I told her I'd see what I could come up with.
That led to stumbling upon Aquascapes video the Worlds Most Beautiful Back Yards, that was it I was hooked! the more videos I watched the more I saw what this could become. The hook was set.
Never in a million years however did I expect to have Aquascapes very own Greg Whittstock ask one day if he could come out and see my first attempt at building a pond. If that wasn't enough when I picked him up at the airport, he informed me that he had chosen my build as the winner of his DIY pond kit giveaway and the best DIY build for 2023. Where he also said that I would also receive $2500 In store credit which just made this person that I had just meet my new best friend. After all when's the last time a friend handed you 2500 bucks within an hour of meeting them.
The money however all kidding aside meant far less to me than did winning recognition as the best DIY by Aquascapes. After all this was just built for my family and not a contest.
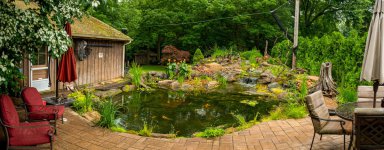
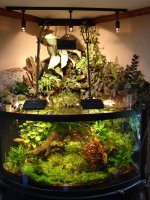
The pond started off like most with the thought of a nice little waterfall and a few fish. Well that quickly grew the more I researched, the more I pictured in my mind what this could be. Everyone wants to live on the water somewhere. But that has it's drawbacks as it is rarely quiet, it's usually a very narrow lot and very expensive. This build turned into a all the bells and whistles project. As the more I sat on my patio the more I loved what I had created and the more everyone else did as well.
So I set out to build an Oasis for the Family. Years later and it is still the best thing I have added to our home.
This is rather a large showcase, but it is packed with lessons learned, and how To's.
In this video I discuss edging, how to hide the liner. Now you may be asking your self we haven't even put a shovel to the ground yet why talk about edging now? Well the answer to that question is with the design of the pond. It is easier to build the pond knowing how you will finish the pond. It will make sense latter on.
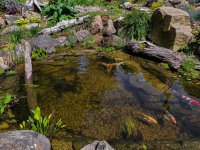
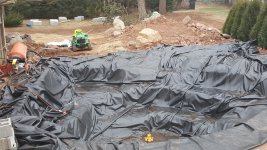
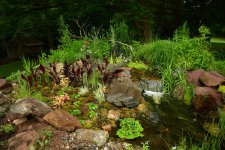
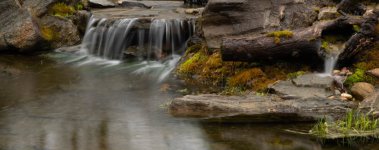
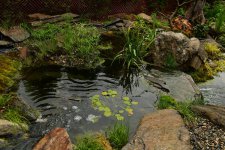
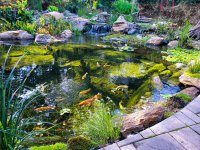
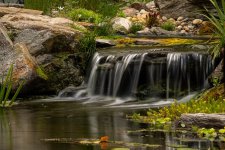
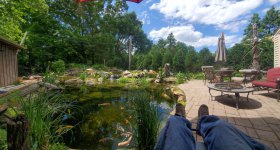
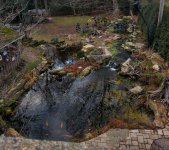
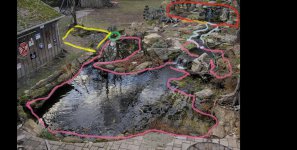
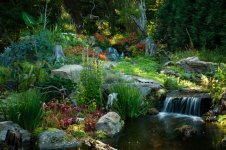
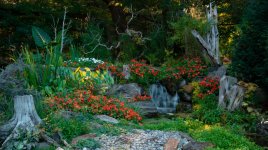
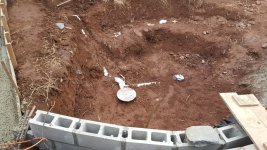
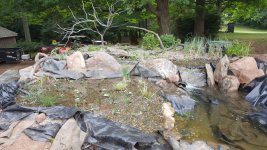
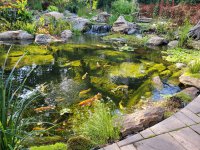
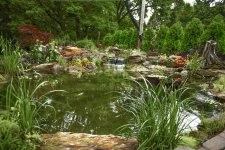
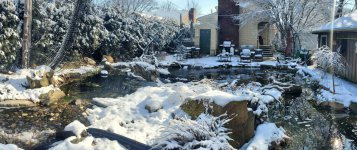
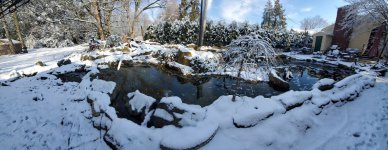
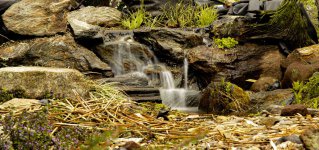
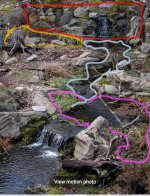
The photo below is the layout of the pond area taken in the fall so you have a reference as to what is being described and where. I'll start at the Matrix bog, the red circle. That today has a 3-foot waterfall that drops down into a 25-foot-long stream. This area originally only had an 8" waterfall which i was never thrilled about and was rebuilt to what you see some 4 years later.
There is a second pea stone bog that also enters the stream right below the 3-foot waterfall. This stream then empties into the upper pond. Where it feeds two waterfalls the main waterfall and what we call hobbit falls.
These drop into the main pond that is L shaped 25- foot long on average 18- feet wide. That has a branch that enters into an intake bay that's 17- feet long by 8- feet at the widest.
Now I had a hard time deciding between an intake bay and a negative edge. After weighing pro's and con's I came to the conclusion that each other's weakness was the others strength, so I incorporated them both.
Once the water drops over the negative edge or vanishing edge there is a 2" intake line in a 6' x 8' Pooling area. Now this area also has a overflow that leads to a 3000-gallon cistern.
At the top of the picture below in red is the matrix bog 8'x 20'x 6'
The orange is the pea stone bog 6'x 8'x16"
The gray is the stream 25 '
The small pink area is the upper pond that feeds two waterfalls to the main pond 17'x 8'X 2'
The larger pink area is the main pond 25' X 18 ' X 37' X 6'
The green is a negative edge at the end of an extra-large intake bay 17 ' X 8'
The yellow is a 3000-gallon cistern.
[ATTACH type="full" alt="POND FALL 2022 (1 of
,
This blog is solely for discussion and is not by any means a legal how to, for your area.
Considerations in Building a Koi Pond with a Wetland filter
1. First questions were of municipalities and what was required or not required. Call Dig safe or Miss Utility ITS THE LAW
2. Would a fence be needed? Environmental concerns and measures.
3. Would there be some crazy by-laws ?
4. Were any of my utilities in the area or in the way?
5. Will the pond's location block future access to an area of the property that will be needed down the road?
6. Is it a pondless waterfall you're leaning toward or is it a Koi Pond? Should I keep it simple "KISS" Or are some of the advanced features appealing?
7. Did I want a deep pond or just a shallow pond but that was long?
8. Do I want Goldfish, Koi, Minnows, or some Native fish?
9. Do I want a concrete pond, or do I want a liner EPDM or HDRPE? These three are the most common, and from there you get what you pay for. EPDM is heavy but flexible, reasonably easy to work with as it will take any shape. But never stretch the liner purposely. HPRDE is lighter, less flexible and not as easy to fold and work into tight areas.
10. What are my soils like, is there ledge in the area could I get to a desired depth without Heavy equipment? Is it all sand, clay, or rocks and boulders or shale and slate That need extra attention in design planning.
11. Is there a high-water table that will require under liner drains?
12. Do you have a good deal of wildlife like bears, chipmunks, prairie dogs or moles as they have been known to puncture liners below the water level? Is a concrete blanket needed or is galvanized chicken wire under the liner sufficient? Or is a heavy duty Non-woven Needle punch fabric needed both inside and under the liner required to do the job.
13. Will there be a bottom drain, do you need two on the same pipe by code?
14. What will work best for you a Skimmer, Bio falls, Intake Bay, or Negative edge?
15. Will there be a stream?
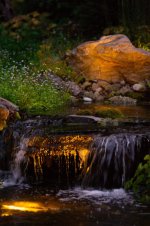
16. Is there to be a Waterfall? and the answer should be " YES " AT ANY C0ST .. In my opinion
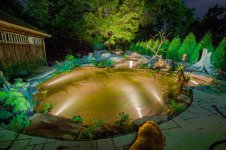
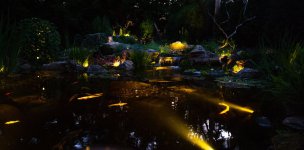
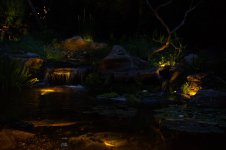
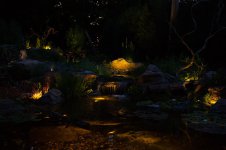
17. Do I want lights " The answer is "YES" AT ANY EXPENSE
18. The taller the falls are the Further the splash will travel and the more evaporation that can occur, the louder it becomes and trying to talk over a waterfall is not ideal. {BUT IT CAN DROWN OUT A HIGHWAY}
19. What type of Filtration, Mechanical filters or Biological or both. Will it be a BOG / Wetland filter, Matrix blocks or all gravel?
20. Do I want a cistern? do i need a cistern to control water in motion?
21. Do I want to keep it small enough to dig by hand?
22. Did I want Basketball sized rocks around the pond or do I want boulders. That will require the use of a machine.
23. Do I want rock in the pond? Do I need rock in the pond?
24. What of kids in the area will they be an issue with the excavation and or pond?
25. Do you live in a very hot or cold climate where a deeper pond will certainly help your fish keeping them cool in the summer or protect them from freezing in winter.
26. Permit
For myself the plan evolved almost daily the more I read, the more YouTube videos I watched, the more I became Obsessed with the project. Some of the best YouTube channels I highly recommend are.
Aquascapes Greg Wittstock the pond guy. Aquascapes has so many video's, Ideas, materials , supplies and C.A.C contractors throughout the country. So much so not even your imagination can use all they have to offer. Many of their C.A.C Contractors are in the list below.
Team Aquascapes,
https://www.youtube.com/c/TEAMAquascape/videos
Atlantis Water Gardens Jaac and his crew and videos always seem to pull a rabbit out of their hat by taking only a handful of boulders and making the yard look like its worth a million bucks. Yet have also built some of the most amazing projects with 10 ton boulders.
https://www.youtube.com/c/AtlantisWaterGardens/videos
Modern Design Aquascaping. Modern design spends a little more time spelling out the who, what, where, when and how in his videos. His tutorials really help to explain what each area is and why it may be the choice for your project. as well as sharing calculations you just can't find anywhere else.
Ed The Pond Professor. The name says it all.
Tussey Landscaping
https://www.youtube.com/c/Tusseylandscaping/videos
OZ ponds This site is a more relaxed and laid back approach to pond keeping i don't believe he ever keeps koi , always goldfish and for smaller ponds koi are not a good choice.
THE BUILD OF THE KOI POND
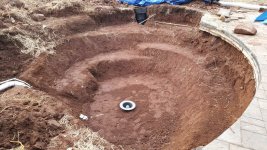
The Excavation
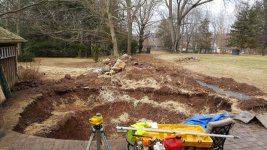
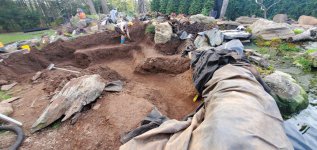
My first move was my first mistake! That was not having PATIENCE! As I started digging with an excavator, literally the day after Christmas 2017. Now in Connecticut that is generally not the best time of year to be excavating. Having three areas showing ledge in my back yard, to my welcomed surprise, I was able to excavate down to over 7 feet in depth. For those thinking of using an excavator for maybe the first time a couple quick notes for you. The less gas you give the machine the slower she moves, the less it can carry. Start there until you get familiar with the machine. Allow no one to be within the swing radius and the reach of the excavator, as hoses and controls do fail and there is always human error. Third the reach of an excavator is limited and the further you reach out the less the machine can lift as it becomes a bit unstable and could easily tip over. Any pond deeper than 3 feet deep and 12 feet wide maybe better left for the pros. So, like I said the first mistake was digging way to early, but it showed me my imagination was the only restriction.
Weather your hand digging your pond or using a machine, walls taller than 4 feet can become a very dangerous thing very quickly thus one reason why the trade makes shelves that are generally under 3 feet tall on average.
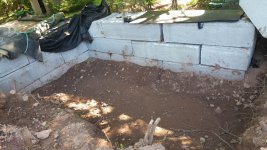
Once the excavation and the shelves are carved out, if there is a lot of rocks, roots or water to deal with? The soil should be raked, rocks should be removed. The soil hand tamped or vibrated to remove as many protrusions as possible. Roots should be cut back into the excavation. Or is a layer of sand needed, is this the best option to give the liner a safe bed to lie on for decades?
The edging shelf or the top shelf is probably the single biggest mistake a first time pond builder makes. The shelf at the top of the pond is what will hide the fabric and liner. Even if you do not plan to add rock in the pond the last thing you want to see is a thin black strip all around the pond as the liner comes up out of the water and then the rock sits on that.
There are many ways to accomplish hiding the liner here. The most common is when you complete the excavation of the pond and then take the sides and dig them down along the edge if you do not plan on utilizing a water replacement system then i would suggest a minimum of 4 to 6 inches below the intended water line. . This way as the water evaporates it does not expose the liner. Again, build your shelves to the size of the material you believe you're going to use to finish the edge with, not the other way around. It's much easier to dig a shelf wider than it is to stretch or shrink a rock. You can always lift the last of the liner and fold it over and back fill the area.
Water can also wick its way UP and out all by itself. Now many will say that's impossible. But yes, water can travel UPWARD by itself without a pump, without an absorbent material or someone sipping on a straw; The folds of EPDM can draw water upward a couple inches. The rubber does not absorb water, but it can create capillary action. This is where water can create a siphon on its own, travel up and out of the liner.. Fabric and plants can act much in the same way as a sponge, So the higher the sides are the less this is a potential problem. Non Woven needle punch does also wick water so it should be stopped and not brought up over the top of the liner if you have relatively low sides.
An other reason but that is rather unpopular is to have very high sides where they are 2 to 3 feet above the water line. This is for the dreaded Great Blue Heron, Snowy White Egret and other birds of prey that fish from the shore line. But equally for the Great Blue Heron the water to the first shelf also needs to be deep or they will wade in while fishing. The deeper the better as they are truly master fishermen. They will go as far as to chum the water to attract fish.
I have included some illustrations of different ways to finish off the edge of a pond. MY only comment to them all is at the water line. That the top of the liner should be built up at least 4 inches around the outside of the pond above the grade . This will help keep runoff from rains out of your pond, as they can wash in a host of chemicals like lawn fertilizers. The pro's will have very little difference between the water line and the build up but that's why they are pro's. I would suggest no edge be less than 4 inches as for the next 20 years or more, hopefully. There will be yourself and KIDS walking along and jumping on the edges of the pond. These will need to be fully compacted and solid to avoid a low edge being made, and thus loosing water. This sounds like it should be easy to find but take my word for it it can take hours upon hours to locate a low edge.
If you have loose soil where the edge rock is wanting to fall in and the sides of the excavation want to fall to the bottom, particularly if you're standing on it. You may want to consider a concrete bond beam around the pond, or if need be a retaining wall of some kind. The Pond Digger has a video of doing such on YouTube. The bond beam Is basically a footing under the edge rock that spreads the weight along the trouble areas and can encircle the pond. Putting this in place before the excavation is dug is by FAR the easiest way to do this, simply dig down the thickness of your bond beam by however wide and pour the concrete maybe even add a piece or two of rebar. However this will lock you into this, is the size, and this is the water level of the pond. Either way having the bond beam or shelf a little off level and leaning toward the outside edge of the pond will help keep rocks from sliding into the pond, more than likely along with someone standing on it.
Gathering supplies
A small shopping list for the entire project
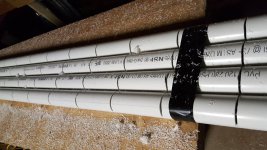
100 feet of 2" flex pvc / NOT KINK FREE
50 feet of 3" flex pvc
45 MIL EPDM 35' x 45' pond / upper pond
45 MIL EPDM 25' x 35' Dead pool
45 MIL EPDM 30' x 35' Matrix bog
45 MIL EPDM 35' x 35' cistern
45 MIL EPDM 35' x 12' stream
45 MIL EPDM 10' x 15' Pea Stone bog
1 gallon epdm primer
1- roll 3" double sided seam tape
1- 6" termination cover tape
2- 8 oz non woven needle punch fabric one roll 15' x 300'
1- 12,000 external performance pro Pump
1- 3,000 easy pro submersible pump
1- 500 submersible pump
1 float switch
20' - 24" HPRE Double wall culvert pipe
15- 6 Foot mafia blocks
6- 3 foot mafia blocks
1- 24" T HPRE
2- 24" HPRE end caps
4 - 3" x 10' pvc pipe.
5 - 2" x 10' pvc pipe.
1 large pvc glue
1 pvc primer
30 large waterfall foam cans
1 waterfall foam gun
20 tubes of epdm compatible caulking
roll of duct tape
rhino 12" air bladder main drain
8" main drain
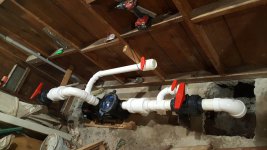
2 - 2" venturi return jets
2- 2" bulkhead fittings
2- 2" ball valves
1- 3" ball valve
3 -2" check valves
3- 2" check valves
1- vacuum breaker
98 large aqua blocks
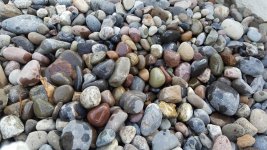
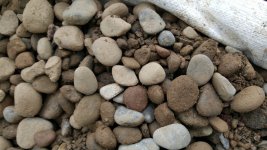
18 yards 3/4" river rock
3 yards 3/8" river
12 - yards 2" -3" river rock
6- yards sand
8 landscape termination strips
15 sheets fiberglass protection board
19 -1/2" sheets azek
3- 16' x 16' x 2" golf nets
9- 1 Watt led aquascape puck lights
1-16 watt transformer
1- Helix skimmer
1- extended basket for the helix skimmer
6- 2x12x 12 pt
12- 2x4 x12 pt
I box 3" tap cons
100 8" cinder blocks
25 bags 5,000 high early concrete
50 bags 3,000 concrete
cement mixer
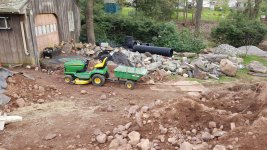
And probably close to 120 ton of boulders
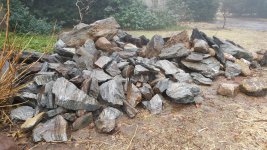
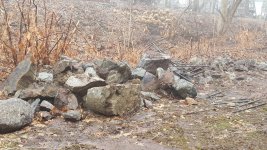
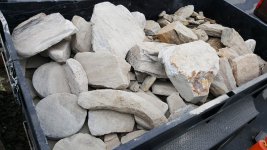
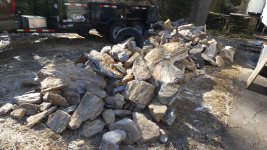
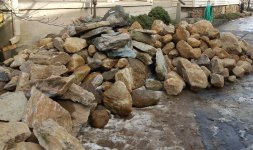
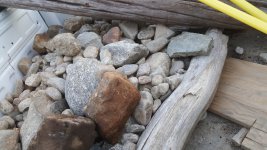
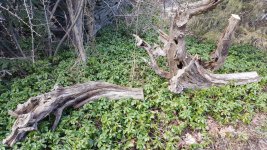
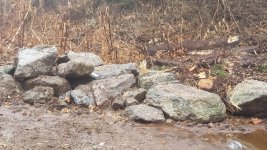
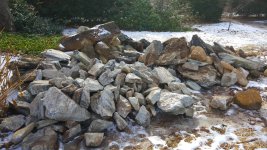
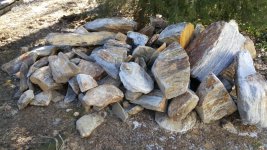
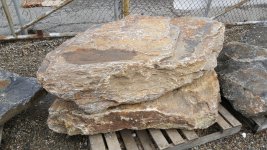
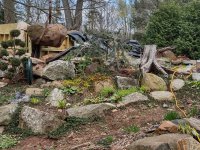
While I was waiting for spring, I was gathering all the rock, tree stumps, moss and driftwood that I could get my hands on. Most of my rock was spoils from other projects. I did Buy some choice boulders that were native to my area. I did not buy any stone from the standard landscape nursery. But I found them at the local quarry and stone yard. This saved hundreds on every boulder. The photos below are about 90% of the amount of rock that was required in the project. Except for gravel for the bogs, shelves and edging of the pond.
The excavation stayed open for 3 months in freezing temperatures while I gathered supplies and materials. All the while mother nature was trying to fill the excavation back in. from winter storms.
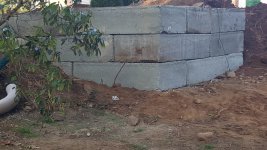
I used straw to help keep the erosion down but that ended up being a thousand sharp little points sticking out of the dirt. I finally spent the money for a tarp that would cover the entire hole but not before I lost quite a bit of the sides and i was down to about 6 feet deep. The freeze thaw over and over dug further into the sides of the excavation and started to undermine my patio.
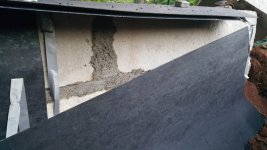
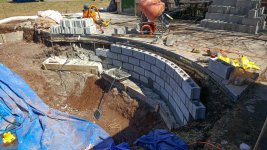
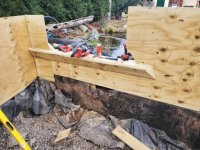
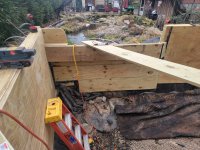
This required a retaining wall. My choice was to use cinder blocks on a 5000 psi high early concrete -footing with 2 - # 5 rebar in the footing and every other bay of the cinder block wall had a # 12 rebar drilled into the footing that was brought up to the top of the wall. Yes, this was size of the rebar was EXTREME over kill it was left over from a project. Once the wall was built the block was poured solid with 3,000 psi concrete.
Two holes were also knocked out in the block wall. They were placed a foot from the designed surface. These would be for return jets to the pond for circulation. All the block wall edges were eased / rounded with a grinder and the bottom sharp 90 degree was rounded off with some mortar.
Now my lot was not level, the patio was left on a angle and water will never be anything but level. This required one end of the pond being a difference of 8" so on the low end of the pond another retaining wall was built to allow the water to come up above the natural grade of the area.
On the opposite end of the pond the reverse was done i made a bond beam the same as the footings for the walls. but this would be for a 7 foot long 2 foot wide and a foot thick boulder. I knew exactly how and where i wanted it but I also did not want it slipping. The concrete bog beam was tied into the retaining walls that had been built for the patio insuring it would never move. Now the last thing that was done was to leave the bond beam lower than I expected the water level to be. this way if something didn't work out I could always lower or raise the boulder with a couple shims.
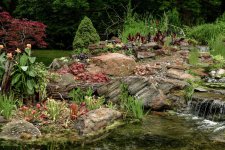
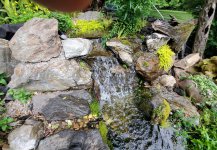
The last of the pond build was the waterfalls This is a tricky area but it can have simple solutions. If you create a vertical bowl with the EPDM and large enough that your character stones and the main falls rock are all in this area . the water will be contained. and no water loss. The other thing to keep in mind is a waterfall of any height will have splash a simple 1 foot drop can have water splash as far as four feet way. Placing the rock on the sides out in front but off to the sides of the falls will catch this splash and contain it in the pond.
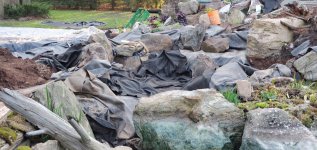
The Liner
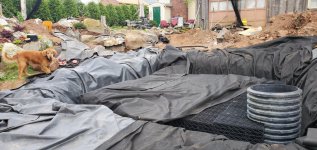
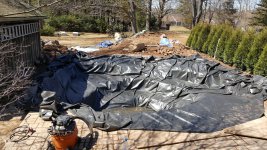
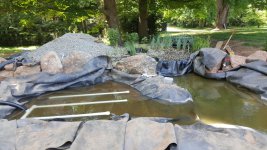
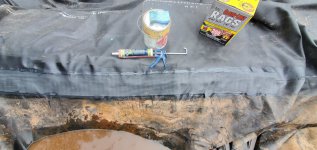
Once the excavation has had rocks, sticks and any other sharp items removed from the excavation Its time for the insurance policy. The underlayment ! The fabric I used which is very tough stuff it's 8 oz Non woven needle punch Geotextile fabric it is extremely rot resistant. ULTRAVIOLET LIGHT is what weakens it the most but that takes years. When your installing it you'll find out quickly that even a brand new utility knife will have a hard time cutting it and will only last a few cuts before you need a new blade.
I prefer the use of a good pair of utility scissors. These comes in different sized rolls with the most common being 15' x 300'. or less. Lay this across the entire pond and overlap appropriately to keep rocks or dirt from migrating. A couple pieces of gorilla duct tape can help hold the liner in place until the liner is placed.
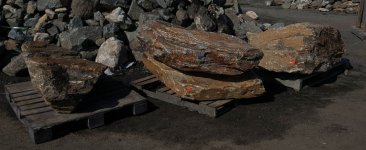
I chose to go with Firestone Pond Safe 45 mil EPDM rubber. It has the exact same procedures for bonding as does Roofing epdm but from what i have been told sometimes a powder is used on the roll to prevent sticking due to its own weight. It may be unfriendly to a pond environment. If washed off there should be no issues As you can see in the photo it took 5 men to carry the liner for my pond which was 700 plus pounds. The rule is taking the depth of your wall down to the bottom of the pond the length of the pond and whatever the measurement is back up to the top plus a foot for each end. That is way to close in my book. Better to have it and not need it then need it and not have it. It also gives you a great deal more freedom in playing with your pond. The pitcher plant bog is one such example . because the pond was not a rectangle i had a good deal of liner left over and it it became a focal point of my pond.
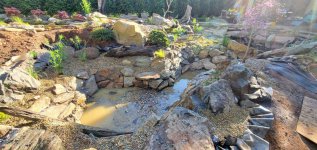
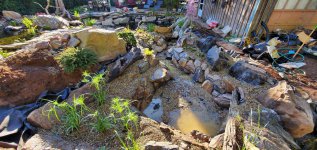
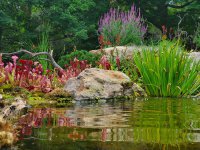
Rocking the pond
I would recommend placing the 8oz needle punch fabric over the entire pond liner. Placing the liner in a nice protective sandwich. This will protect it from the boulders as well as the smallest rocks that can and have split creating razor sharp edges. It is also some insurance against the family dog or wild animals. The 8 oz would protect from the family dog but I doubt it would be enough for a bear digging looking for a meal.
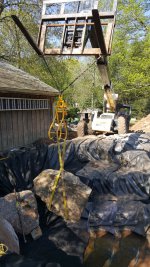
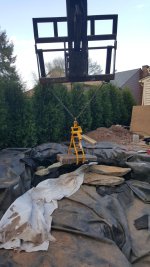
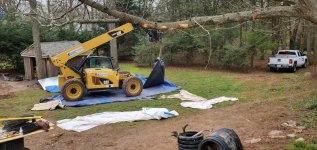
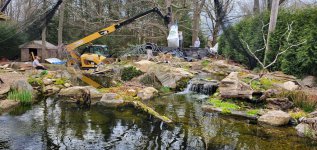
Because my pond has limitations on three sides an excavator can not reach to the other side of the pond from only one side. This required the use of a All terrain boom fork truck. While an excavator with a thumb may be the most common way to rock the pond, this is a close second.
A timber grappler, endless sling, set of fork rings and a tagline made rocking in the pond possible. Because of the size of the boulder making sure that each one was placed where it could never roll or slip and pin someone under water was the foremost thought placing each stone. This was never meant to be a rec pond i knew there would be times someone would be in the water.
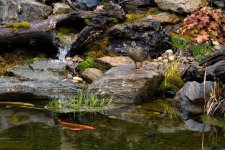
While I had dug in the soil a fish cave one that would be buried right into the side of the pond making it look more natural. While installing the rock i had one large 4 foot x 6 foot flat rock about 8 inches thick. i decided in one of my shelves at the bottom to place a boulder on the bottom that was about a foot taller then the shelf. Place a couple boulder up on the shelf place the flat rock on top of both making a fish tunnel/ hotel.
The timber grappler ended up being very valuable as it had a swivel and allowed the load to be spun without fighting the weight of the rock. It also was indispensable carrying two and three man boulders. If the rock has lots of character it could also be used for loads up to 3000 pounds.
The endless sling also allowed for the atv to be able to lower the rocks down into the bottom of the pond as they are made to reach up and out not so much downward.
One VERY important tip to making the pond look natural is not having all the same size rocks. But what is worse is when they are all placed evenly end to end with the longest length . Twist and turn the rocks place a couple smaller rocks under one lifting it breaking the string of pearls. leave gaps between the rocks for plants. If you ran fabric it won't take long for it to fill in. Moss is another great material for naturalizing your pond.
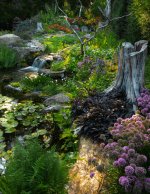
The picture below shows a tree stump on the left and coming into it from a diagonal is a rectangular shape covered in moss well that is nothing more than the cinderblock wall with a protection layer of fabric the liner and a second layer of fabric where i placed a Thin layer of rotting leaves and then placed moss on top of that and let it go. As you can see there's no rocks edge to edge and it makes for a more natural appearance.
The Pea stone or Gravel PVC bog
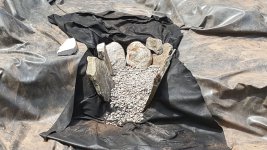
This type of bog is so much easier to build. You start with a pit of any size or shape. HOWEVER, THE DEPTH SHOULD BE NO LESS THAN A FOOT OF RIVER ROCK OR PEA STONE. Now there does seem to be a debate on the size of the gravel while many say 3/8 ” Pea stone is the choice to use other feel it’s a bit to small and ¾" river rock is their choice.
With an additional 8 inches of wall / containment above the water level. MAKING THE MINIMUM OF THE CONTAINMENT WALLS AT 20” Now that will leave little to no water running over the surface of the bog which is fine. But it is limiting the types of plants that can be used. It is easier to have thicker areas for those plants that only like their feet wet. But that will require a taller containment.
Again, the bog is a living breathing area and it does grow, it expands with the roots and amazingly so. Some bog plants have very deep roots and can grow down to depths of 24" . Though I have never heard of someone complaining their pipes were blocked due to roots I can see this happening too easily. @ ADDY1 Has had her pond for over ten years with 3/8” pea stone in her bog and it is even deeper then 24" and has never had any problems whatsoever.
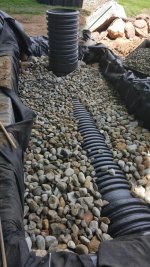
So if it was my project I would have at least 24 inches of gravel ABOVE the 2" pvc baffle. 2" PVC pipe with holes or cuts in the pipe. I prefer cuts in the pipe 1/3 of the way through the pipe with a 1/8 circular saw blade. Not the easiest blade to find today or you can make a second pass enlarging the cut. So, a 1/3 cut through the pipe every 6 inches is all I feel is needed. You want to make a baffle with these pipes approximately 18”apart. The idea here is to have a uniform distribution of the water throughout the bottom of the bog. I prefer the cuts facing down but with the pipe elevated off the bottom by simply adding a 1inch stone under the pipe. This way the water as it is blowing out the pipe does not beat on the same spot instead it is diffused by the rock.
Now the size of the feed pipe or pipes will determine how many Gallons per hour you're going to send through the bog. Between both my bogs I estimate I am only sending 4,000 gph to the matrix bog and 3.000 gph to the pea stone bog. I should have mentioned this earlier but the whole idea is to have the water get stalled inside the bog and give it a chance to settle thus any particulates have the ability to drop out of the water column. Give the plants the chance to absorb any compounds and minerals from the water.
Tying Areas Together with an Overlap
Liners do not necessarily have to be bonded to control the water. From one area to the next. A simple overlap will do the job in some circumstances. If you have a bog with a 1 foot drop down to the pond, if you were to lift the liner at the outflow/waterfall and bring the liner of the pond up and under the liner from the bog at the waterfall, secure it at the top and then drape the liner from the bog down and over the pond liner as long as there is a sufficient overlap in length and height you will not have a leak. So, for a 12-inch drop bring the pond liner up at least 6 inches and the bog liner down to the water level creating a 6"overlap to me that would be the minimal overlap I would be comfortable with where there are no glues or Fasteners involved. But the two layers need to sit nicely, one on top of the other. Allow a plant to grow into this area and there will be no guarantees so the larger the overlap the taller the height above the water the better off you will be.
Bonding / Seaming EPDM
I am not going to go into detail here as to how to go about seeming EPDM as there is already an extensive write up that I did in the forum Pond construction and equipment / sticky at the top Seaming EPDM liner and again in the same forum but under Going for it, phase one 12,000 gallon pond
https://www.gardenpondforum.com/threads/seaming-epdm-liner.26807/
And the build blog found here
https://www.gardenpondforum.com/threads/going-for-it-phase-one-12-000-gallon-pond.22563/page-39
Though on the lower half of the seam it looks as the rubber was not exactly clean, i can assure you that the lower half looked as clean as the top does. you would never want to attempt to seam over rubber that looks like the lower half does.
Intake Bay / Dead Pool
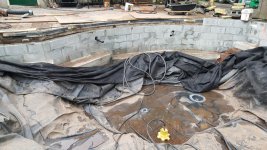
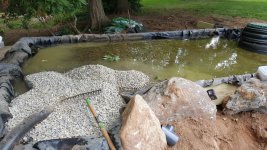
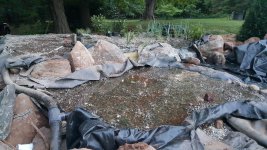
The pond had to be drained down so the left over liner that had been folded over instead of being cut . "About a 4' wide edge 12' long was pulled up once the water pressure was relieved. The old side of the excavation where Dead Pool's opening would be was removed and pulled back far enough so an excavator could safely pull back the rest of the area carving out the new excavation.
A couple 2 x planks were spread across the area where the two liners would meet making a flat consistent surface, a crucial step in seeming properly.
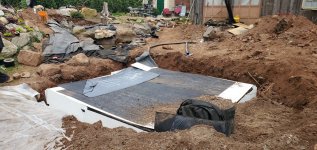
To make it even more challenging while looking for some plants to go around Dead Pool a Weeping Red Bud was found that would make for an incredible look as the limbs draped down over hanging the pond. This in turn created a challenge on how to plant close to the pond liner and keep the roots from doing any damage. The solution was two layers of the 1/8" fiberglass sheeting as it is flexible yet exceptionally durable, so I made it bow out into the channel within Dead pool and planted the tree.
Once the excavation was complete the biggest challenge to the design was next, the end of the Dead Pool where the negative edge will be and the catch basin on the back side. This required some good-sized boulders three to be exact, each weighing close to 2,000 pounds.
The more I thought about how much weight there would be pushing against these boulders. As from this area to the other side of the pond was a good 45 feet away. And at 8 pounds per gallon there was going to be some real pressure against this retaining wall. I realized I should have left a virgin strip of soil, about 6 feet wide 2' tall backing up the retaining wall / boulders. This would have ensured nothing was going to move.
The solution was to fold the rubber with a 6’ overlap fold the rubber against itself. Lay the fold inside Dead Pool and run the remaining tail that was about 15’ long under where these boulders were to be set. Place fabric down and begin building the end wall cementing the boulders together.
Lift the fold and place it against the boulders running it up to the top of these boulders, thus finishing the waterproof wall that was needed to complete the pond's containment.
Place the cap rock to the negative edge and seal the rubber to the rocks with EPDM caulking and waterfall foam. This will never be a watertight seal. This joint does not need to be as the liner runs under the whole area and the water is contained.
I then applied a different edging than what I had done anywhere else in the pond. I used fairly thin rock 3” to 6” thick by a 1’ or longer and ran them on the angled walls that I had created in Dead pool. Instead of the previous straight up walls with large boulders, that were in the pond.
To keep the rock laying against the angled wall I used Waterfall foam and used that to lock the rocks in place. Will it take the abuse of being walked on? Yes I have. Will it take a swim ponds traffic No I don’t think it will. Eventually some of the rocks will probably fail but this is not a swim pond especially in this area..
There was no need to be careful with the foam as the expanding foam was allowed to dry most of it protruding out from the spaces between the rocks. Once the foam dried a simple putty knife or power scraper would cut the foam flush to the rock. If I had slipped the flat blade may not have cut the rubber as it had no teeth and was not sharp.
Along the three boulders where the liner was run up, I made the same look with the flat rock and used mortar this time to create a wall against the three boulders wall thus making it even more secure. The liner was now all contained. And the Dead Pool was complete.
3000 gallon Cistern
A 3000 gallon Cistern was added to the project collecting rain water. As luck would have it my home was built 100 years ago and i dug up the old construction debris pile. Pretty much every home had one back then it was leftovers and trash, or in my case lots and lots of whiskey bottles and others all made of glass and the absolute last thing you'd want to find when your planning to make a rubber cistern underground.
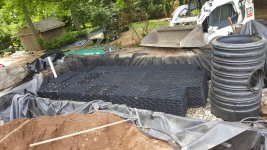
Over sizing the excavation is probably the best way to resolve the problem. however it could also open another bag of worms " to put it nicely". My solution was to install a layer of 1/8" fiberglass infused with asphalt and then a layer of 3/4 inch azek a plastic non toxic non biodegradable product that is also pretty tough stuff. once those sheets were in place 8oz. non woven geotextile fabric was installed along with the 45 mill epdm and the second layer of fabric. The aqua blocks were then placed within this sandwich and wrapped on all sides leaving just one area open on the top where water would be entering from the ponds over flow. and once that was complete the area was back filled with sand.
The Bogs
The pond consists of three bogs, a Matrix bog that has a Snorkel and Centipede with Matrix blocks, and 3 layers of graduated sized gravel in 18'x10'x7' footprint.
Matrix / Aquascape bog
This was my second mistake in the build while i did have a small waterfall after building a retaining wall over 6 feet high. the pizaze was just not there this led to a re-make of the matrix bog a very time consuming and rather expensive re-work, and all for a waterfall.
Gravel bog/ pvc
A second gravel bog with 2" PVC pipe making a baffle in a 8' x 6' x 16" footprint.
This last photo is both bogs side by side and in the early spring as they have not overgrown the areas as yet.
Rebuild of the original Matrix Bog
The original matrix bog./ wetland filter worked flawlessly for 4 years. It however had a design flaw on my part, I made it too low. The waterfall was not tall enough and the energy of the pump to the bog was being wasted. As soon as the plants started to grow in the spring the old waterfall disappeared.
The answer was to rebuild the entire Matrix Bog to raise the edges, a task that was every bit as much work as I expected it too be.
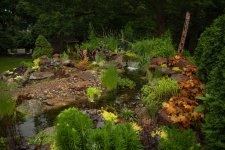
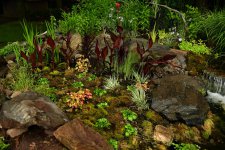
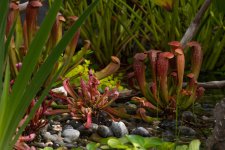
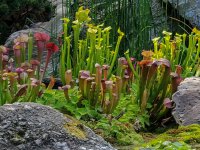
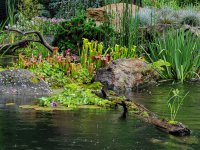
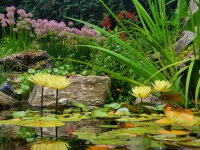
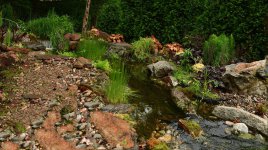
Pitcher Plants
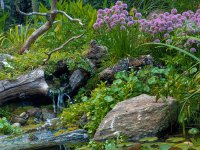
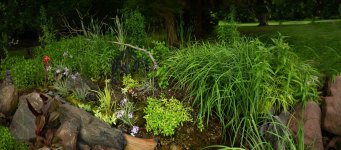
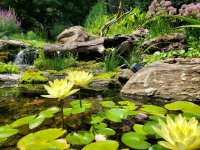
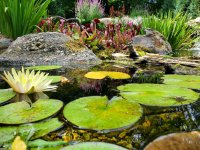
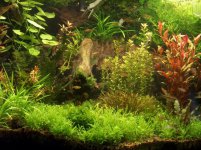
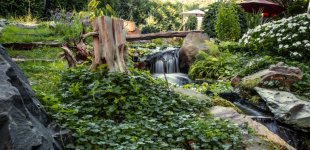
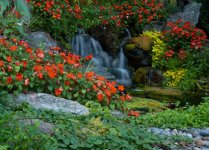
The Pitcher Plant bog has no upflow filter and the area protrudes into the main pond. This area was not part of the original design, but it evolved into probably an equal focal point as is the waterfalls. It provides vibrant color all through out the growing seasons.
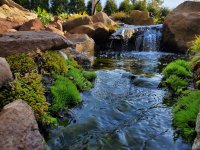
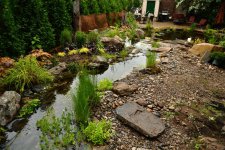
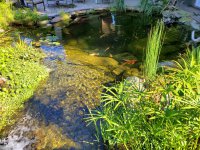
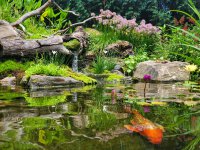
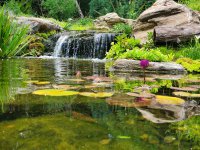
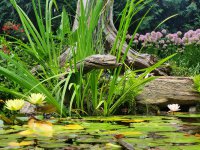
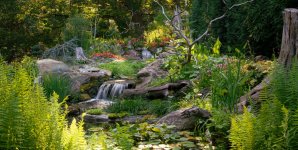
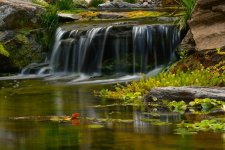
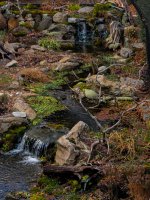
The Stream
A 25' stream 4' to 8' wide that has a slight drop making current into the little upper pond. Watching bubbles float across the surface can absorb one's attention for an incredible amount of time.
Upper Pond
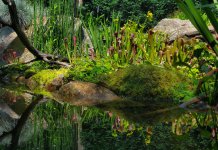
As the stream empties into the upper pond as it travels it tapers down to just 3' wide above Hobbit Falls and is only 8 inches deep. At the time of the photo, I had tried growing Papyrus on an aquablox. That worked so well the very first year it had to be removed. As the entire blox was completely full with one massive mass of roots
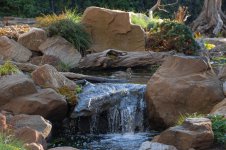
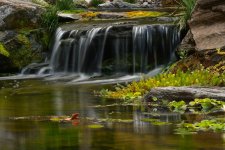
Main Waterfall.
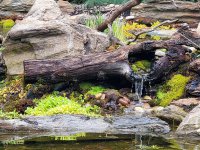
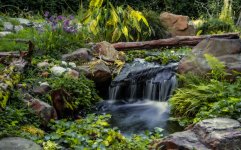
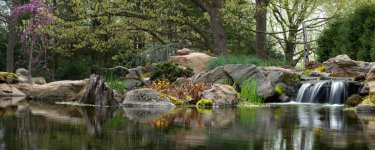
The upper pond has two spillways, one that spills off of a 3' wide flat rock and drops 16" into the pond.
Hobbit Falls
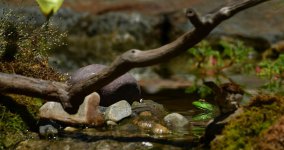
While the other spills out from an old log. The Mrs. nicknamed this Hobbit Falls.
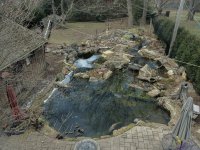
The Main Pond
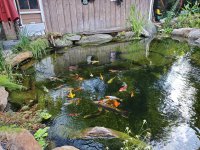
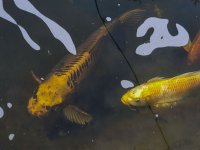
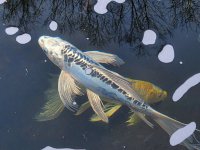
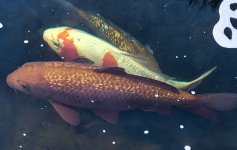
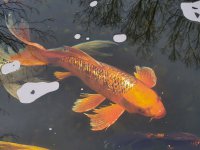
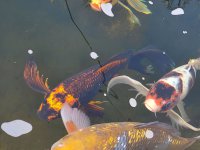
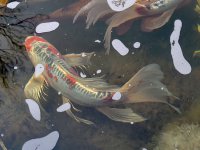
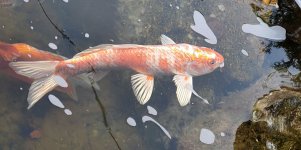
The main pond is 28' x 18' x 6' which on average is home to on average 30 Koi and 2 channel cats. I quickly found out that the fish were spawning several times a year and the population was doubling. The problem that arose when I designed the pond with fish caves, tunnels and the overall size and depth of the pond. That what was meant to give the fish plenty of hiding places from predators, that these would also work against me as I became a predator trying to catch them this proved to be futile.
This led to the creation of Dead Pool.............
Intake Bay/ Dead Pool[/B]
So, the solution to the inability to net the fish led to the addition of an Intake Bay within the second year. I began construction of a 17' x 8' x 2' area that tapered to just 3' wide where it joined to the pond with a 12" opening, Simply feeding the fish in this area and closing off the opening with a net, meant the fish could easily be caught and shipped to the local supplier. Having resolved the biggest problem to date this area gained the nickname of Dead Pool. " A little humor".
In the first photo the opening to Dead Pool is at the end of the rock on the bottom right of the photo cutting across the water. Dead Pool continues to the left.
Negative Edge
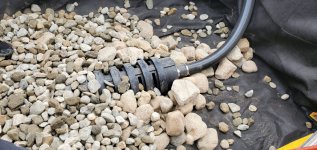
Now I also had decided to add a 3000-gallon cistern to the pond to make the project a bit Green. But to do so I needed to add yet another overflow or a Negative Edge. This created a waterfall with a 16" drop into the catch basin 6' x 8'. x 2'. A 2" intake pipe was added to this area. It was placed into a custom cut matrix block and zip tied together. This was then buried under 3" and 4" rock preventing heavy debris that might still make it into the area impossible to get pulled into the pump.
That area too has an overflow that leads down into the 3000-gallon cistern. Now ultimately, I originally wanted the main pump the 12,000 gph external to pull water from the cistern. However, I quickly found out that an external pump lacks the ability to pull water as well as it pushes water. It simply could not pull the water up the 6 feet from the bottom of the cistern and pull it some 20 feet even with two check valves. So, the solution was to place a small 450 gph pump set with a float switch in the cistern to pump water back up to the pond. This kept the water circulating and viable.
The Negative edge has one major advantage over intake bays . As when it is coupled with a cistern the water level is always a constant.
This first video is a walkdown of the pond in early spring of the fourth year. It shows exactly how the pond is set up. The second video is a little different, it's just a view from the patio as if you were just sitting there enjoying the day. You can see Jack and I hanging out enjoying the day.
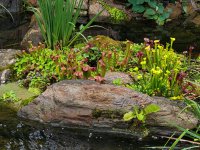
Pitcher Plants and Moss Bog[/SIZE][/SIZE]
Last but no by no means the least of the bogs is the natural Pitcher plant and Moss Bog peninsula about 6' x 8' x 6". It evolved as the pond was being built and was not planned. Having a love for moss the original idea was nothing but sphagnum moss, an island with a carpet of green. With a visit to a local supplier and seeing that pitcher plants could endure the winters here the evolution continued to grow.
Planning and Construction
Matrix Bog
The height of the bog is crucial if waterfalls are desired, also the bog in my case was 30 feet from the pond so 1/8'' per foot will get water moving in the direction desired. If more of a current is desired, you can see how that can add up requiring more height. In my case I wanted at least a foot drop from the bog down into the stream. Between the stream and the upper pond, I wanted to see some water movement flowing between the rocks where there is a 4 '' drop into the upper pond.
Then there are the sides of the bog, The containment area around the bog that is above the water level. I recommend a solid 6 to 10" as the bog is living and breathing and it is constantly growing. What is unforeseen with the bog is that the plants and the liner when it is folded along with the Needle punched fabric. All three can wick water like a straw or a sponge thus leaking water out of the pond which can become a nightmare to find later once the edging is completed.
I elected to use concrete mafia blocks on two sides in order to obtain the necessary height. These blocks weigh 4000 pounds apiece and measure 6'x3'x18'' . Once the overall box was formed, I then created a extension using 2"x12" Pressure treated, screwed a 2x4 onto the bottom and top making a U. I used the bottom 2x4 to screw into the concrete with tap cons securing this 15" extension flush with the inside of the mafia blocks. This gave me a 2 and a half foot wide walkway around the elevated sides of the bog. This was also easy to hide and complete the edging. I thought in time I would need to place some cross braces from the top on a 45 down to the concrete to keep things straight and level but 4 years later and everything is still straight and plumb.
The mafia blocks were very rough and hardly square, they were in need of infilling due to the gaps. These were up to three inches wide where that is simply too much for fabric and liner to span comfortably. I would suspect in time it would fail. A little mortar and concrete and problem was resolved. I also placed a layer of fiberglass protection board along against the mafia blocks to ensure there would be no problems or punctures, before placing the 8oz fabric and liner.
.jpg")
.jpg")
.jpg")
.jpg")
.jpg")
.jpg")
.jpg")
I would have liked to have used the snorkel and centipede that is the industry standard, but I acquired some 24" HPRE double walled culvert pipe. That had the right price for it, so it won the challenge hands down. In the lower ribs of the pipe on every other rib I used a chain saw to cut slots in the pipe. I am only feeding this bog which is 18' x 9' x 6' with a 2" line that on average pressure is good for just over 4500 gph. This comes into the opposite end from the snorkel. In the horizontal 24" centipede.
The snorkel was also placed a foot deeper than the centipede as it works as a trap for debris to settle out in. This is for cleaning at a later date.. The centipede was then surrounded by river rock from 3" to 1' until the layer was brought level to the top of the pipe.
18 large Matrix blocks were then installed on top of this area, centered over the 24” pipe they were then surrounded on all sides by 2”and 3"river rock with 4” of the mix to the top. Then 6" of 1" to 3/4" river rock and finally a 4" layer of 3/4" and 3/8".
Finding well-washed river rock is not an easy thing to do. To get the best of what the supplier has if you ask the operator not to scoop from the bottom of the pile as 99% of all operators will do. By scooping from the middle of the pile will get you the best the pile has to offer.
For an additional price they can place the river rock into 1 yard sack. Money well spent as you can lift a yard, place the sack right where you’d like it and pull the tie on the bottom, and you can spread the stone while suspended. Keeping the stone off your lawn saving hours of work on both ends of the project down the road. Using an excavator skid steer or all Terrain fork truck can save days of work with a wheel barrel precariously maneuvering around and, in the pond. Then having to use a shovel or rake to push the wheel barrel piles around the pond.
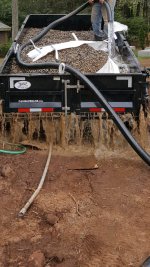
Trying to wash the gravel yourself is one heck of a task. I used a dump trailer tipped and a 3" water line using 12,000 gph and it barely did anything. Oh, I saw dirt flying out but when I stirred the pile it looked as if it had not seen a drop of water. The first picture is washing the gravel. The second was what it looked like on the surface after washing and the third is what was left behind after I removed material and dug into the gravel it became obvious only the finest of granules had been washed out.
.jpg")
This is how much water I threw at cleaning the pile of gravel
.jpg")
This is what it looked like after thousands of gallons
.jpg")
And this is what it looked like once the rock on the surface was removed it did not do a whole lot. The only way to wash gravel is with a screen and in thin layers.
-2.jpg")
Re-design 4 years latter of the Matrix box
The bog worked flawlessly. it was myself who came up short in my design. While I had built up the back yard almost 7 feet to get the bog a foot higher than the stream was. Then the stream dropped 3" into the upper pond before the water dropped a foot into the main pond.
So the re design was to extend the Previous 1 foot build up on top of the Mafia blocks to 40". This would give me a 3 foot drop down to the stream and I hoped would be low enough not to create a Volcano in appearance.

I did not go with a more traditional method using landscape timbers as I felt I did not need that much support as my frame would also be surrounded by Boulders. I used conventional framing 16" oc. as I was also going to be using two layers of 3/4 inch pressure treated plywood. and that along with the studs making for strong backs every 16 inches with triple interlocking plates That would be more than enough to hold a pile or gravel and water. If the entire space was all water i would have gone with 6x6

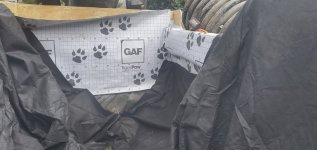
The entire interior was then covered in a layer of GAF tiger paw underlayment this does not wick or allow water to pass. As rubber will surely sweat as one side will be cool water in the summer time and hot air on the other . This will help insure that the frame lasts for many many years.
Then a layer of 8 oz. non woven felt was installed and then the liner. and a second layer of non woven 8 oz. sandwiching the rubber for years of trouble free issues.

I then installed Aquascapes Centipede at the bottom of the bog a foot above the bottom of the 24" snorkel. I went this route because I had the 24 inch snorkel and the 10" compact centipede would allow for more gravel above the Aquablocks.


After seeing how deep some of the bog plants got. I opted for a 4 to 6" layer of 2 to 3" river rock
with 20 inches of 3/4" river rock and toped that with 4" of 3/8" pea stone.
To finish off the extension boulders were placed toward the viewing area and 45 degree braces were installed on the back and one side.

The height of the bog is crucial if waterfalls are desired, also the bog in my case was 30 feet from the pond so 1/8'' per foot will get water moving in the direction desired. If more of a current is desired, you can see how that can add up requiring more height. In my case I wanted at least a foot drop from the bog down into the stream. Between the stream and the upper pond, I wanted to see some water movement flowing between the rocks where there is a 4 '' drop into the upper pond.
Then there are the sides of the bog, The containment area around the bog that is above the water level. I recommend a solid 6 to 10" as the bog is living and breathing and it is constantly growing. What is unforeseen with the bog is that the plants and the liner when it is folded along with the Needle punched fabric. All three can wick water like a straw or a sponge thus leaking water out of the pond which can become a nightmare to find later once the edging is completed.
I elected to use concrete mafia blocks on two sides in order to obtain the necessary height. These blocks weigh 4000 pounds apiece and measure 6'x3'x18'' . Once the overall box was formed, I then created a extension using 2"x12" Pressure treated, screwed a 2x4 onto the bottom and top making a U. I used the bottom 2x4 to screw into the concrete with tap cons securing this 15" extension flush with the inside of the mafia blocks. This gave me a 2 and a half foot wide walkway around the elevated sides of the bog. This was also easy to hide and complete the edging. I thought in time I would need to place some cross braces from the top on a 45 down to the concrete to keep things straight and level but 4 years later and everything is still straight and plumb.
The mafia blocks were very rough and hardly square, they were in need of infilling due to the gaps. These were up to three inches wide where that is simply too much for fabric and liner to span comfortably. I would suspect in time it would fail. A little mortar and concrete and problem was resolved. I also placed a layer of fiberglass protection board along against the mafia blocks to ensure there would be no problems or punctures, before placing the 8oz fabric and liner.
I would have liked to have used the snorkel and centipede that is the industry standard, but I acquired some 24" HPRE double walled culvert pipe. That had the right price for it, so it won the challenge hands down. In the lower ribs of the pipe on every other rib I used a chain saw to cut slots in the pipe. I am only feeding this bog which is 18' x 9' x 6' with a 2" line that on average pressure is good for just over 4500 gph. This comes into the opposite end from the snorkel. In the horizontal 24" centipede.
The snorkel was also placed a foot deeper than the centipede as it works as a trap for debris to settle out in. This is for cleaning at a later date.. The centipede was then surrounded by river rock from 3" to 1' until the layer was brought level to the top of the pipe.
18 large Matrix blocks were then installed on top of this area, centered over the 24” pipe they were then surrounded on all sides by 2”and 3"river rock with 4” of the mix to the top. Then 6" of 1" to 3/4" river rock and finally a 4" layer of 3/4" and 3/8".
Finding well-washed river rock is not an easy thing to do. To get the best of what the supplier has if you ask the operator not to scoop from the bottom of the pile as 99% of all operators will do. By scooping from the middle of the pile will get you the best the pile has to offer.
For an additional price they can place the river rock into 1 yard sack. Money well spent as you can lift a yard, place the sack right where you’d like it and pull the tie on the bottom, and you can spread the stone while suspended. Keeping the stone off your lawn saving hours of work on both ends of the project down the road. Using an excavator skid steer or all Terrain fork truck can save days of work with a wheel barrel precariously maneuvering around and, in the pond. Then having to use a shovel or rake to push the wheel barrel piles around the pond.
Trying to wash the gravel yourself is one heck of a task. I used a dump trailer tipped and a 3" water line using 12,000 gph and it barely did anything. Oh, I saw dirt flying out but when I stirred the pile it looked as if it had not seen a drop of water. The first picture is washing the gravel. The second was what it looked like on the surface after washing and the third is what was left behind after I removed material and dug into the gravel it became obvious only the finest of granules had been washed out.
This is how much water I threw at cleaning the pile of gravel
This is what it looked like after thousands of gallons
And this is what it looked like once the rock on the surface was removed it did not do a whole lot. The only way to wash gravel is with a screen and in thin layers.
Re-design 4 years latter of the Matrix box
The bog worked flawlessly. it was myself who came up short in my design. While I had built up the back yard almost 7 feet to get the bog a foot higher than the stream was. Then the stream dropped 3" into the upper pond before the water dropped a foot into the main pond.
So the re design was to extend the Previous 1 foot build up on top of the Mafia blocks to 40". This would give me a 3 foot drop down to the stream and I hoped would be low enough not to create a Volcano in appearance.
I did not go with a more traditional method using landscape timbers as I felt I did not need that much support as my frame would also be surrounded by Boulders. I used conventional framing 16" oc. as I was also going to be using two layers of 3/4 inch pressure treated plywood. and that along with the studs making for strong backs every 16 inches with triple interlocking plates That would be more than enough to hold a pile or gravel and water. If the entire space was all water i would have gone with 6x6
The entire interior was then covered in a layer of GAF tiger paw underlayment this does not wick or allow water to pass. As rubber will surely sweat as one side will be cool water in the summer time and hot air on the other . This will help insure that the frame lasts for many many years.
Then a layer of 8 oz. non woven felt was installed and then the liner. and a second layer of non woven 8 oz. sandwiching the rubber for years of trouble free issues.
I then installed Aquascapes Centipede at the bottom of the bog a foot above the bottom of the 24" snorkel. I went this route because I had the 24 inch snorkel and the 10" compact centipede would allow for more gravel above the Aquablocks.
After seeing how deep some of the bog plants got. I opted for a 4 to 6" layer of 2 to 3" river rock
with 20 inches of 3/4" river rock and toped that with 4" of 3/8" pea stone.
To finish off the extension boulders were placed toward the viewing area and 45 degree braces were installed on the back and one side.
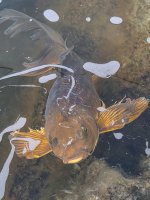
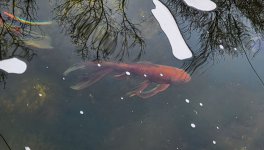
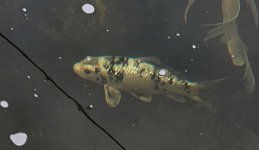
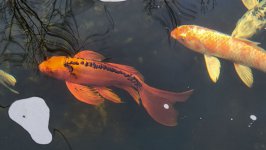
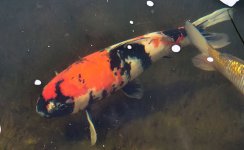
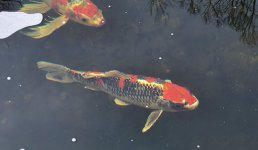
Fish / Plant Stock
The Aquatic Family
Joey Two Lips
.jpg") Fin Diesel
Fin Diesel
.jpg") Liberachi
Liberachi
.jpg") Khi
Khi
.jpg") Shimo
Shimo

D Day
.jpg")
Sloth
.jpg") Rha
Rha
.jpg") Midge
Midge
.jpg") Knoxville
Knoxville
.jpg") Knox
Knox
.jpg") Dweezel
Dweezel
.jpg") Brass
Brass
.jpg") Baluew
Baluew
.jpg") Anubias
Anubias
.jpg") Tig
Tig
.jpg")
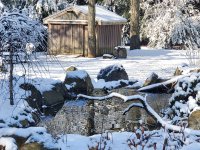
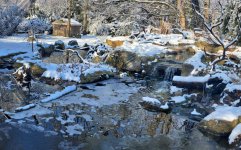
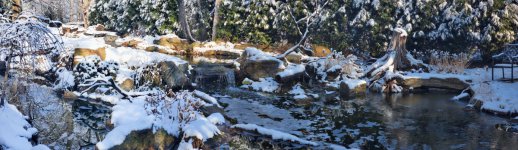
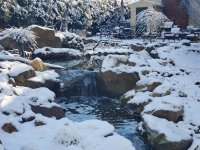
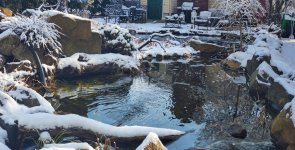
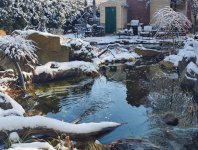
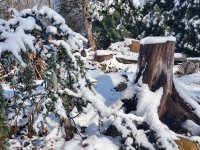
Winter Wonderland
.jpg")
.jpg")
.jpg")
.jpg")
.jpg")
.jpg")
History
The Planted Aquarium
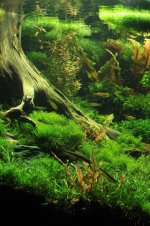
I have kept aquarium Fish in the past, both a Reef tank back in the 80's and a Planted Aquarium up until 2010 This Koi pond was not going to be restricted to 4 walls of glass. Though admittedly I didn't exactly stick to the boundaries there either with the previous aquarium.
My Planted Aquarium Blog with live breeding birds " Shaft Tail Finches " and a waterfall can be seen here.
 www.aquariacentral.com
.jpg")
.jpg")
.jpg")
.jpg")
.jpg")
Joey Two Lips
D Day
Sloth
Winter Wonderland
History
The Planted Aquarium
I have kept aquarium Fish in the past, both a Reef tank back in the 80's and a Planted Aquarium up until 2010 This Koi pond was not going to be restricted to 4 walls of glass. Though admittedly I didn't exactly stick to the boundaries there either with the previous aquarium.
My Planted Aquarium Blog with live breeding birds " Shaft Tail Finches " and a waterfall can be seen here.
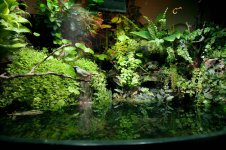
PALDARIUM VIVARIUM I'M UNSURE BUT I THINK YOU'LL LIKE
92 gallon corner tank ,lighting is and this eveyone always says is NO GOOD is Quartz hallogen. yes it is a little yellow but a picture is worth a thousand words. Eheim canister filter. plants include FOREGROUND- Pogostemon helferi, Pellia,Dwarf sagitaria the bronze grass i do not know what it...
-
 4TH YEAR SPRING POND 2 (100 of 1).jpg
 -
 LOG FALLS (100 of 1).jpg
 -
 carni (100 of 1).jpg
 -
 Planted Tank (100 of 2).jpg
 -
 Planted Tank (101 of 2).jpg
 -
 Building (106 of 30).jpg
 -
 Building (108 of 30).jpg
 -
 Building (110 of 30).jpg
 -
 Building (113 of 30).jpg
 -
 Building (115 of 30).jpg
 -
 Building (116 of 30).jpg
 -
 Building (117 of 30).jpg
 -
 Building (118 of 30).jpg
 -
 Building (119 of 30).jpg
 -
 Building (120 of 30).jpg
 -
 Building (122 of 30).jpg
 -
 Building (123 of 30).jpg
 -
 Building (124 of 30).jpg
 -
 Building (125 of 30).jpg
 -
 Building (126 of 30).jpg
 -
 Building (127 of 30).jpg
 -
 Building (128 of 30).jpg
 -
 Double Drains (100 of 1).jpg
 -
 Block Walls (100 of 1).jpg
 -
 Building (100 of 30).jpg
 -
 Main falls 2 (100 of 1).jpg
 -
 OVER VIEW (100 of 1).jpg
 -
 Building (101 of 30).jpg
 -
 Building (102 of 30).jpg
 -
 rock (100 of 5).jpg
 -
 rock (102 of 5).jpg
 -
 rock (103 of 5).jpg
 -
 rock (104 of 5).jpg
 -
 Building (107 of 30).jpg
 -
 river rock (100 of 1).jpg
 -
 river rock (100 of 1)-2.jpg
 -
 river rock wash (100 of 1).jpg
 -
 TOPING THE BOG (100 of 3).jpg
 -
 TOPING THE BOG (101 of 3).jpg
 -
 TOPING THE BOG (102 of 3).jpg
 -
 bogs (108 of 12).jpg
 -
 Stream (100 of 1).jpg
 -
 main falls (100 of 1).jpg
 -
 main falls (102 of 4).jpg
 -
 BEST POND (100 of 1).jpg
 -
 BEST POND LAYOUT (100 of 1).jpg
 -
 BEST UPPER LAYOUT (100 of 1).jpg
 -
 BEST UPPER LAYOUT (100 of 1)-2.jpg
 -
 lights (100 of 2).jpg
 -
 lights (101 of 2).jpg
 -
 planted (100 of 1).jpg
 -
 final.jpg
 -
 DAY 2 .1.jpg
 -
 DAY 2.jpg
 -
 start of dead pool.jpg
 -
 ROCKING THE POND (109 of 15).jpg
 -
 ROCKING THE POND (110 of 15).jpg
 -
 ANUBEUS (1 of 1).jpg
 -
 BALUEW (1 of 1).jpg
 -
 BRASS (1 of 1).jpg
 -
 D DAY (1 of 1).jpg
 -
 DIESEL (1 of 1).jpg
 -
 DRAGO N OHMAHA (1 of 1).jpg
 -
 DWEEZEL (1 of 1).jpg
 -
 JOEY TWO LIPS (1 of 1).jpg
 -
 KHI (1 of 1).jpg
 -
 KNOX (1 of 1).jpg
 -
 KNOXVILLE (1 of 1).jpg
 -
 LIBERACHI (1 of 1).jpg
 -
 main falls (102 of 4).jpg
 -
 main pond (100 of 1)-3.jpg
 -
 MIDGE (1 of 1).jpg
 -
 RHAW (1 of 1).jpg
 -
 Sloth (1 of 1).jpg
 -
 Tig (1 of 1).jpg
 -
 SHIMO.jpg
 -
 Winter wonderland (1 of 9).jpg
 -
 Winter wonderland (2 of 9).jpg
 -
 Winter wonderland (3 of 9).jpg
 -
 Winter wonderland (4 of 9).jpg
 -
 Winter wonderland (5 of 9).jpg
 -
 Winter wonderland (6 of 9).jpg
 -
 Winter wonderland (7 of 9).jpg
 -
 Winter wonderland (8 of 9).jpg
 -
 Winter wonderland (9 of 9).jpg
 -
 20220612_174332.jpg
 -
 IMG_20220417_113252868_HDR.jpg
 -
 Bod rebuild 3 foot drop.jpg
 -
 13194.jpg
 -
 20220416_110945.jpg
 -
 20220416_134930.jpg
 -
 20220416_151833.jpg
 -
 20220416_170931.jpg
 -
 20220416_092310.jpg
 -
 POND FALL 2022 (1 of 1).jpg
 -
 POND FALL 2022 (1 of 2)-2.jpg
 -
 pond pano.jpg
 -
 ice pond (1 of 1).jpg
 -
 Pond 2023-5.jpg
 -
 Pond 2023-4.jpg
