
Hey folks,
Thank you so much to the folks on the forum for the guidance I've received so far!
I'm preparing to undertake a revamp of the water feature in the backyard we have and am looking to expand it to some 700 gallons. But before spending thousands of dollars and a couple of hundred hours on the project, I thought I would run my design past the wise minds on this forum.
I've actually put together a Google doc on the project where you can directly add comments here. So if you'd prefer to review it in Google docs, you can. I've replicated that document here, and would love to get your thoughts on:
- Is this totally crazy?
- Will the suggested support structure for the pond be sufficient?
- Is the approach to filtration correct?
- Any thoughts on ways to keep the cost down?
Raised Bed Pond Design with Rain Curtain
The goal of this project is to take an existing originally pondless rain curtain and turn it into a 700 gallon pond. This is to make it deeper so that the water temperature doesn’t significantly fluctuate, and also to make it resistant to attacks from predators (raccoons, herons). And to accommodate more fish -- mostly goldfish. Perhaps one or two koi (after making an agreement with a friend to take them on once they get to 2 feet).
The original water feature looked something like this:
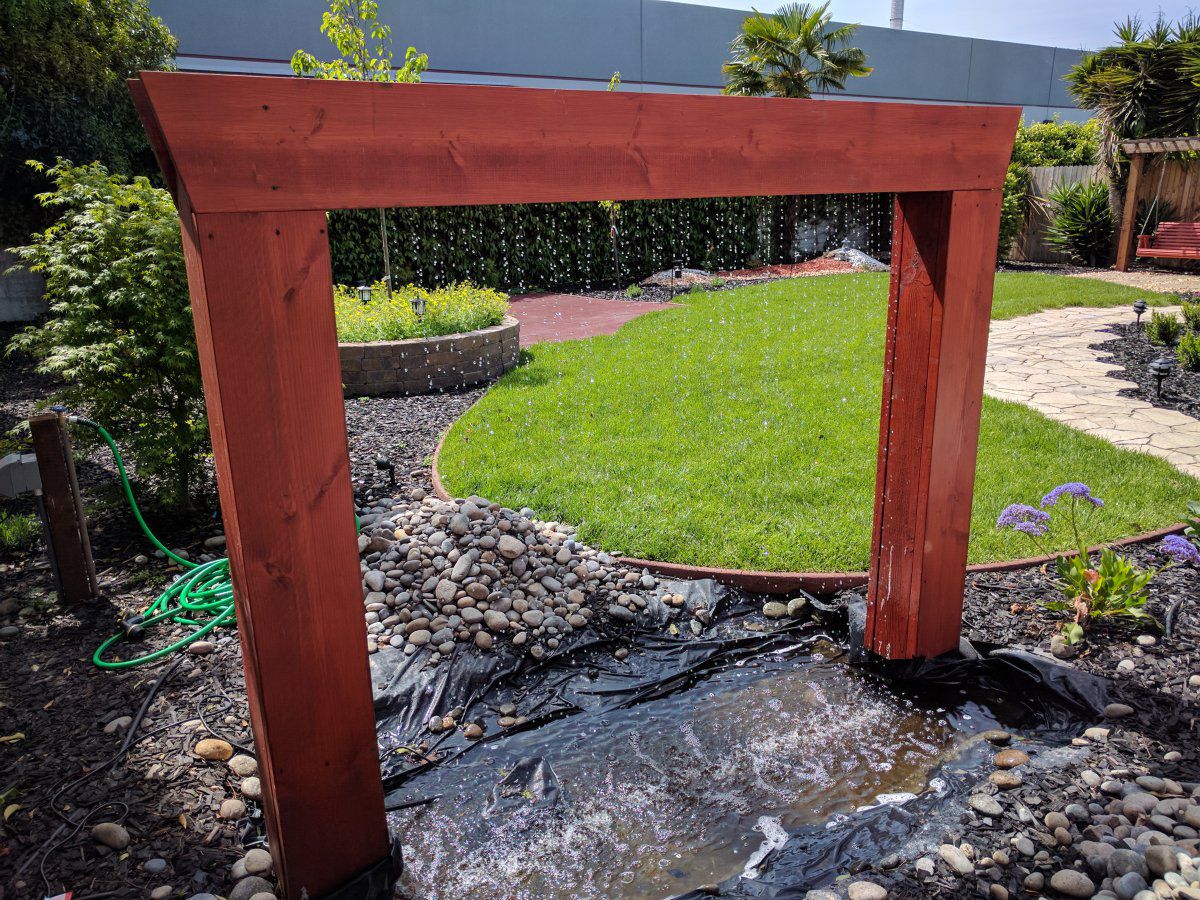
With the central pool being about 11 inches deep. The goal of this project is to add a raised component taking the total depth to 29 inches, but also expanding its footprint (such that its front-to-back size is increased from about 40 inches to about 120 inches).
Raised component construction
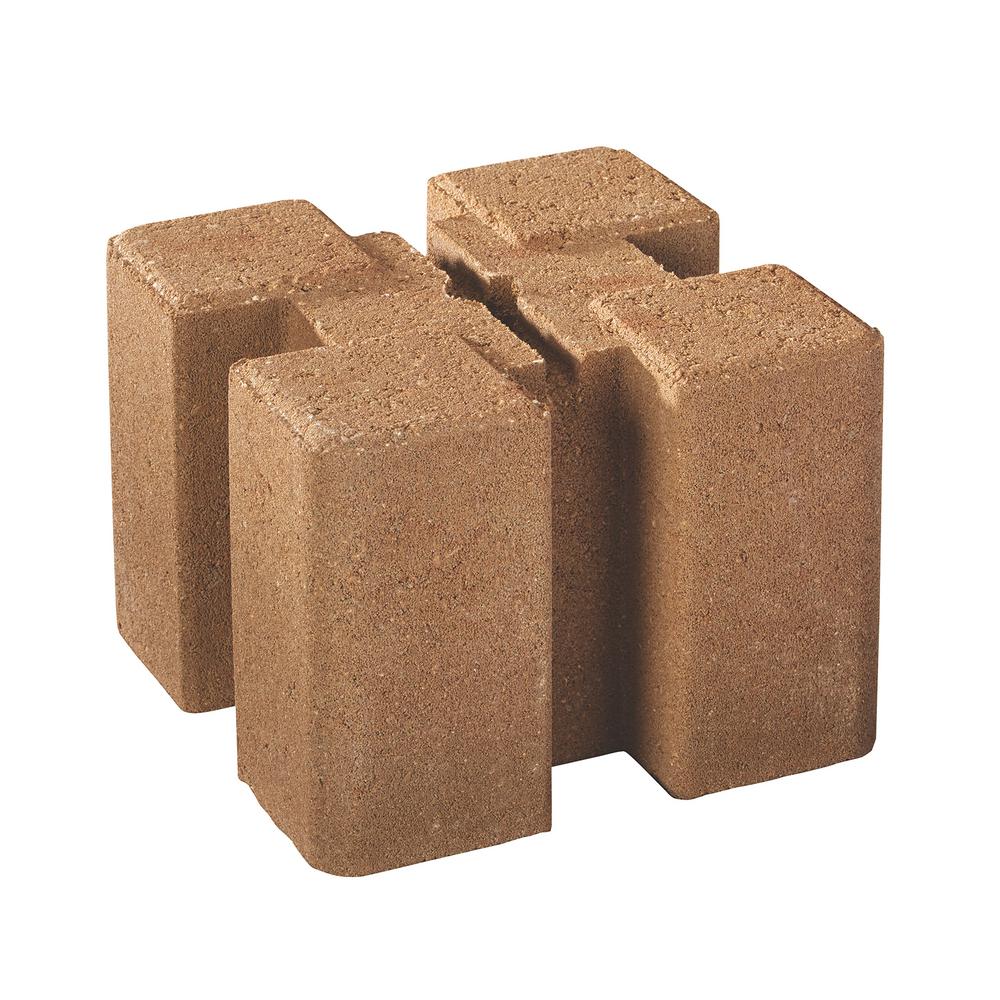
The planned construction technique is to use raised bed planters from Home Depot to make a stack 3 high:
Then hammer rebar through the center holes to anchor them into the ground.
Then use 2x6 wood to go into the slots, but also to vertically stack them to make a solid 4.5 inch thick wall (which should be able to take the 800 gallon weight).
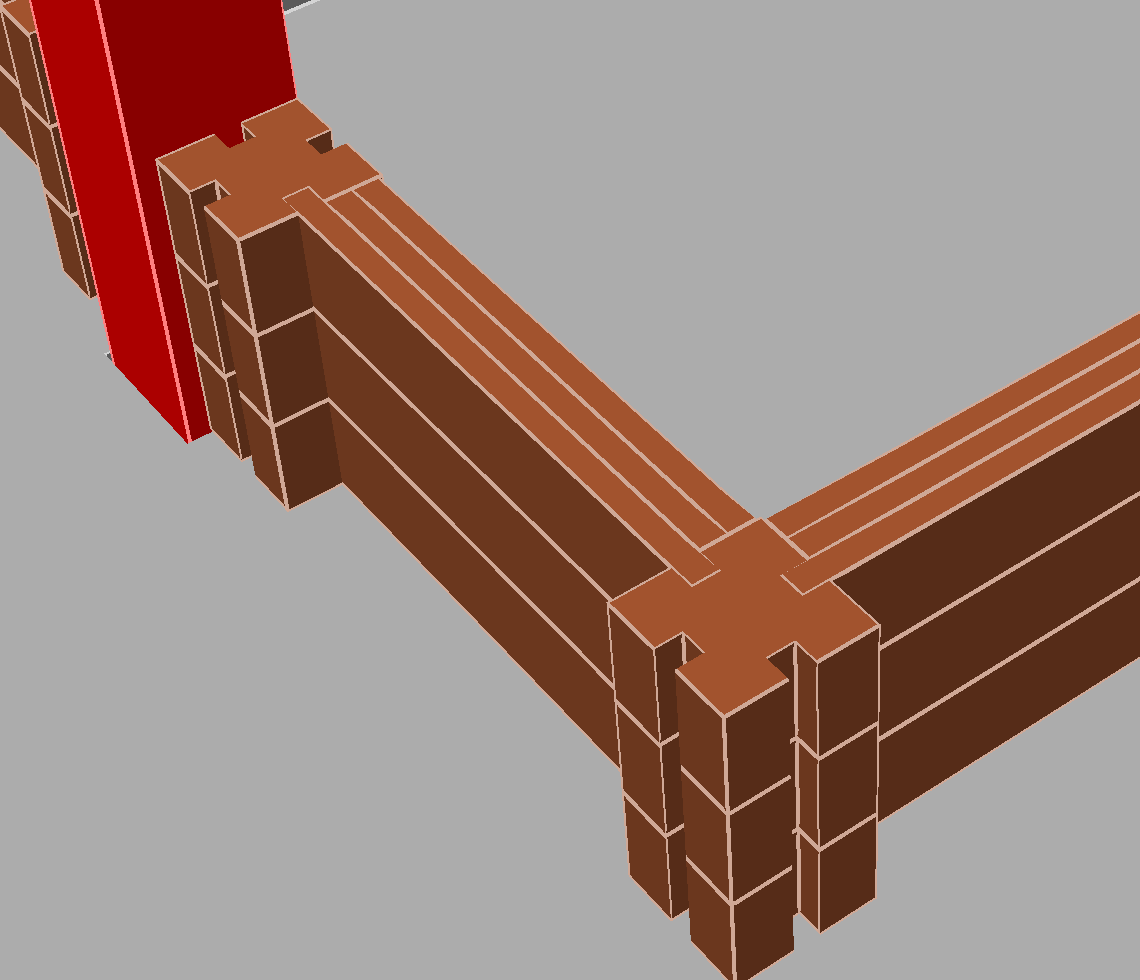
So that the entire frame looks like this:
Then put a 2x10 end cap on it to make it look nice (see first picture). Plan is simply to screw it onto the 2x6 foundation.
Lining
The plan is to put a pond underlay and a 45mm EPDM pond liner, and stick it to the top of the 2x6 boards, then put the 2x10 endcaps on top of the liner.
Filtration & Waterflow
The plan is to use a Tetrapond Skimmer as the primary point of entry into the filtration system. A pump then sucks water with debris removed and then drives a pressurized filter. The output from the filter is split via valve in two streams: one to the rain curtain, and one to an output in the pond, designed to generate a current so that leaves etc end up in the skimmer.
Budget

Thank you so much to the folks on the forum for the guidance I've received so far!
I'm preparing to undertake a revamp of the water feature in the backyard we have and am looking to expand it to some 700 gallons. But before spending thousands of dollars and a couple of hundred hours on the project, I thought I would run my design past the wise minds on this forum.
I've actually put together a Google doc on the project where you can directly add comments here. So if you'd prefer to review it in Google docs, you can. I've replicated that document here, and would love to get your thoughts on:
- Is this totally crazy?
- Will the suggested support structure for the pond be sufficient?
- Is the approach to filtration correct?
- Any thoughts on ways to keep the cost down?
Raised Bed Pond Design with Rain Curtain
The goal of this project is to take an existing originally pondless rain curtain and turn it into a 700 gallon pond. This is to make it deeper so that the water temperature doesn’t significantly fluctuate, and also to make it resistant to attacks from predators (raccoons, herons). And to accommodate more fish -- mostly goldfish. Perhaps one or two koi (after making an agreement with a friend to take them on once they get to 2 feet).
The original water feature looked something like this:
With the central pool being about 11 inches deep. The goal of this project is to add a raised component taking the total depth to 29 inches, but also expanding its footprint (such that its front-to-back size is increased from about 40 inches to about 120 inches).
Raised component construction
The planned construction technique is to use raised bed planters from Home Depot to make a stack 3 high:
Then hammer rebar through the center holes to anchor them into the ground.
Then use 2x6 wood to go into the slots, but also to vertically stack them to make a solid 4.5 inch thick wall (which should be able to take the 800 gallon weight).
So that the entire frame looks like this:
Then put a 2x10 end cap on it to make it look nice (see first picture). Plan is simply to screw it onto the 2x6 foundation.
Lining
The plan is to put a pond underlay and a 45mm EPDM pond liner, and stick it to the top of the 2x6 boards, then put the 2x10 endcaps on top of the liner.
Filtration & Waterflow
The plan is to use a Tetrapond Skimmer as the primary point of entry into the filtration system. A pump then sucks water with debris removed and then drives a pressurized filter. The output from the filter is split via valve in two streams: one to the rain curtain, and one to an output in the pond, designed to generate a current so that leaves etc end up in the skimmer.
Budget
Last edited:
")