Squidheads Pond, Waterfall & Stream Build

Joined
May 10, 2010
Messages
268
Reaction score
3
Location
Waxhaw, NC
I guess I better at least start this so here are the ealry stages.

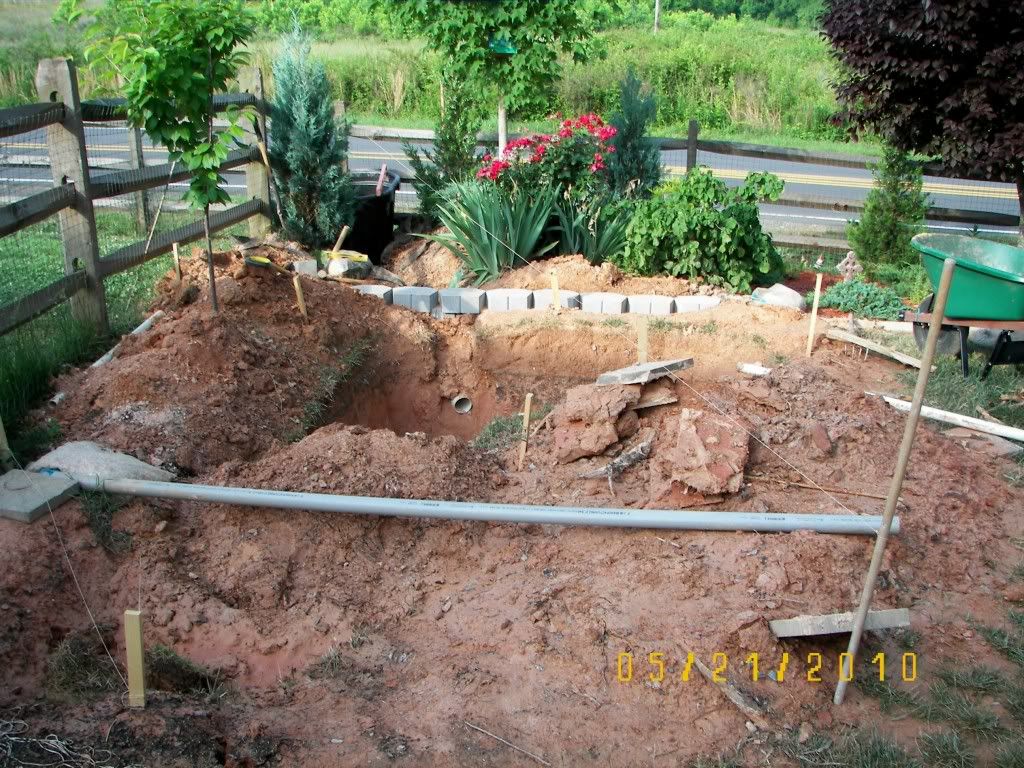
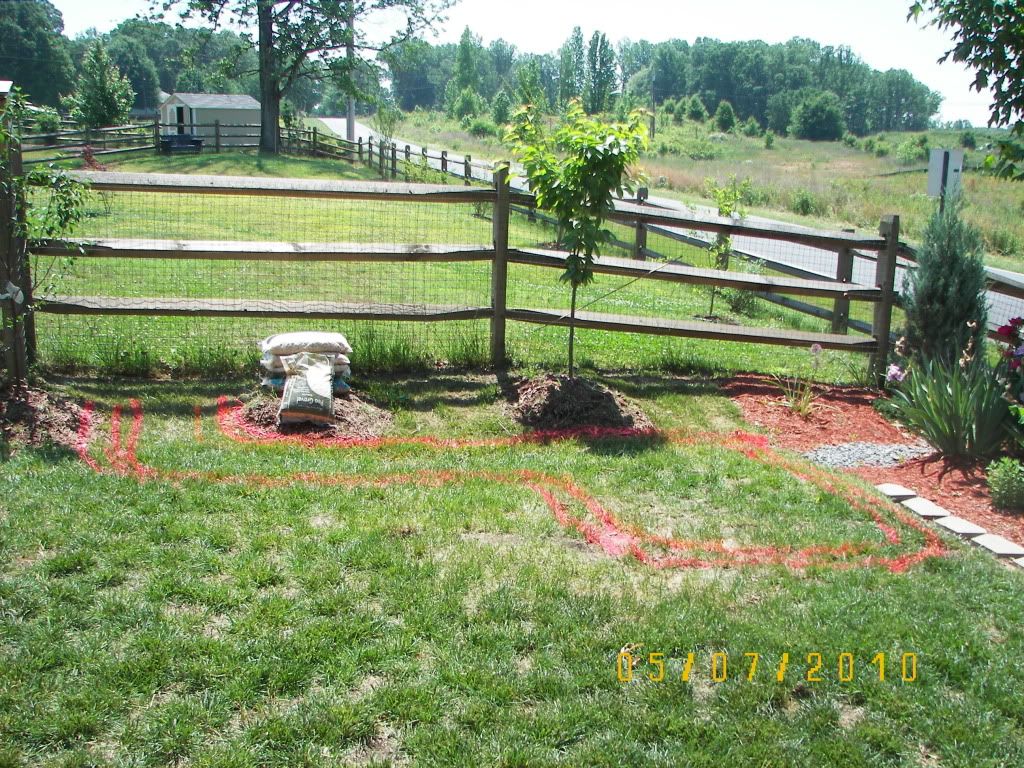
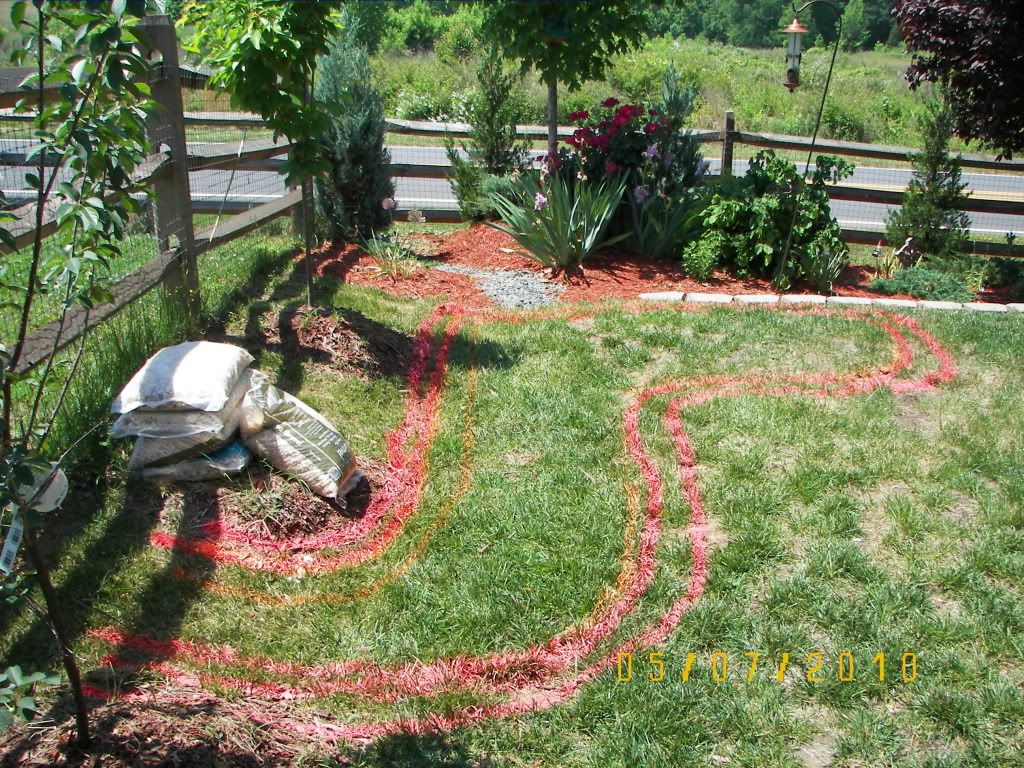
This is the area I want to put my pond. I used orange markout paint to make the footprint. To the extreme left side is going to be my filter return/waterfall. The falls will be facing you head on as you are looking at it, The water will fall then turn downstream to the right. The stream will be 6-8 feet long and 3' wide depending on how the water fall ends up turning out. I have a basic idea but the rock I end up with will dictate final dimensions.
000_0009.jpg


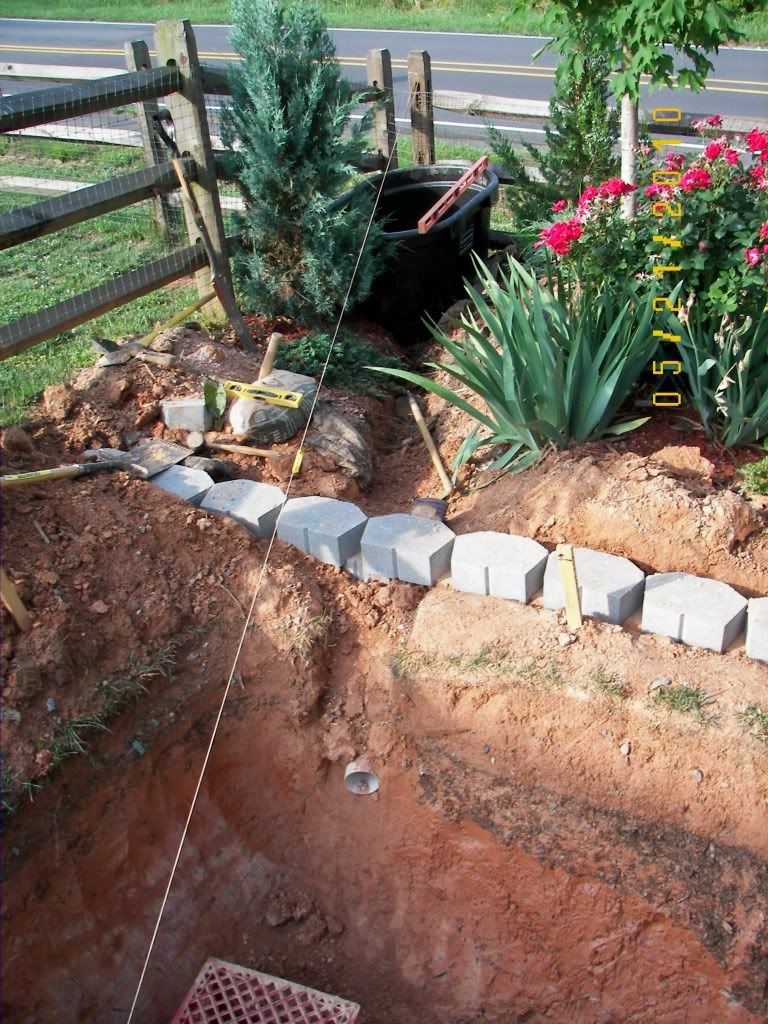
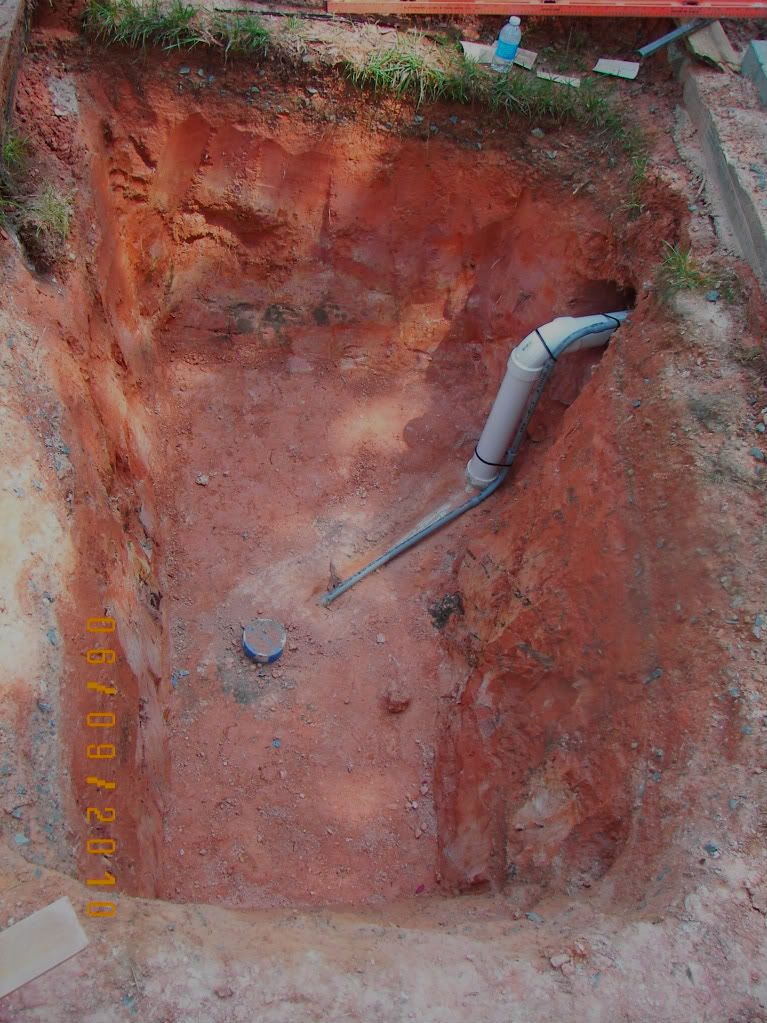
Here is a look at the markout, looking downstream. The small evergreens to the far left and right corner of the fence will help screen my Stock Tank Filter. I am installing a Koi Toilet II 3" Bottom Drain modified with air supply and a 7" disc aerator that will gravity feed the Stock filter. The Stock filter will gravity feed the pump, then the pump will shoot uphill to the waterfall. I will be running electric, as well as waterline for a hose and water changes and an irrigation line for the landscaping to the right of where the stock filter will be located.

000_0011.jpg


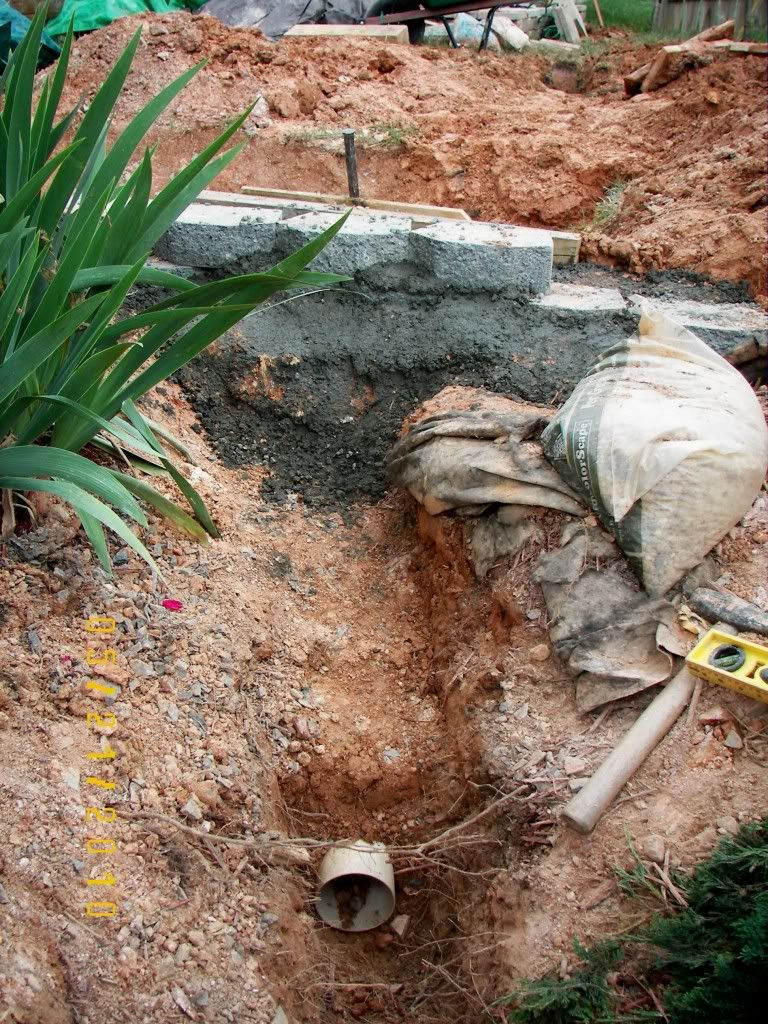
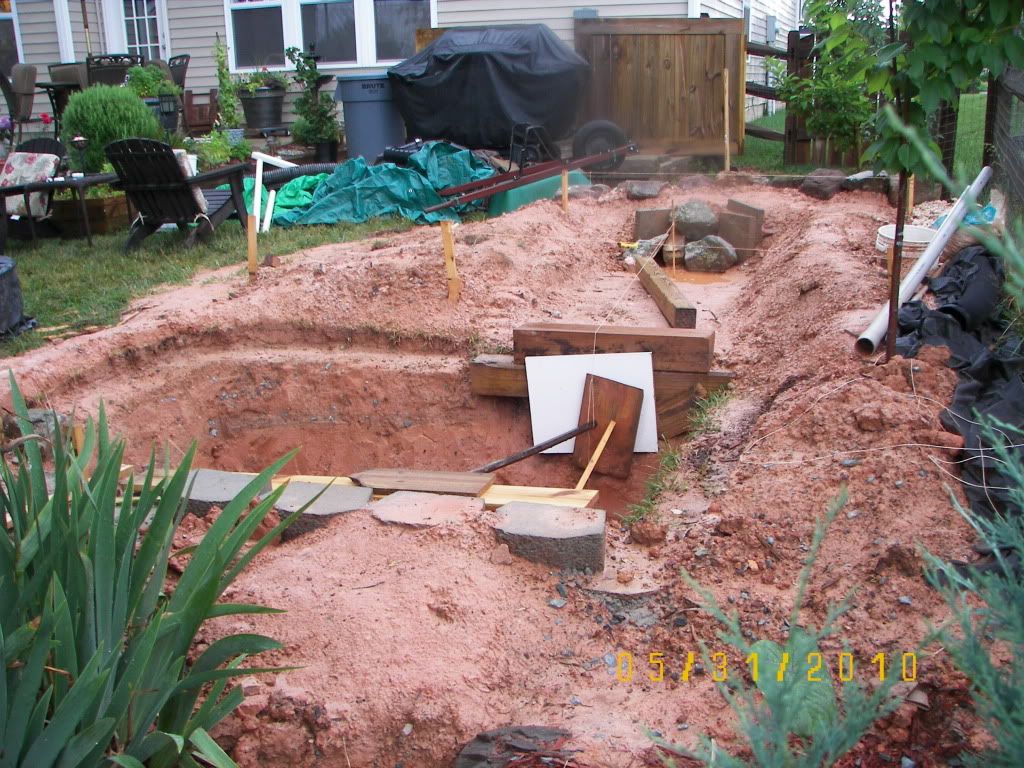
I let the markout sit for a while to make sure this is what we wanted as far as shape and location before digging. I dug up pretty much the whole thing in a couple days by hand. I live in a new construction sub-division so the ground is somewhat loose and clean red clay. We got a storm Monday night and I pumped out. We got another one Tuesday night and it filled right up again.
000_0020.jpg


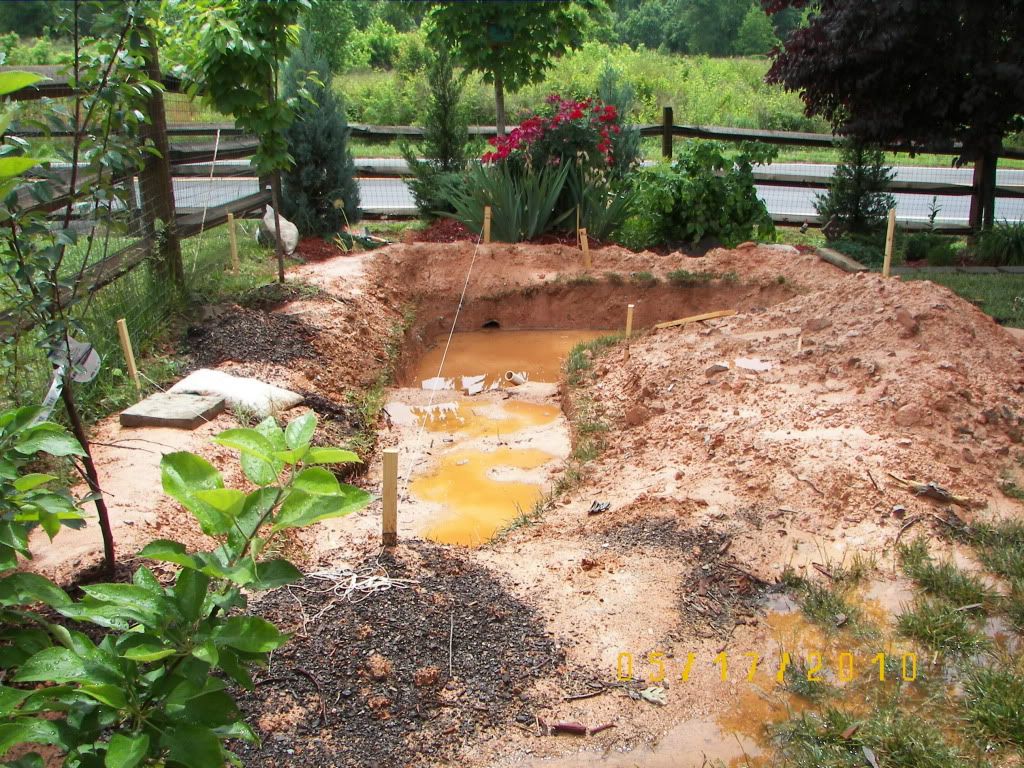
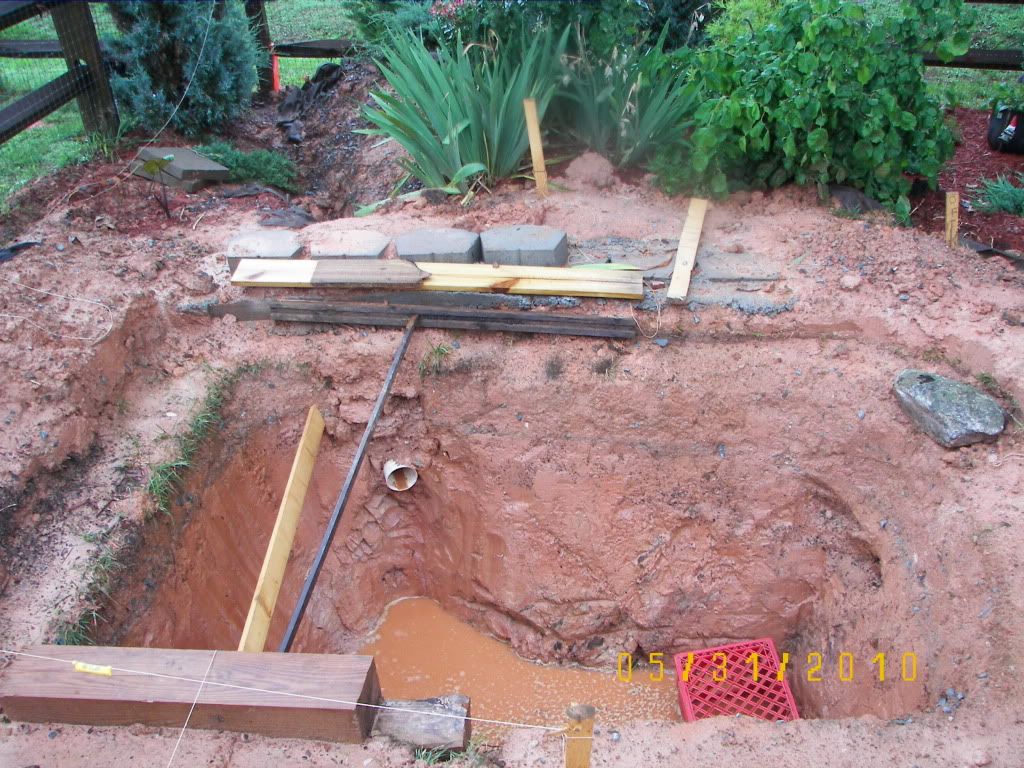
I made some good progress today after I dug the residual 4 inches of silt mud out and could walk around without getting my oversized Giant Yellow Boots stuck and wore normal boots. More Pics to come ASAP
 
Joined
May 10, 2010
Messages
268
Reaction score
3
Location
Waxhaw, NC
joshk87 said:
Looks good so far. How deep are you going?

It will actually be 4' deep not 3' like I have on my profile thing below my posts. At the point you see it with the water in it I am at about 3' 7" at the lowest point and about 5' at the deeper parts. The ground where I am building it has a pretty steep and uneven pitch to it. I am building a berm around it, then grading that into the existing terrain it should still have a sort of natural look to it when I am done grading. I will put some updated pics tonight as I guzzle down some Guiness.
 
Joined
May 10, 2010
Messages
268
Reaction score
3
Location
Waxhaw, NC
OK, here's a view looking downstream. You can see the Rubbermaid Stock Tank in position to the left behind the evergreen. I just have it there to make sure my waterline and it will be where I want it. You can see some retaining wall blocks just in front of it. That will be the waterline level. This area was dug lower then grade when the house was built for run-off. I will be adding fill behind it to build up the ground level and help hold in the water. Just below the blocks you can see a 4"white PVC pipe coming through the wall of the pond. This is a conduit for my 3" pipe to the stock filter. Just before the filter I will put a cleanout and reduce to 2" PVC.
000_0026.jpg


Another view of the same area
000_0028.jpg
 
Joined
May 10, 2010
Messages
268
Reaction score
3
Location
Waxhaw, NC
Here's a view an hour or so later. I want to be sure this area will not colapse. I added another coarse of block and 4 - 80# bags of Quick Crete in front and behind the blocks. There is about a 6" wide layer of concrete on the bottom coarse of block to the top of the second coarse where the water line will be. The top coarse will be above the water line. I will cover the block with the compact clay soil and fill in the and make that area higher. I will have good drainage around the entire pond so no run-off from my neighbors property or mine will get to the pond.
000_0030.jpg
 
Joined
May 10, 2010
Messages
268
Reaction score
3
Location
Waxhaw, NC
Since I don't have enough time to dig today, I'll post some pics I took a few days ago. I carved out the coping shelf around the pond and built up the grade around the creek bed. At least some good has come of the recent drenching we have got! I know know that no run off will get into the pond. The trench I put along the fence that will have my conduit for electric, waterfall feed from the pump, misting irrigation for flower beds at the back of the property and hose to fill the pond and rinse the filter as well as perferated pipe and crushed stone, worked great. The berm around the pond did not allow any runoff from my yard in. It streamed around nicely. The creekbed is sloped upward towards the pond to create a small pool, and to keep my stone and gravel from being swept over the smaller waterfall into the pond. It also will retain most of the water that is in transition if a power outage occurs. I put some large stones in place to hold the berm up to the far left. The stones and pavers in the stream are only there to help with errosion until the liner is installed. I still have to carve the coping shelf around the creek. I am trying to focus on the pond and plumbing since I am at the goal depth and grade. The 6 X 6 beams at the end of the stream going into the pond are to form the shelf for the coping there. The top of the top beam is where the bottom of the creek will be. There is about a 1 foot drop to the waterline of the pond.

100_4384.jpg
 
Joined
Sep 18, 2008
Messages
230
Reaction score
1
Location
Brownsburg,IN
Lookin good! How's moving the red clay? Here in Indiana its not fun, but not sure if the georgia red is any different. Keep up the good work
 
Joined
May 10, 2010
Messages
268
Reaction score
3
Location
Waxhaw, NC
nigil said:
Lookin good! How's moving the red clay? Here in Indiana its not fun, but not sure if the georgia red is any different. Keep up the good work

Not too bad. I needed a good part of what I dug to build up a berm and redirect run off flow. The rest went to my neighbors backyard. The last few summers we had little rain and we live in a new construction sub-division. With that said peoples lawns had little shade from the younger trees and the grass died in areas stressed by the sun. When it rains you get erosion, so my neighbor was able to replace what he lost.
 
Joined
May 10, 2010
Messages
268
Reaction score
3
Location
Waxhaw, NC
Update: Yesterday I completed the Koi Toilet modification I posted in the DIY forum. Then I installed it along with the pipe that will run under the pond, and the 1/4 turn elbow that will connect to the pipe going up the wall (behind the liner). I poured concrete around the plumbing , but left the top of the pipe uncovered until I installed the grey 1/2" PVC for the air supply line. I also connected the elbows to the grey PVC to bring the airline up and over the pipe. I taped a cap over the elbow that will receive the bottom drain, and taped over the grey PVC so concrete wouldn't get into them. I didn't take any pictures of it before installing the concrete because I was running out of time. Today I finished both the 3" and grey PVC run to where the filter and airpump will be. I cable tied the 1/2" grey PVC airline to the 3" PVC as pictured. I also had to tunnel out to the pump location. The conduit I put in, was just a hair too small and I wanted to bring it on a more direct line with the Filter. That took some time. I went to my sons kindergarten graduation, thatn came home and made a form out of OSB up the side wall. I mixed some concrete and filled the wall in. Tomorrow I will cover up the bottom of the pond and get the final grade. I decided to put a skimmer in place also. This will be just mechanical filtration for fall leaves and floating debris. Then I can pick up the rest of my coping stone and start placing the liner. Here is a pic of the plumbing that wasn't covered by concrete yet. I don't have a picture of the concrete form in place yet, maybe I will post one in case anyone needs or wants to do this.
100_4423.jpg
 

Ask a Question

Want to reply to this thread or ask your own question?

You'll need to choose a username for the site, which only take a couple of moments. After that, you can post your question and our members will help you out.

Ask a Question

Members online

Forum statistics

Threads
30,914
Messages
509,947
Members
13,122
Latest member
Mozzzika

Latest Threads

Top