Waterfall construction under $10,000

Joined
May 7, 2008
Messages
560
Reaction score
9
Location
Salem Oregon
:salook: I'll bet the 5 figures got your attention. But I'm only 1/2 joking albeit by a factor of 5 i.e. $2,000. Some of the options we've considered could easily run $2,000. My wife wants me to hire a consultant/contractor to give us ideas. I figure that would cost at least $200 and I hate to spend it on just advice.

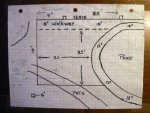
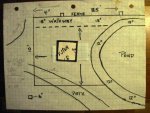
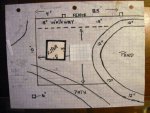
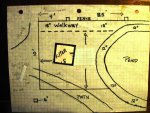
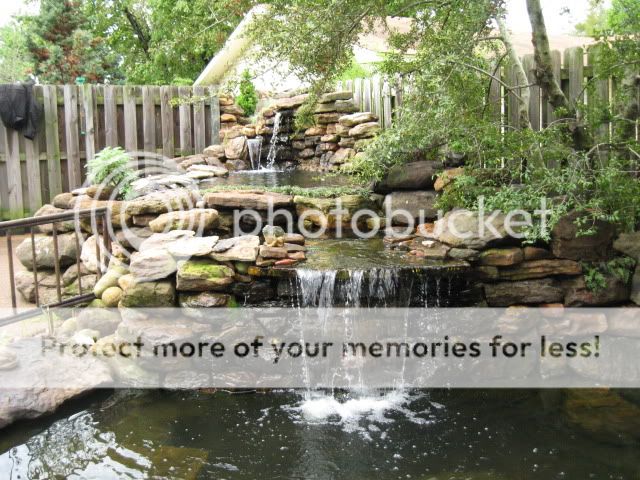
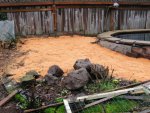
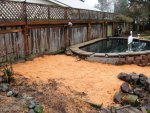
Many of ya'll have seen the progress on the expansion of our pond. Water's in. Plumbing for the first filter, a bead type, is nearly done. Now it's time to add the waterfall. Sigh. What an enigma.

Several big issues / obstacles.
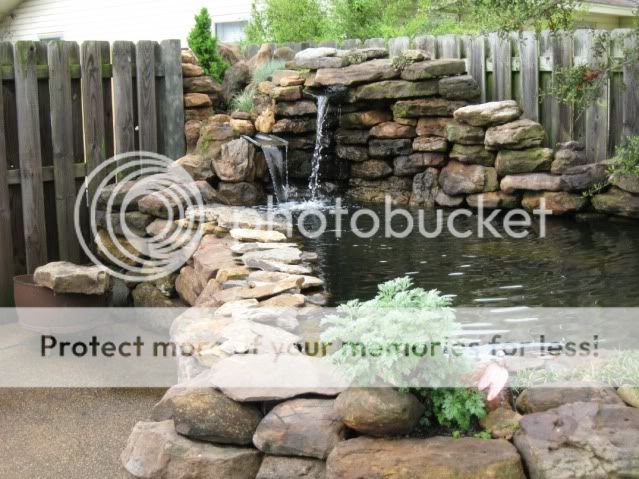
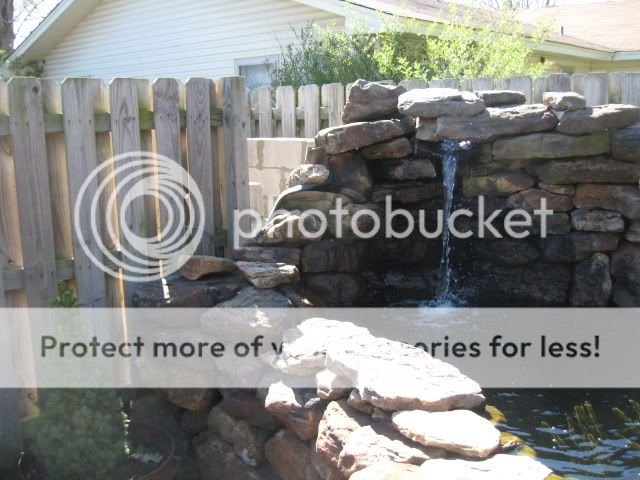
1) the above surface wall is nice looking, but definitely not "natural". I'm concerned about building a "natural" waterfall thinking it'll clash.
2) the wall rises 18 inches above the ground level. Water level is nearly at the top of that 18 inches. This leaves an 18 inch gap on the outside.
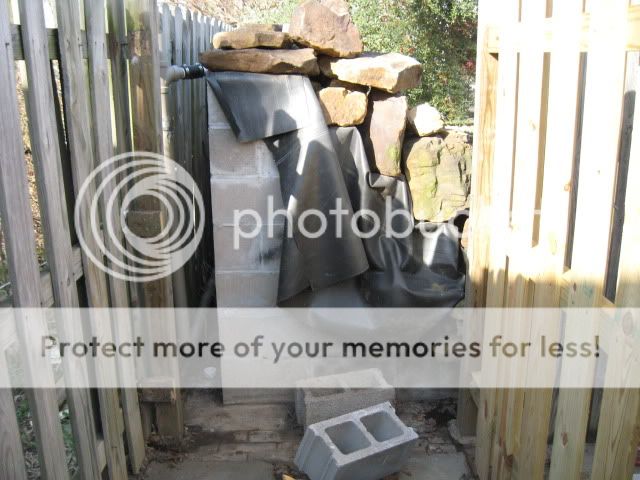
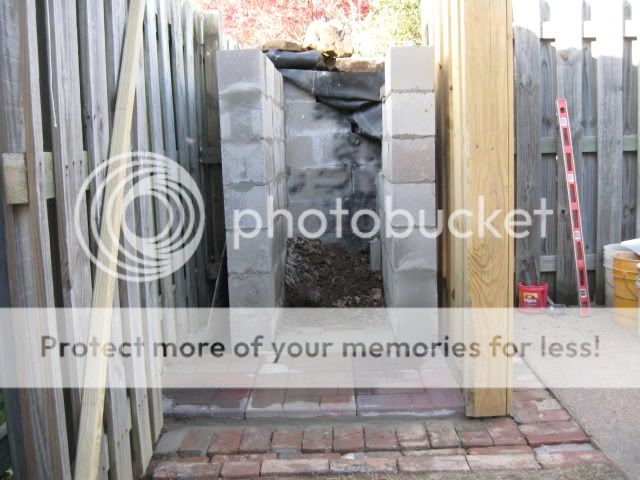
3) we have a medium size Easy Pro Aquafalls filter that used to be the primary bio filter for the original pond. For the expansion we've added an Ultima II 4000 bead filter, but I still want to incorporate the Aquafalls. Not only does it increase filtration, but it adds a back up system in case one fails. Problem is, the darn thing is 36X36. Not small or easy to hide. We didn't even try on the first go round.

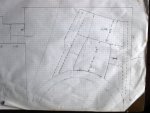
I've considered hiring a concrete contractor (thus the $2,000 estimate) to build a slab, level with the wall, surrounded by a semi-circular tapering wall into which the Aquafalls would fit at the apex of the semi-circle. That's how the builder did the waterfall at the hospital where I work, but minus the aquafalls. This would be sweet, but gad. I don't even want to get a bid.

How about this instead?

1) use the same landscaping stones as the wall and build the semicircular wall tapering it up to the height of the aquafalls. Be a lot of stones so I'd probably have to mortar them.
2) use preformed treated-wood stair stringers & cross boards to provide the cascade for the falls. all of this will be covered by a liner so no worries about the treated wood.
3) mount the aqua falls at the desired height on ordinary cement building blocks probably placed on a small slab.
4) use some kind of paver for the stones in the falls. These will sit on top of the liner. They make some nice, rose colored, soft-edged stones that would do nicely. Coat these with White Mountain Stone Laquer.

All of this can easily be adjusted for variable heights between drops and to allow a reasonable drop into the pond. It would definitely not look "natural", but I think with proper care it could look very nice.

whattya think?
 

DrCase

Moderator
Moderator
Joined
Dec 29, 2007
Messages
4,400
Reaction score
789
Location
Arkansas
Hardiness Zone
7a
My raised pond is 24" high made of block and mortar
I face ed it with the same rocks that i used every were else
the rocks are big enough that they just dry stacked every were and stay put
 
Joined
May 7, 2008
Messages
560
Reaction score
9
Location
Salem Oregon
It would be nice if I could do that. I mean, I guess I could but it would take up even more of the yard. Worth thinking about though, i.e. dry stacking. Most folks face brick and mortar with flat rocks and that I can't do.

Can you provide a couple pics please
 
Joined
May 7, 2008
Messages
560
Reaction score
9
Location
Salem Oregon
here are some drawings and diagrams.of the waterfall area with a mock up of the filter set back at 2, 3 and 4 ft. I'm hoping to get some help from a professional designer. I'll let you know.
 

Attachments

  • filter-waterfall work area.jpg
    filter-waterfall work area.jpg
    63.2 KB · Views: 531
  • filter-waterfall 2 ft. back.jpg
    filter-waterfall 2 ft. back.jpg
    67.2 KB · Views: 495
  • filter-waterfall drawing 4 ft. back.jpg
    filter-waterfall drawing 4 ft. back.jpg
    64.3 KB · Views: 543
  • filter-waterfall 3 ft. back.jpg
    filter-waterfall 3 ft. back.jpg
    82.1 KB · Views: 504

DrCase

Moderator
Moderator
Joined
Dec 29, 2007
Messages
4,400
Reaction score
789
Location
Arkansas
Hardiness Zone
7a
I cant find the ones from the side but here are a few
rock1.jpg

rock2.jpg

rock3.jpg
 

DrDave

Innovator
Moderator
Joined
Aug 29, 2007
Messages
6,851
Reaction score
112
Location
Fallbrook, Ca USA
These are the best photos so far. I didn't notice before how great your waterfall is. Good job!:biggrin:
 
Joined
May 7, 2008
Messages
560
Reaction score
9
Location
Salem Oregon
Great is right. Your work looks so good. Now that I've seen what you did there is no question. And I know when my wife sees it she'll be equally convinced.

Our wall slopes inward at a slight angle, so dry stack should work just fine. As far as taking up more of the yard, it'll be worth it to lose another foot. It'll change the whole character of the pond much, much for the better.
 
Joined
May 7, 2008
Messages
560
Reaction score
9
Location
Salem Oregon
As for the waterfall construction, I wonder, generally speaking, how high one can dry stack rock of that size. Depending on how high we put the filter-falls, I think we may need to design in two, or even three graduated stacks.

The filter falls itself is 28 inches tall. The wall of the pond is 18 inches. So if we put the bottom of the filter falls level with the top of the wall it'd be 46 inches of dry stack. I think I'd like more height. I'd like a drop of at least 12 inches into the pond and another drop near the filter falls of maybe 2 feet (already have most of this depending on what the water falls into.) So, maybe 60 inches of dry stacked rocks at the maximum height at the back of the filter falls box.

Final question is whether to build up the height with dirt or use some kind of constructed form, e.g. the stair stringers on posts. If we use dirt how does one pack it in so the rocks in the stream bed don't do a lot of settling?

The dirt from the pond expansion dig is in the side yard and is mostly clay. When it gets wet it becomes like silly putty. You just mush around in it and it doesn't really pack down well. Recently we added a lot of saw dust to it to see if that helps.
 
Joined
Oct 9, 2009
Messages
95
Reaction score
0
Location
Oregon - zone 8b
Sand would help make the soil more workable, too. I think 60" of dry stacking rocks is a little worrisome, unless you are going to have dirt behind most of it and only have pond/water at the top little bit (1' or less?). Or were you going to stack block? That would be more stable, but still 60" seems like a lot! JMO

Also, want to echo the compliments to Dr Case. Very nice setup.
 

DrCase

Moderator
Moderator
Joined
Dec 29, 2007
Messages
4,400
Reaction score
789
Location
Arkansas
Hardiness Zone
7a
All the rocks making the water fall sit on mortared blocks starting a few inches below the water level , and have mortared blocks behind them,the top row sits on the rocks and the blocks to keep it all in place
after work i will look for more pics
 

DrCase

Moderator
Moderator
Joined
Dec 29, 2007
Messages
4,400
Reaction score
789
Location
Arkansas
Hardiness Zone
7a
I don't have any pics of my upper pond build.
I have a few of the side of the upper water fall during my remodel and filter addition.
the concrete blocks stair step up as the walls get higher..all the rocks are capped with a larger rock that sits on a block and the top of the rocks
bl1.jpg

bl2.jpg

bl3.jpg

you cant just push the rocks down they all lean against the block walls
 
Joined
Dec 28, 2009
Messages
49
Reaction score
0
Location
S. Ontario - Zone 5b
undrtkr_00 said:
Sand would help make the soil more workable, too. I think 60" of dry stacking rocks is a little worrisome, unless you are going to have dirt behind most of it and only have pond/water at the top little bit (1' or less?). Or were you going to stack block? That would be more stable, but still 60" seems like a lot! JMO

Also, want to echo the compliments to Dr Case. Very nice setup.
It is hard to put rocks together and make it look natural or even good. I agree, well done Dr Case. Dry stacking can be stable, natural & beautiful if the stone is tiered. Here is an example of a dry stack tiered wall:


droc406_1ff_06_SplittingStone01_lead.jpg


BTW, the page that pic came from is a good 'How To' article on building dry stack walls. Click here to see the original article. I've saved it for my archives.
 
Joined
May 7, 2008
Messages
560
Reaction score
9
Location
Salem Oregon
My wife keeps suggesting we get a consult on the waterfall. I've checked around and there's a couple possibilities, but it's hard to know just how much experience a person has, particularly with what I think is an unusual situation. Frankly the more I design and think about it and after consulting with you guys, the less I think I need more input, particularly paid. Once I get the basic block structure thought through, THEN I'm going to need input on how to build it.

Yesterday I finished clearing out the area where the water fall will go. I covered it in sawdust because it's been raining constantly and is very muddy. I also drew up some plans based on measured dimensions and projected construction requirements. One drawing is seeing the base construction from the side. The other two are from above and include the base and the structures on which to put the dry stack rock.

The dotted lines are block walls. The right hand wall will have dry stacked rocks along the inside, the fence on the outside. The will be 2-3 levels of shelves with the height of dry stack rocks to be no more than 3 ft. The left hand wall will have dry stacked rocks on both sides, i.e. inside as part of the interior of the waterfall and outside to dress the entire structure. Then we will dry stack rocks all along the front of the pond wall, as well.

Does this seem too complicated?
 

Attachments

  • Pond expansion 2010 002.jpg
    Pond expansion 2010 002.jpg
    91.7 KB · Views: 542
  • Pond expansion 2010 003.jpg
    Pond expansion 2010 003.jpg
    97.8 KB · Views: 524
  • Pond expansion 2010 009.jpg
    Pond expansion 2010 009.jpg
    52 KB · Views: 543
  • Pond expansion 2010 006.jpg
    Pond expansion 2010 006.jpg
    59.6 KB · Views: 509
  • Pond expansion 2010 005.jpg
    Pond expansion 2010 005.jpg
    58.2 KB · Views: 472

Ask a Question

Want to reply to this thread or ask your own question?

You'll need to choose a username for the site, which only take a couple of moments. After that, you can post your question and our members will help you out.

Ask a Question

Members online

Forum statistics

Threads
30,897
Messages
509,803
Members
13,112
Latest member
Terinb

Latest Threads

Top