Overview
June 2014, I began the conversion of my badly damaged 23 y/o conventional swimming pool to an organic swimming pond, after researching various concepts for three years. I worked within the existing fence line and did all work by hand/power tools and my small tractor/trailer.
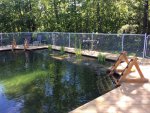
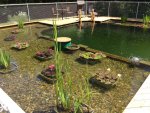
I opted to go with an air system to circulate water using a small 60w air compressor, air lines, air stones and common 4" plumbing fittings and perforated plastic distribution pipe. This, combined with aquatic plants (in tubs) placed in a greatly expanded water area filled with layers of sharp sand and colorful river rock, and the emergence of a natural ecosystem of water life (frogs, tadpoles, water beetles, dragonflies, etc. that mostly tend to stay in the planting zone), continually cleans the water (the 8' bottom can be clearly seen) and controls mosquitos. There is no algae, and the shallow plant area also serves as a natural solar water heater with the warmed water recirculated back into the swimming area. The water has been totally clear since I first added water last fall, even through very heat/humid periods thus far this summer. Best of all, no chemicals whatsoever. No more fishing out dead frogs and other critters. As for fish, although I could add ornamental fish like koi, or even eating fish like bass, I will not be doing that. I've struck a great water quality balance for swimming which is my priority and fish could be problematic.
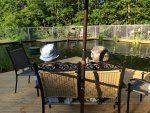
This system is minimal maintenance. It balances itself. For winter, no draining of lines because they are only air-filled...no water/pump lines. Just turn off the compressor and cut-back the plants. That's it! It is wonderful to swim in. I just placed the deck furniture yesterday and my wife and I have finally been able to sit out and enjoy...read, me playing guitar.
Below are pics of some major steps of the project. All I have left to do is build the in-water stairs, ladder and diving board, which I will do next week.
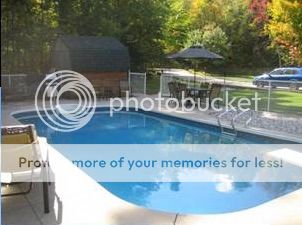
Original pool: The pic was taken a few years before the damage that occurred as a result of a very cold/harsh winter in 2013/14 where the side walls bowed-in somewhat, separating the skimmer housing, and the concrete decking seriously heaved and cracked. I knew the day was coming where serious intervention would be required, which is why I began to research an alternative, especially since I was never comfortable with a chemical pool.
Committed (some say I should've been) ...")
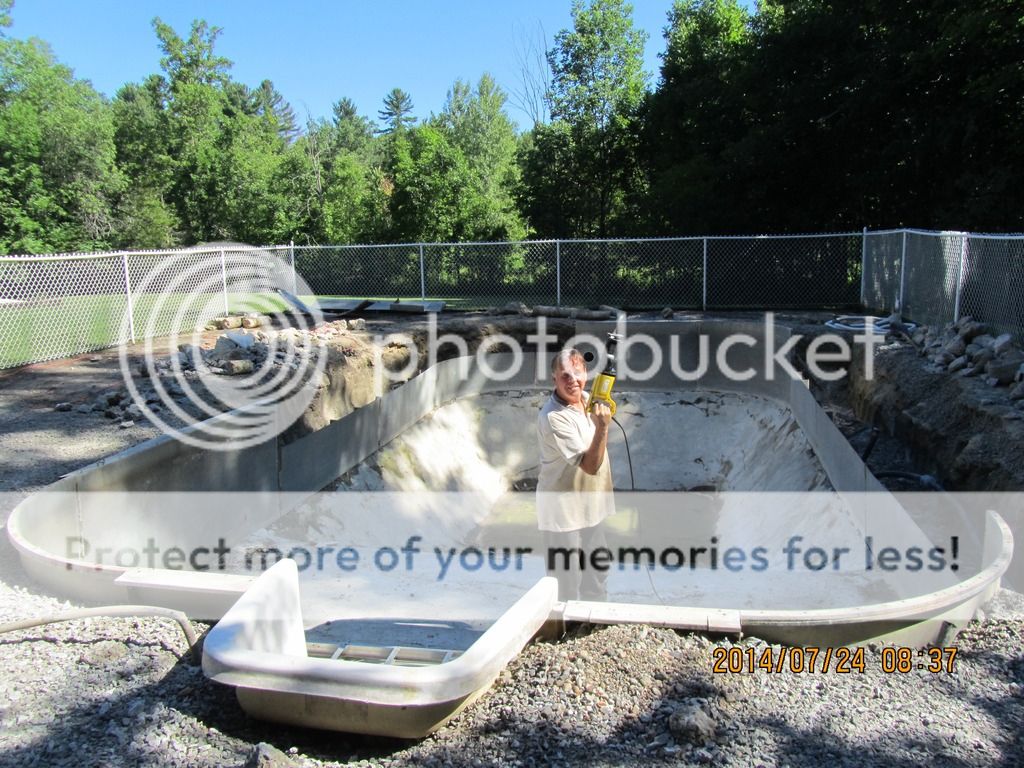
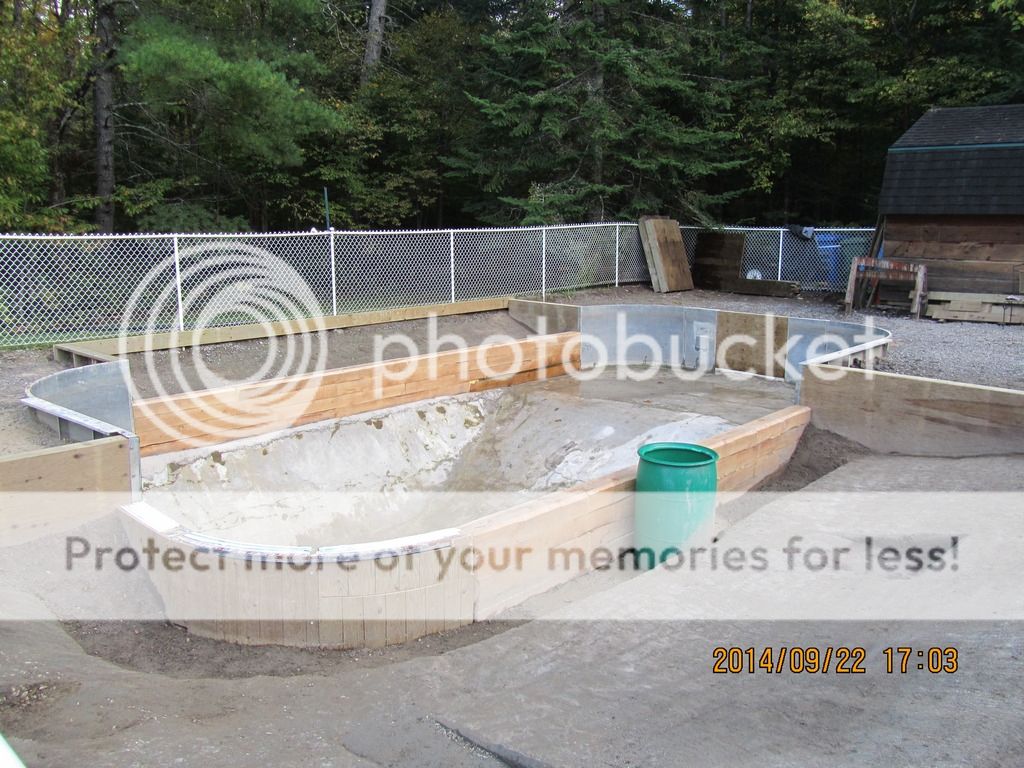
Framing (retained some existing galvanized steel walls, and used hemlock timbers and in-ground rated pressure-treated wood)...
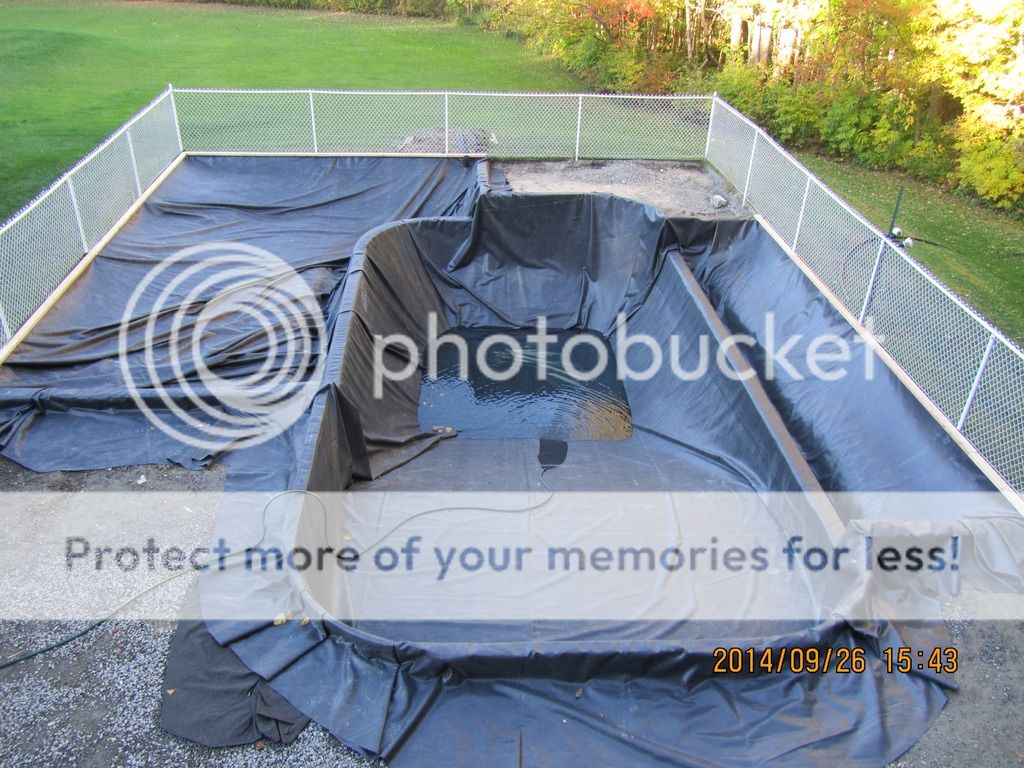
One-piece Firestone pond liner (45 mil) installed...
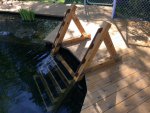
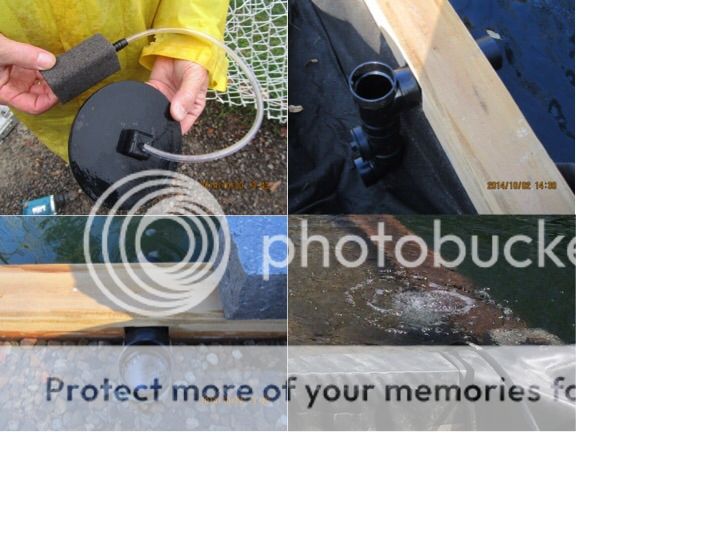
Air/stone 'bubble lift pump' water circulation assembly (there are 5 around the pond)...
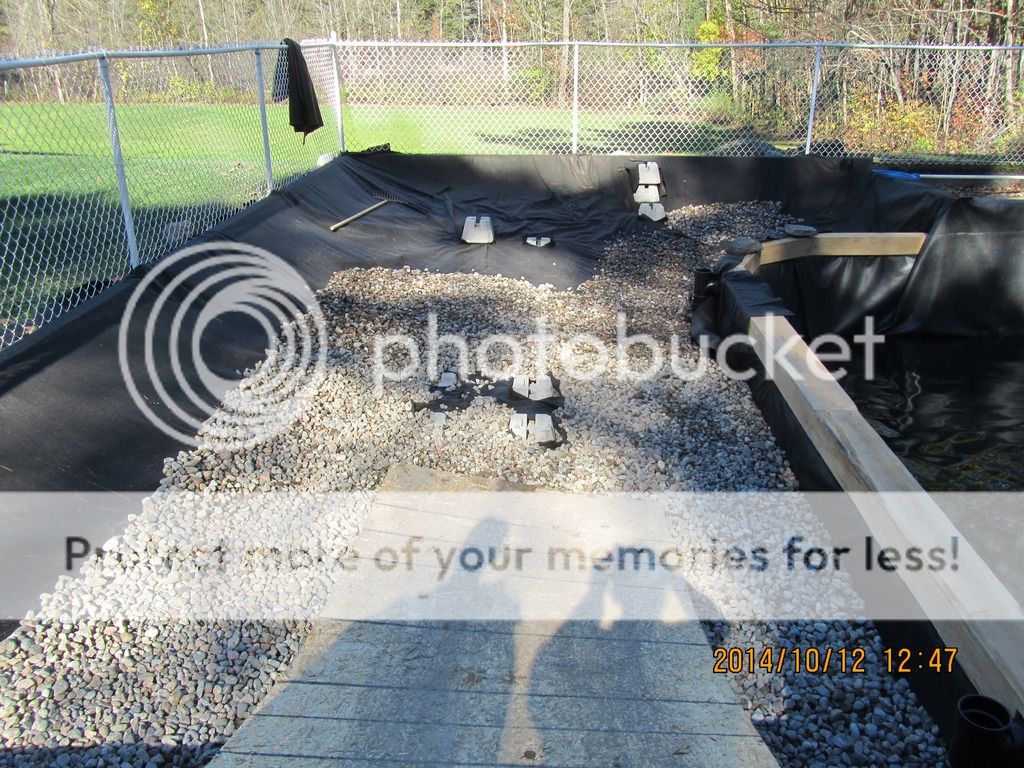
Installation of river rock (all hand-washed) and sand layers...
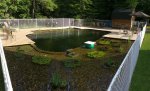
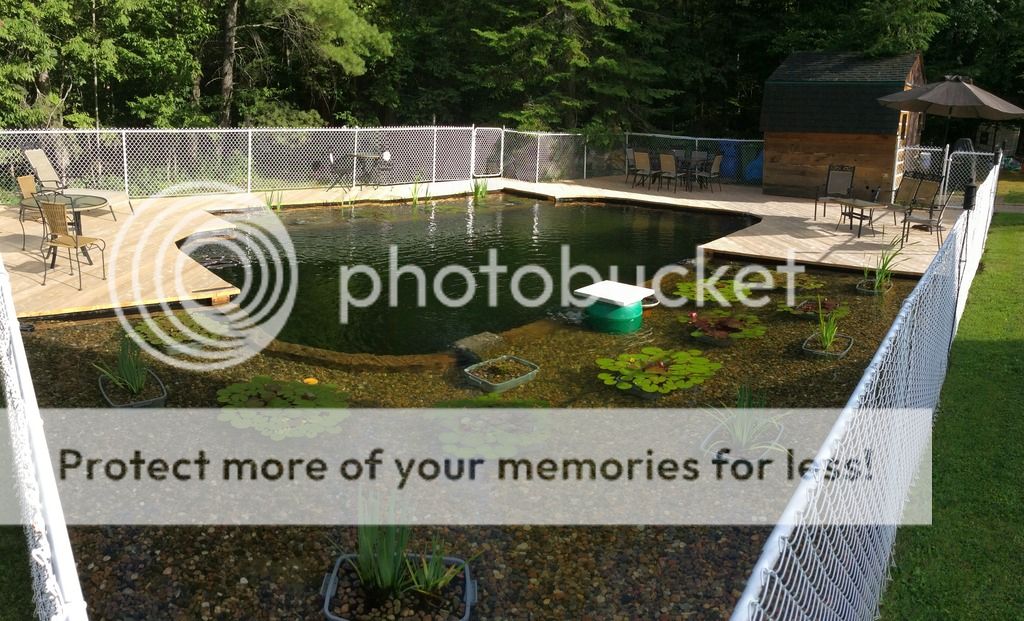
Finished product with cedar decking (as of yesterday). I moved the far fencing out 4' to construct a boardwalk to connect the shallow-end and deep-end decks. The green barrel is a homemade skimmer/filter driven by a bubble air-stone pump. A perforated basket fitted with geotextile fabric is within the barrel that I remove, hose-down and replace once a week...
I opted to go with an air system to circulate water using a small 60w air compressor, air lines, air stones and common 4" plumbing fittings and perforated plastic distribution pipe. This, combined with aquatic plants (in tubs) placed in a greatly expanded water area filled with layers of sharp sand and colorful river rock, and the emergence of a natural ecosystem of water life (frogs, tadpoles, water beetles, dragonflies, etc. that mostly tend to stay in the planting zone), continually cleans the water (the 8' bottom can be clearly seen) and controls mosquitos. There is no algae, and the shallow plant area also serves as a natural solar water heater with the warmed water recirculated back into the swimming area. The water has been totally clear since I first added water last fall, even through very heat/humid periods thus far this summer. Best of all, no chemicals whatsoever. No more fishing out dead frogs and other critters. As for fish, although I could add ornamental fish like koi, or even eating fish like bass, I will not be doing that. I've struck a great water quality balance for swimming which is my priority and fish could be problematic.
This system is minimal maintenance. It balances itself. For winter, no draining of lines because they are only air-filled...no water/pump lines. Just turn off the compressor and cut-back the plants. That's it! It is wonderful to swim in. I just placed the deck furniture yesterday and my wife and I have finally been able to sit out and enjoy...read, me playing guitar.
Below are pics of some major steps of the project. All I have left to do is build the in-water stairs, ladder and diving board, which I will do next week.
Original pool: The pic was taken a few years before the damage that occurred as a result of a very cold/harsh winter in 2013/14 where the side walls bowed-in somewhat, separating the skimmer housing, and the concrete decking seriously heaved and cracked. I knew the day was coming where serious intervention would be required, which is why I began to research an alternative, especially since I was never comfortable with a chemical pool.
Committed (some say I should've been) ...
Framing (retained some existing galvanized steel walls, and used hemlock timbers and in-ground rated pressure-treated wood)...
One-piece Firestone pond liner (45 mil) installed...
Air/stone 'bubble lift pump' water circulation assembly (there are 5 around the pond)...
Installation of river rock (all hand-washed) and sand layers...
Finished product with cedar decking (as of yesterday). I moved the far fencing out 4' to construct a boardwalk to connect the shallow-end and deep-end decks. The green barrel is a homemade skimmer/filter driven by a bubble air-stone pump. A perforated basket fitted with geotextile fabric is within the barrel that I remove, hose-down and replace once a week...