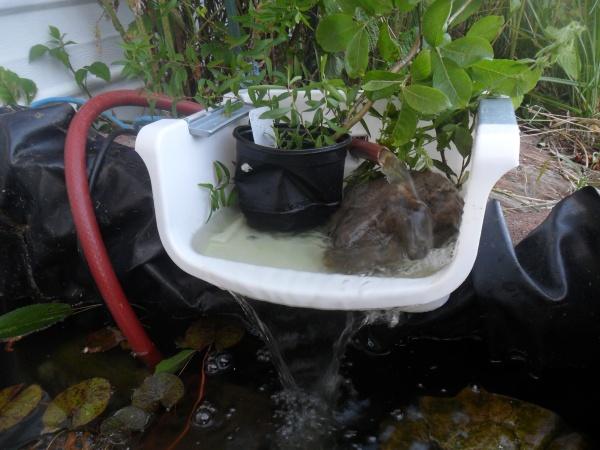
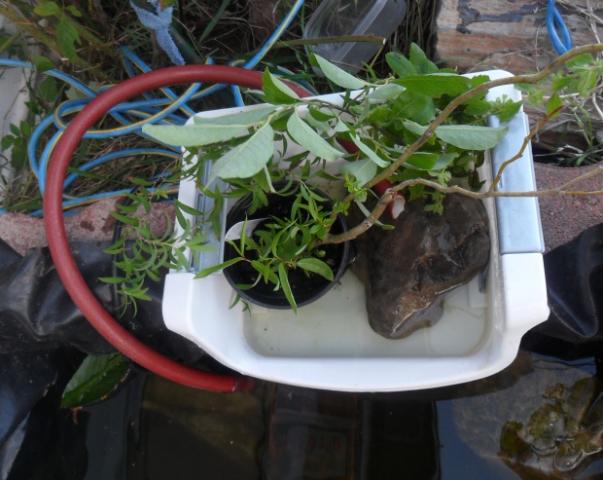
A simple and easy Waterfall that I have made for my pond. The fish love it and I do too. I chose this design because it doesn't need a deep basin and I was able to use the pump and hoses that I already had lying around. The basin I used is an Office Organizer that I bought at Goodwill for $0.99, but I have also seen them at Walmart and Staples and other office supply stores. The total cost including the pump was around $20.00. My pump is a small one, about 150gph, but I have a larger pump on order. I like my water to cycle over about 2x/hour to keep the water clear and the temps down in the pond for the fish.
Materials:
-Office Organizer with a Lip
-Pump with attachment for hoses
-Hosing that is sized for the diameter of the nozzle on your pump
-Knife/Scissors/Box Cutters
-Tape(either waterproof or Duct Tape)
-Optional(rocks, plants, etc. for looks)
How It Works:
This system is pretty simple. The water starts in the pond where the pump draws it up and it is pumped through the hosing. The hose feeds into the basin through a hole in the back and fills the basin. As the basin fills it overflows and creates the waterfall effect.
Steps:
1. Select the spot you would like your waterfall to be. The simplest way to set up this waterfall is to have it resting on the edge of the pond and overhanging slightly over the water. For an in ground pond it is best to set the waterfall up on a couple of bricks so that it is elevated above the water level to create the waterfall effect. I have mine at around 4" high and it seems like a good hight, but it is all dependant upon preferance and how powerful the pump is that is used.
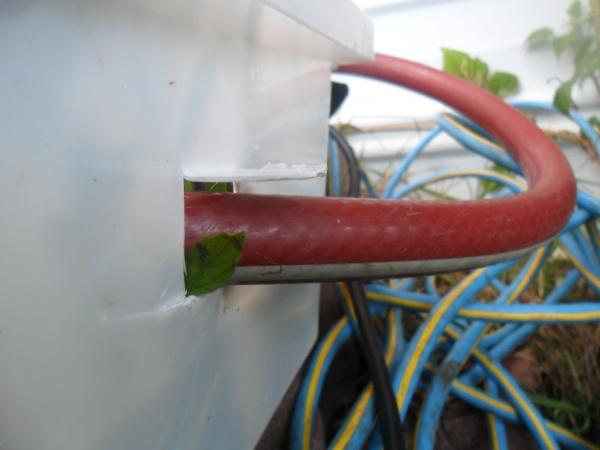
2. Cut a hole in the back of the Basin. This will be te hole that the hose feeds through to fill the basin. The diameter of the hole should be slightly larger than the diameter of the hose you are using. The hieght of the hole depends upon the hieght of the back of the basin. I placed mine at 3" high. Be sure that the hole is above the water level in the basin to prevent leaks.
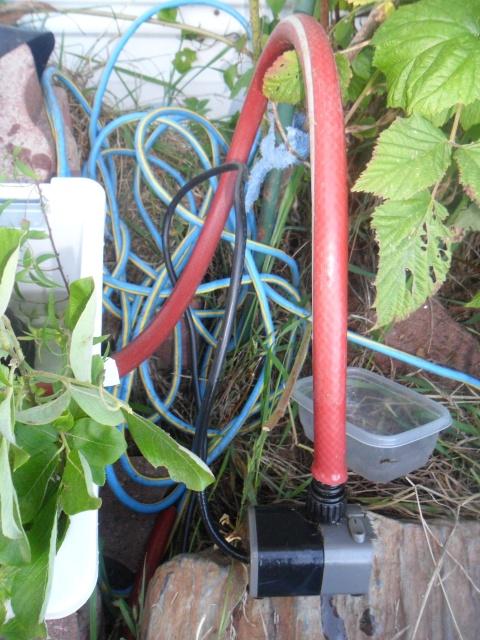
3. Measure the distance between the section of the pond that the pump will be resting in and the back of the Basin where the hosing will feed through into the basin. Once you know this distance you can cut the hosing to the appropriate length. It is best to keep the pump up off of the bottom of the pond, as this will help to keep the pump from getting clogged with debris.
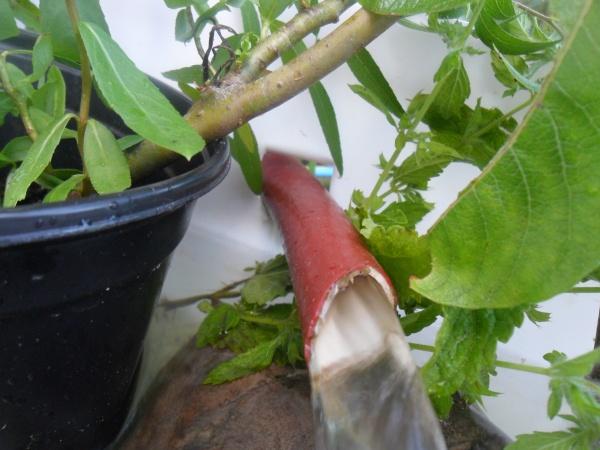
4. Once the hose has been cut to length feed it through the hole in the back of the basin. The hosing can be secured to the back of the basin using tape, but I chose not to secure mine so that it would be easier to take apart the waterfall if I ever had to do so. The hosing can either rest it in the bottom of the basin to fill it or have the hosing raised so that the water falls a short distance into the basin. Either way will work.
5. Connect the other end of the hosing to the pump. Be sure that the hose is fitted snug enough to prevent it from flying off when the water starts to flow.
6. Submerge the pump and anchor it. Most pumps will have suction cups on the bottom to attach it to the bottom or side of the liner. Be sure the pump is fully submerged and that it is low enough that if the water level drops it will not be likely to be uncovered. A pump running without water isn't a very good thing.
7. Dress up the basin with a few rocks and plants if you choose to. I use the basin as a place to put young plants or starts that I want to get rooted up better. If you find that the flow in the basin isn't high enough to prevent algae from forming in the basin, you may need to increase the flow or cover it with black plastic to keep out the sunlight and keep the temperature down in the basin.
Hope you all found this helpful.
