Getting back into water gardening

Joined
Oct 27, 2011
Messages
1,993
Reaction score
1,786
Location
BC Canada
Hello All
It has been about 4 years now since I had anything to do with water gardening, we moved and left our pond behind. We bought a new house and have been renovating this since we moved in, but finally this last spring we broke ground on a big project that entailed installing a new pond. It has been a long, hard project. To start with the ground we were breaking into was all coated with pavement, so first that had to be broken up and moved somewhere temporarily. Also the pond part of the project was just a piece of the total project and had to wait till the main part was pretty much complete. The main part of the project was a walled courtyard out the back sliding door, the pond will be inside the walled courtyard area.
Anyway, it’s been a long haul, but the main courtyard area is done and I am finally well into the pond landscaping part of the deal. My job yesterday was putting a layer of insulation in the pump/filter room. (yes I have a dedicated room for the pump and filters) My task today was to start building the waterfall, which I got a good start on before I had to go to work.
From what I have read in this forum so far it’s clear you like to see pictures. So I’ll try and post a couple pic.

This first picture is very early on in the project, but represents about a month’s worth of work or more of the hardest physical part of the project. Seen in the pic is my wife and son breaking up the last bit of pavement in the courtyard area. All the areas where you see the foundation walls and post had to also have the pavement broken up and removed, then hand dug out and then formed up.
courtyard+pondarea.JPG

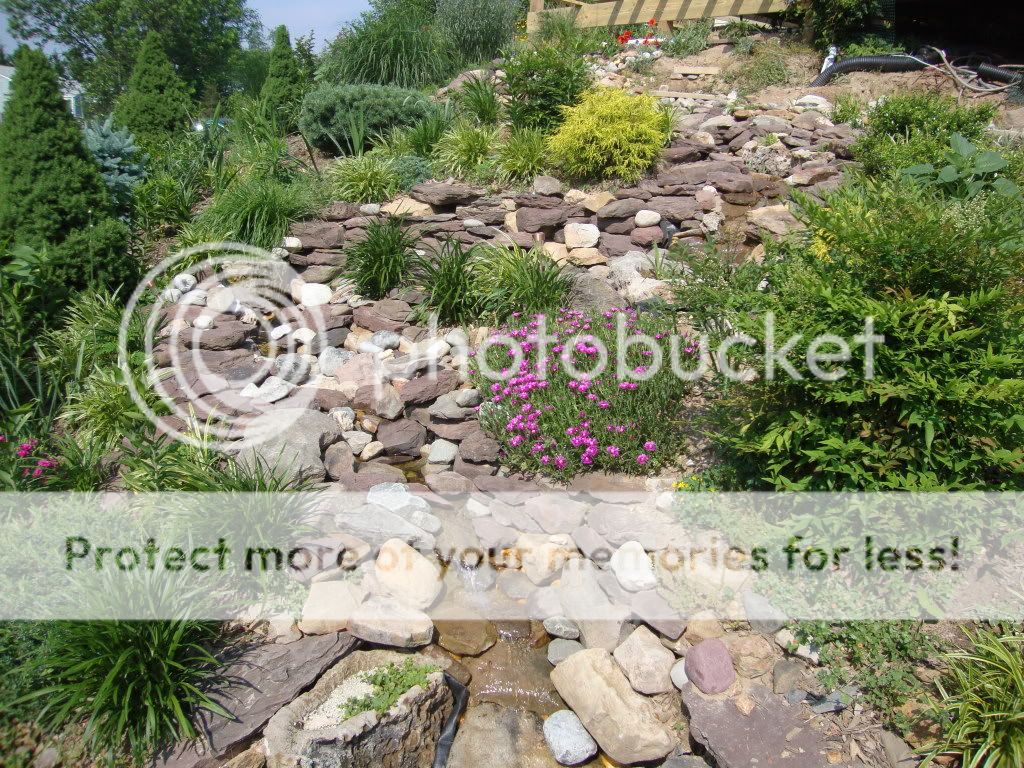
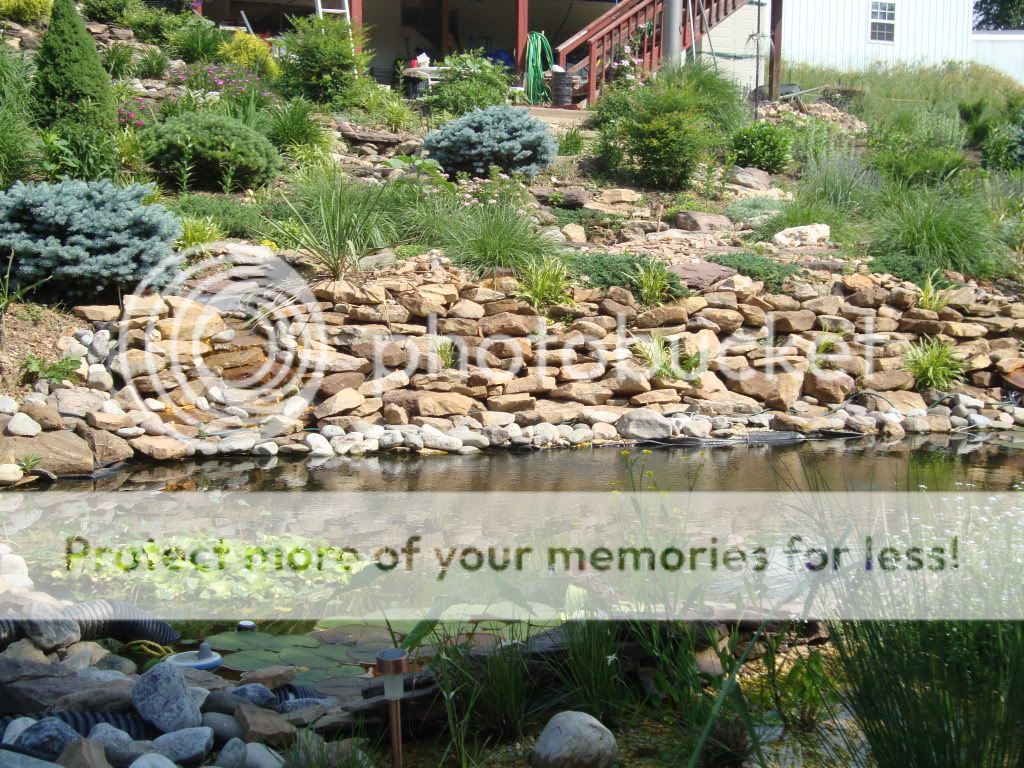
This next picture is the waterfall area I built up yesterday. I am contemplating how to install the rocks in the falls. Do I mortar them in or use expanding foam?
waterfallLiner.JPG


Well thanks for reading, I do have more pictures if anybody is interested.

Mucky
 
Joined
Apr 10, 2010
Messages
3,214
Reaction score
1,296
Location
Phoenix AZ
I think most first time builders like the foam but I think mortar is a lot easier. I found foam very difficult to work with, very messy. Mortar allows you to position rocks exactly where you like, the foam is more for filling voids. I think the mortar looks more natural, plus I often build fake rocks in with the real to get exactly what I want.

cliff1.jpg


I'm surprised you're debating this because clearly you're comfortable with mortar.
 
Joined
Oct 27, 2011
Messages
1,993
Reaction score
1,786
Location
BC Canada
Thanks for the reply Waterbug
It is true that I am comfortable with mortar, but not having tried foam for building a waterfall before I thought there might be some advantages to it . Ive emptied many a can of the expanding foam before, but never for sealing a waterfall, so I know what you mean when you say messy. The only other waterfall I built before had only one flat stone that was mortared into place to seal the lip of the upper pond so the water would spill over the rock. All the other rocks below it were just set in place without mortar or foam. That one mortar joint eventually cracked , but the spillway still worked ok so I never bothered to fix it, but I always wondered if I had used foam would the extra flexibility have stopped it from breaking?
Also I’d like to have no mortar joints showing between my rocks and from what I’ve seen foam seems to be less visible. The black stuff anyway.
Anyway, if there is no great advantage to foam I’ll happily use mortar.
 

addy1

water gardener / gold fish and shubunkins
Moderator
Joined
Jun 23, 2010
Messages
44,400
Reaction score
29,176
Location
Frederick, Maryland
Showcase(s):
1
Hardiness Zone
6b
Country
United States
I have always used foam. I like to stack my rocks, watch the flow, change them until I am happy. Usually after I stack the rocks and I am happy with them then I use the foam to fill in voids so the water does not flow behind the rocks. I have used pond foam and also the door and window foam for areas I don't want a lot of expansion. If it over fills and spills out, don't cut it, pull it off with your fingers (when dry) makes a rough edge that looks real natural and after a small amount of time you don't even see the foam it gets dirty and just disappears.

Just remember the foam is not water tight, it just directs the water, but will seep.

Mortar would be fine, but I don't like the look and you can't change your mind...........lol

My stream and pond have tons of rock, all stacked for multiple waterfalls, all foamed where need be. Still have a little liner here and there to hide, some more foaming to do.........never really done lol

DSC01701.jpg


DSC01531-1.jpg


DSC01537.jpg


What a job you are taking on that is going to look really nice when you are done.

and welcome! to our group

Frogswelcomev.gif
 
Joined
Apr 10, 2010
Messages
3,214
Reaction score
1,296
Location
Phoenix AZ
Mucky, I know what you mean by not wanting the mortar to show. The picture of the falls I posted was one of my first and pretty bad. Using river rock in a falls is out of place and the exposed mortar not too good. Later I studied natural falls and got better.

So at some point later I used flatter rock and kept the mortar back, out of sight. You really only need mortar, or foam, in the back 75% or so of the rock. In a natural falls, with exposed bed rock, it's pretty much a solid piece with cracks. The pieces are very close together. To simulate that with flat rock means basically dry stacking them and using the mortar just to keep them from rocking. Getting foam in there is pretty tight.

The foam is much more flexible of course, but compression strength isn't great. If the rocks are really close together, or you set the rock in foam before curing, compression isn't a problem. But in that case cracked mortar wouldn't be an issue either.

You could also try both and see what works for you. A can of foam isn't too expensive.

Addy, can't say I've ever had a problem removing mortared rock or cleaning the rock of mortar. Few taps, wire brush. Foam...not so easy to remove.
 
Joined
Aug 15, 2011
Messages
2,367
Reaction score
1,585
Location
Manchester, UK
Hardiness Zone
9a
Country
United Kingdom
Hello and welcome! :wave:

Looks like an interesting project, I look forward to seeing how you get along.
 

addy1

water gardener / gold fish and shubunkins
Moderator
Joined
Jun 23, 2010
Messages
44,400
Reaction score
29,176
Location
Frederick, Maryland
Showcase(s):
1
Hardiness Zone
6b
Country
United States
The foam I use is just to redirect the flow. The rocks are stacked tight enough they don't shift. I never used the foam to mortar the rocks together. But my falls etc are made of flat rocks, stacked, with some round, different sized rocks for a more natural look. Any excess foam on the rocks I could just peal off.
 

sissy

sissy
Joined
Jan 17, 2011
Messages
33,086
Reaction score
15,702
Location
Axton virginia
Showcase(s):
1
Hardiness Zone
7A
Country
United States
welcome to the world of hard ponding work .It looks like you are going to extend the roof or build a trellis over the pond .Gos by the looks of it you have put a lot of work into this and still have a lot of work a head of you
 
Joined
Oct 27, 2011
Messages
1,993
Reaction score
1,786
Location
BC Canada
Thanks again for the replies.
I’m thinking that the best course for the falls might be to use both mortar and foam, as waterbug suggested. I’ll start by mortaring the bigger rocks in to stop them from rocking and maybe finish up with foam to fill any voids. I think I’m gona need some flatter rocks though. Fortunately I live about two minutes away from a rock slide area, only problem with it is most of the rocks are not particularly flat, and they have some iron ro something in them that creates a rusty color on the surface. I don’t mind the color, but I don’t water it leaching out into the pond, so I have to be very selective in the rocks I pick.
It’s getting a little late in the year for this kind of work, but I’m just happy to be working on the pond after working around it for so long.

I’m a lot further a long then that first picture shows, but I wanted to post one of the earlier pics first showing the tougher part of the job. Here’s a couple more pic of how the project progression went along.
The pond is in the area you see right with the mount of dirt in it.
framing.JPG


stuccowire.JPG


And this wasn't even half way yet. there was no way I could start on the pond until I got this courty area finished.
 

sissy

sissy
Joined
Jan 17, 2011
Messages
33,086
Reaction score
15,702
Location
Axton virginia
Showcase(s):
1
Hardiness Zone
7A
Country
United States
wow a wall around it too ,geeze first ever pond room for this forum .I love the wave in the walls you are building .Need to ask what are the round wire mesh things for that I see .Geeze what a build ,I'm really impressed this is some build you have going can't wait to see more of what you do
 

taherrmann4

Tmann
Joined
Mar 3, 2011
Messages
3,142
Reaction score
702
Location
Louisville KY
Hardiness Zone
6
Country
United States
I made my pond with the dry stack method, stacked them up and if one was rocking I wdged another smaller one in the spot to keep it from rocking. I have changed my waterfall and creek several times and want the flexibility to do that. I have used maybe one can of foam in my entire setup, I use rocks to control the flow and path of the water for which I want it to go. Sure I have water seeping under the rocks but after a year or so I am sure it is down to a trickle b/c muck and who knows what else will find it's way in those cracks and slow the water, plus my pump is large enough that I don't even know if lose that little bit of flow going around or under the rocks.
 

addy1

water gardener / gold fish and shubunkins
Moderator
Joined
Jun 23, 2010
Messages
44,400
Reaction score
29,176
Location
Frederick, Maryland
Showcase(s):
1
Hardiness Zone
6b
Country
United States
Did the same tmann, and have moved a bunch of them around off and on, just to change the flow. After a summer of running the water flows right where I want it to.
 
Joined
Oct 27, 2011
Messages
1,993
Reaction score
1,786
Location
BC Canada
Well my son and I went and collected a load of rocks this morning and we “mortared” the rocks in up the waterfall spillway.
I think with the rocks I have to use, and the basic shape of the waterfall I had to work with, I doubt I would have had much success with the dry stack method. I basically did dry stack with my last pond except for the very top stone, but the falls on that pond was much for vertical. I think to get good results with dry stack method you need a more vertical falls. With this pond I’m working on now I’m trying to keep the waterfall noise down to a minimum, because it’s in a confined, walled in area. I don’t want the noise in there to be overwhelming. I'm shooting for something closer to a trickling stream. Anyway, it’s done now, so I let it set for a day or two and turn the water back on and see how it turned out.
.
Sissy, thanks very much for the compliments, (blushing)
The rolls of mesh you see are stucco wire. Stucco is my trade actually, and these courtyard walls are something I have been meaning to do for myself for a very long time. I have stuccoed countless adobe style houses and courtyards for other people, and loved the look of them. I’m finally getting around to doing some for myself,,, well not just myself, my wife is very happy with our new courtyard too. Of course it’s gona be a whole lot nicer when we get the pond established. :razz:

Here was the base coat of stucco
DSC02336.JPG
 

addy1

water gardener / gold fish and shubunkins
Moderator
Joined
Jun 23, 2010
Messages
44,400
Reaction score
29,176
Location
Frederick, Maryland
Showcase(s):
1
Hardiness Zone
6b
Country
United States
Nice, you do beautiful work. Can't wait to see the end product
 
Joined
Apr 10, 2010
Messages
3,214
Reaction score
1,296
Location
Phoenix AZ
I assumed everyone was using foam to seal the back of the waterfalls...my mistake. I've generally always used smaller pumps than I think most people would choose. I'd pick a pump rated for 1/4 the pond size for example. Because of that I always wanted all water in the falls to be visible so I mortar the entire back of the falls, no voids. It also makes more sense to me now when people say they like to be able to tweak the rocks to get the flow right. My approach is more of a brute force way. The only tweaks I have to make is along the edges to keep water inside the liner. So I think the choice of foam or not has more to do with whether to dry stack or not than whether foam is better than mortar. Choose the right tool for the job.
 

Ask a Question

Want to reply to this thread or ask your own question?

You'll need to choose a username for the site, which only take a couple of moments. After that, you can post your question and our members will help you out.

Ask a Question

Members online

Forum statistics

Threads
30,871
Messages
509,588
Members
13,096
Latest member
bikmann

Latest Threads

Top