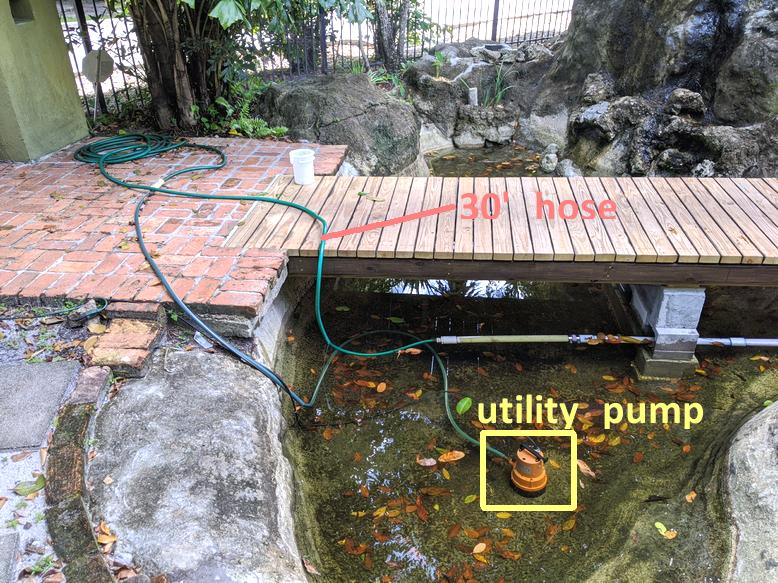
The new Sequence 750 pump and the priming pot arrived so I started to try installing them.
A couple of initial observations.
(1) the pump is smaller and lighter than I expected, and comes with a cord, so I don't have to do any hard wiring so from that stand point is a good thing.
(2) the priming pot does not have a flat bottom so it's not going to sit nicely unless you connect it to the pump end to end. If you install this priming pot say 16" or 24" upstream on the suction side of the pump, this pot will be like a humpty dumpty unless you fabricate some custom support for it.
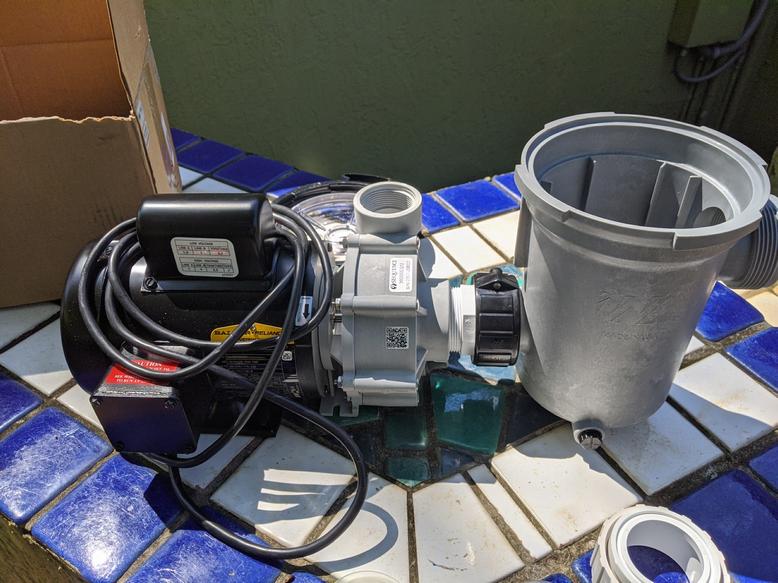
(2) the priming pot cover has a unique design. Unlike my pool pump that needs a special wrench to unwind it, this one has two handles that can be opened by hand without a tool. Down side is there is a clear lid and there is a retainer to open and close. Half the time the retainer picks up the lid, the other times the lid falls off the retainer.
(3) On one side of the pump there is an electrical box where the cord comes out of. The wiring instructions, the motor specs, and the priming pot drain plug are all on that side. In my case, the pipes are coming from the left, so I really need to turn the pump around for it to work, which means all these will end up facing the wall, and if I ever need to open or access these, it will be kind of awkward and inconvenient.
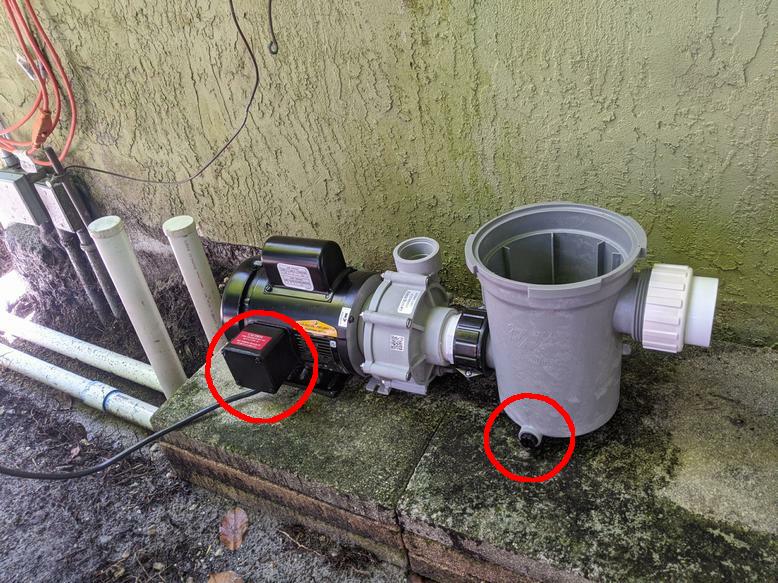
I noticed on the motor housing there is a sticker that says "ROTATION" with a down arrow. Anyone know what this is for? Is there some way the motor can be rotated on it's axis to spin the electrical box to face up for access if needed? I doubt it but thought I ask what the ROTATION means.
Yes, I am aware I can disconnect the pump at the inlet and outlet and turn it around for service. I just thought I mention this because it never occurred to me to ask if there is a right or left drain plug on the priming pot for cases like mine when the plug faces a wall. Oh well.
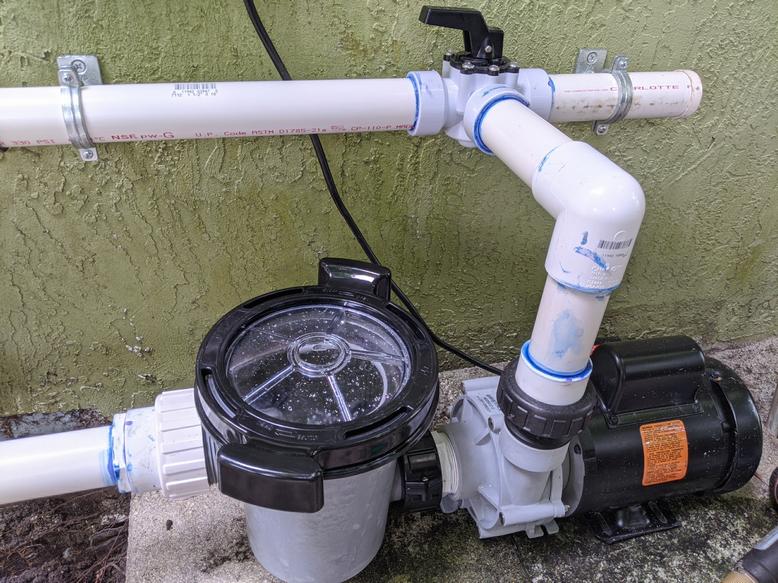
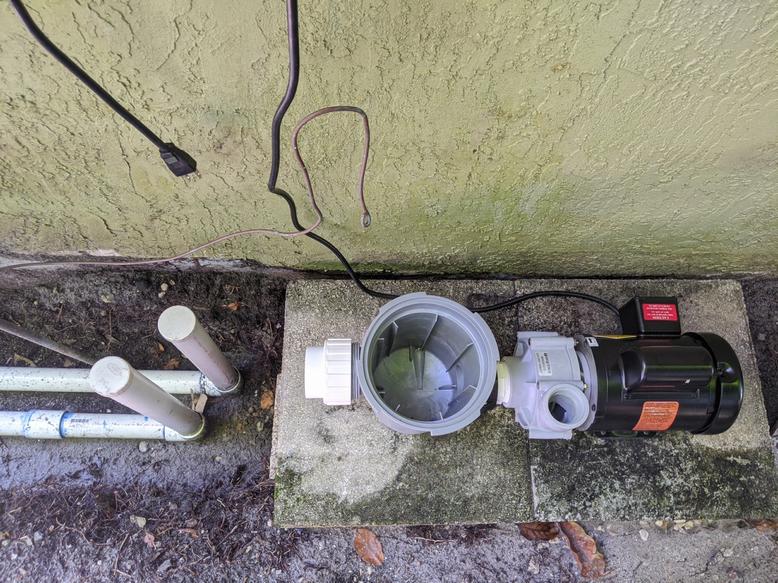
(3) Trying to figure out how to make the connections. Here is a top view of the pipes and the pump after I turned it around.
The suction side is simple. I just need to cut the vertical pipe, put in a 90 elbow and connect to the inlet union, as shown in the red line below.
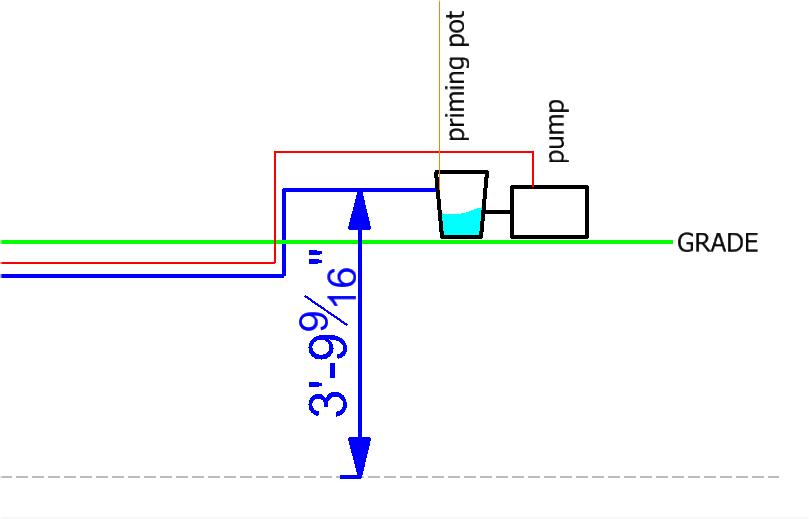
The return side is a bit of a challenge since the outlet is not in the middle and my return line is also offset. Normally I would just run it across, but I need to do it in a way to not interfere with the opening and closing of the priming pot lid, my thinking is I need to cut the return horizontal pipe so I can rotate that pipe towards the wall at an angle, then a 90 elbow to turn horizontal to run it along the wall, then a 3 way valve so I can open one port to drain the pond, then a short run to directly above the outlet, then finally vertically down to a union to connect the outlet port, as shown in blue below.
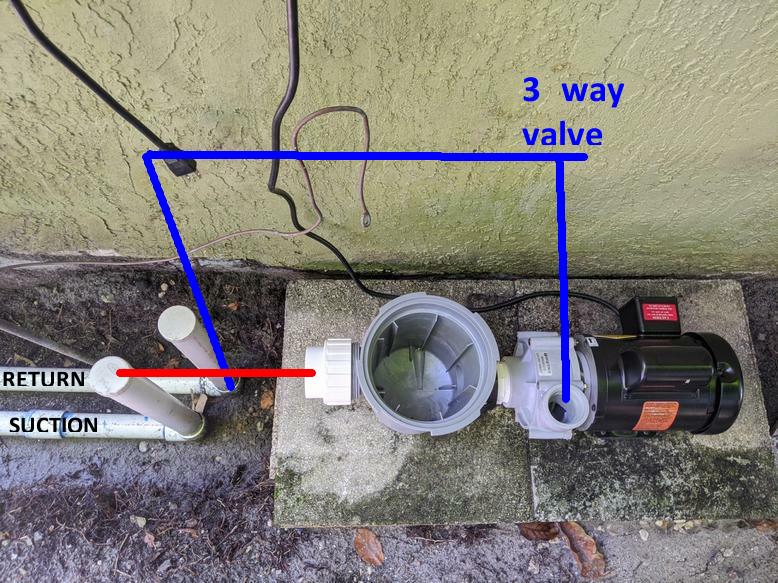
Certainly more 90 elbows then ideal, but will this work?
A couple of initial observations.
(1) the pump is smaller and lighter than I expected, and comes with a cord, so I don't have to do any hard wiring so from that stand point is a good thing.
(2) the priming pot does not have a flat bottom so it's not going to sit nicely unless you connect it to the pump end to end. If you install this priming pot say 16" or 24" upstream on the suction side of the pump, this pot will be like a humpty dumpty unless you fabricate some custom support for it.
(2) the priming pot cover has a unique design. Unlike my pool pump that needs a special wrench to unwind it, this one has two handles that can be opened by hand without a tool. Down side is there is a clear lid and there is a retainer to open and close. Half the time the retainer picks up the lid, the other times the lid falls off the retainer.
(3) On one side of the pump there is an electrical box where the cord comes out of. The wiring instructions, the motor specs, and the priming pot drain plug are all on that side. In my case, the pipes are coming from the left, so I really need to turn the pump around for it to work, which means all these will end up facing the wall, and if I ever need to open or access these, it will be kind of awkward and inconvenient.
I noticed on the motor housing there is a sticker that says "ROTATION" with a down arrow. Anyone know what this is for? Is there some way the motor can be rotated on it's axis to spin the electrical box to face up for access if needed? I doubt it but thought I ask what the ROTATION means.
Yes, I am aware I can disconnect the pump at the inlet and outlet and turn it around for service. I just thought I mention this because it never occurred to me to ask if there is a right or left drain plug on the priming pot for cases like mine when the plug faces a wall. Oh well.
(3) Trying to figure out how to make the connections. Here is a top view of the pipes and the pump after I turned it around.
The suction side is simple. I just need to cut the vertical pipe, put in a 90 elbow and connect to the inlet union, as shown in the red line below.
The return side is a bit of a challenge since the outlet is not in the middle and my return line is also offset. Normally I would just run it across, but I need to do it in a way to not interfere with the opening and closing of the priming pot lid, my thinking is I need to cut the return horizontal pipe so I can rotate that pipe towards the wall at an angle, then a 90 elbow to turn horizontal to run it along the wall, then a 3 way valve so I can open one port to drain the pond, then a short run to directly above the outlet, then finally vertically down to a union to connect the outlet port, as shown in blue below.
Certainly more 90 elbows then ideal, but will this work?