Here are some directions for plumbing a stock tank. The one in the photos is a Rubbermaid 150 gallon tank, but you can do this set up with a 100g one (or smaller). It is basically the same plumbing as a 55g barrel. I used this stock tank on my newest pond build you can find here.
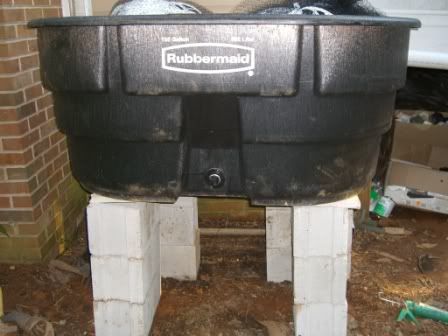
Here is the stock tank in question. I got mine from the Tractor Supply Company for $120 bucks, and I had a $5 coupon that I found online that I brought to the store with me. You can see that it has a 1 1/2" drain plug on the front, but I have completely ignored it because I want a bigger waste valve from below. You do not need to put it on as many blocks as I have. I needed to do this because I am trying to make the clearance of my crawl space under my screen porch. But you will need to put it on at least 1 set of blocks to get the waste pipe under it that I will show you later.
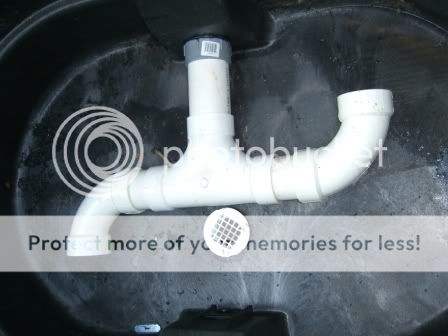
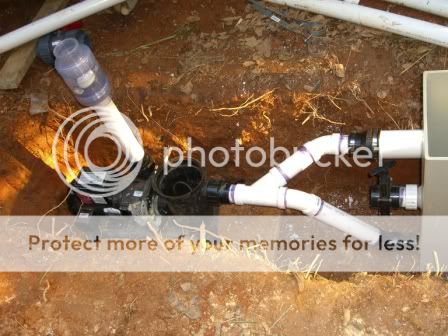
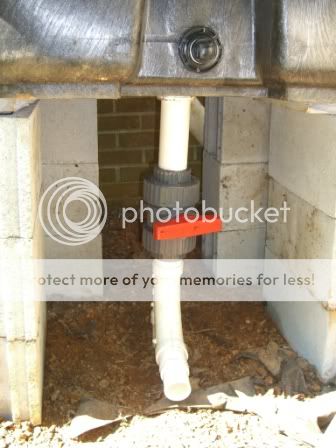
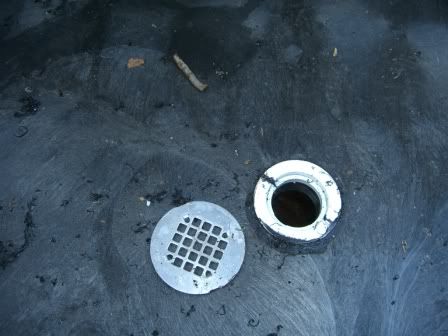
Let's begin. I would go no smaller than 2" PVC to plumb this stock tank You will need to get a shower drain from Lowes/Home Depot to serve as the waste on the bottom floor of the tank. You can also use a bulkhead fitting here if you happen to have one laying around. The drains are normally 3" on top, but the pipe below it is 2". Nonetheless you will need to buy a 3 1/4" holesaw from Lowes (so that it will fit the 3" drain). You simply drill a hole through the tank bottom, and clamp your drain on. You then grab some P&L Roofing and Flashing Sealant (in the caulk aisle) and work it in around your drain above and below.
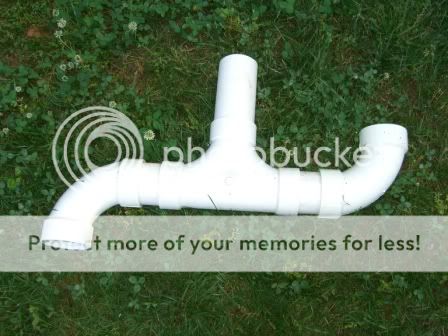
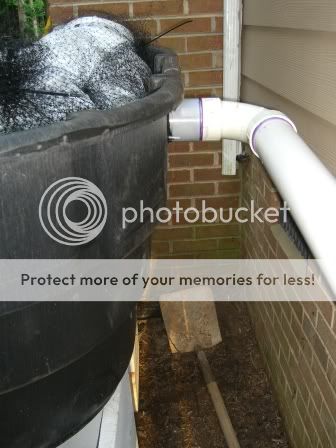
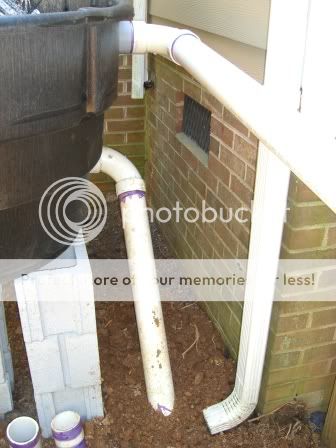
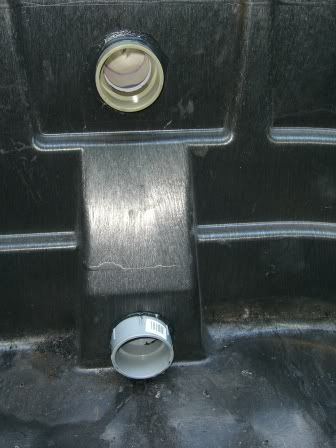
Next, we'll make the inlet and the outlet holes on the side of the stock tank. I decided to make them both on the same side of the tank, so I wouldn't have pipe wrapping around both sides, and I wanted to avoid that 1 1/2" drain, as I mentioned earlier. Go to the electrical/conduit section of Home Depot and get two 2" (or 3", if you've decided to plumb your tank with 3" pipe like I did) male and two 2" female grey conduit adapters. They screw right into eachother as seen below. You put the female on one side, and the male on the other side of the tank wall and they screw very tightly together. DO NOT USE PVC FITTINGS FOR THIS TASK! PVC does not have the same type of close fit threading to clamp tightly together. Use P&L Roofing and Flashing Sealant all around the inside and outside of the fitting to prevent leaks.
Make sure that your upper exit pipe is at least 3-4 inches down from the top of your stock tank rim.
Here is the stock tank in question. I got mine from the Tractor Supply Company for $120 bucks, and I had a $5 coupon that I found online that I brought to the store with me. You can see that it has a 1 1/2" drain plug on the front, but I have completely ignored it because I want a bigger waste valve from below. You do not need to put it on as many blocks as I have. I needed to do this because I am trying to make the clearance of my crawl space under my screen porch. But you will need to put it on at least 1 set of blocks to get the waste pipe under it that I will show you later.
Let's begin. I would go no smaller than 2" PVC to plumb this stock tank You will need to get a shower drain from Lowes/Home Depot to serve as the waste on the bottom floor of the tank. You can also use a bulkhead fitting here if you happen to have one laying around. The drains are normally 3" on top, but the pipe below it is 2". Nonetheless you will need to buy a 3 1/4" holesaw from Lowes (so that it will fit the 3" drain). You simply drill a hole through the tank bottom, and clamp your drain on. You then grab some P&L Roofing and Flashing Sealant (in the caulk aisle) and work it in around your drain above and below.
Next, we'll make the inlet and the outlet holes on the side of the stock tank. I decided to make them both on the same side of the tank, so I wouldn't have pipe wrapping around both sides, and I wanted to avoid that 1 1/2" drain, as I mentioned earlier. Go to the electrical/conduit section of Home Depot and get two 2" (or 3", if you've decided to plumb your tank with 3" pipe like I did) male and two 2" female grey conduit adapters. They screw right into eachother as seen below. You put the female on one side, and the male on the other side of the tank wall and they screw very tightly together. DO NOT USE PVC FITTINGS FOR THIS TASK! PVC does not have the same type of close fit threading to clamp tightly together. Use P&L Roofing and Flashing Sealant all around the inside and outside of the fitting to prevent leaks.
Make sure that your upper exit pipe is at least 3-4 inches down from the top of your stock tank rim.