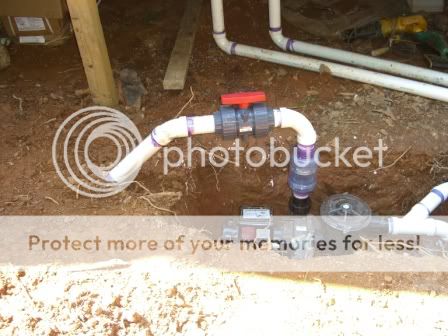
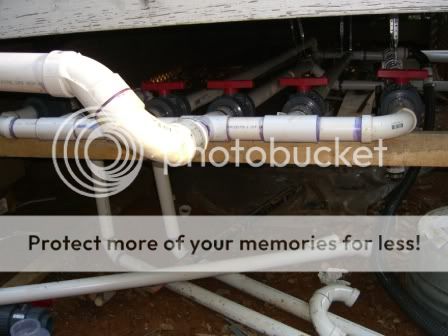
During the last 3 days we have been focusing on the web of plumbing pipe and putting everything together. Gosh, pond plumbing does take time to do right. One word of advice is dry fit everything first and glue everything at the end.
Nothing massive to report, but here's some photos on the progress:
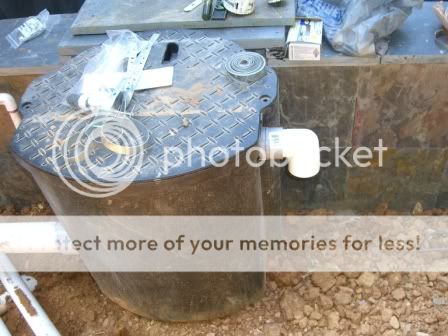
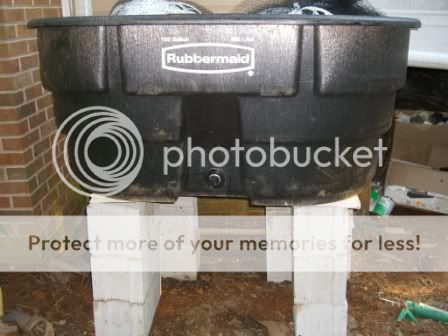
Here is the 150g stock tank up on 3 rows of blocks. I've had to raise it this high for several reasons. 1) I need it to gravity flow down to my waterfall, so it needs to be higher than the falls; and 2) I need to be able to get access to that space under my screen porch, so wanted the pipe to fall above that opening and not block it. Tomorrow I will post a separate thread on plumbing the stock tank, as we're nearly done with it.
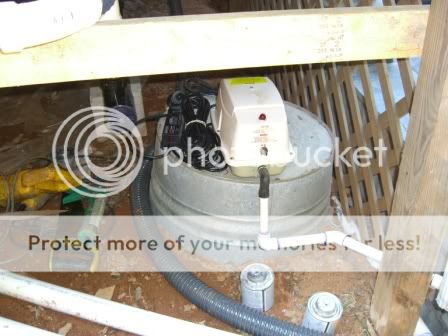
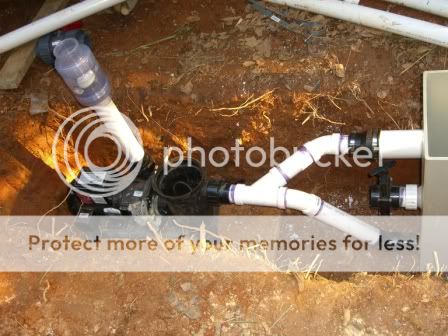
Here is my pump sitting on two blocks and a piece of liner to prevent flooding in event of a heavy rain. The ground slopes downward to where I will have a sump pit to catch any rain that comes in. The pump is not yet plumbed on the uppper outlet side. You can see my clear checkvalve waiting to be mated to a piece of PVC. I will line the sides of this area with some 2" high roof flashing when we're done and put some 1" gravel on the ground to keep everything neat. You can see the Ultra Sieve on the right.
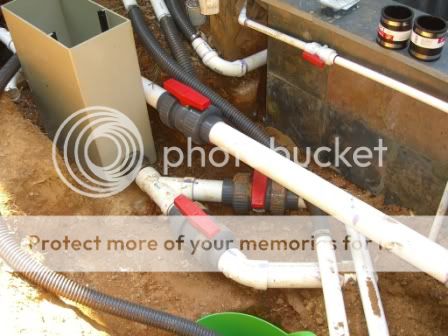
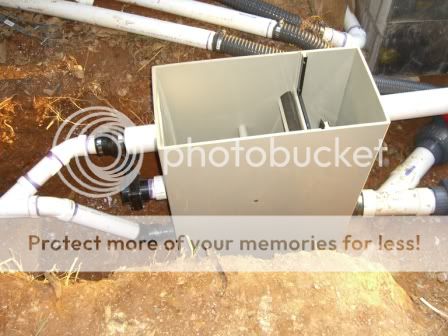
Here's the Ultra Sieve in all her glory (I named her Betty). LOL! On the right side of the photo on the bottom, that wye fitting connects both my 3" aerated BD's into the 4" mouth of the sieve. I just used a rubber fernco coupler fitting to upsize from 3" to 4". Plus it gives me a way to remove the sieve should I need to. We used lots of rubber fittings on every line, so everything can be dismantled for any reason.
Nothing massive to report, but here's some photos on the progress:
Here is the 150g stock tank up on 3 rows of blocks. I've had to raise it this high for several reasons. 1) I need it to gravity flow down to my waterfall, so it needs to be higher than the falls; and 2) I need to be able to get access to that space under my screen porch, so wanted the pipe to fall above that opening and not block it. Tomorrow I will post a separate thread on plumbing the stock tank, as we're nearly done with it.
Here is my pump sitting on two blocks and a piece of liner to prevent flooding in event of a heavy rain. The ground slopes downward to where I will have a sump pit to catch any rain that comes in. The pump is not yet plumbed on the uppper outlet side. You can see my clear checkvalve waiting to be mated to a piece of PVC. I will line the sides of this area with some 2" high roof flashing when we're done and put some 1" gravel on the ground to keep everything neat. You can see the Ultra Sieve on the right.
Here's the Ultra Sieve in all her glory (I named her Betty). LOL! On the right side of the photo on the bottom, that wye fitting connects both my 3" aerated BD's into the 4" mouth of the sieve. I just used a rubber fernco coupler fitting to upsize from 3" to 4". Plus it gives me a way to remove the sieve should I need to. We used lots of rubber fittings on every line, so everything can be dismantled for any reason.

")