My 5,000 Gal Pond Build In Photos

Joined
Jul 7, 2009
Messages
2,817
Reaction score
19
Location
North Carolina
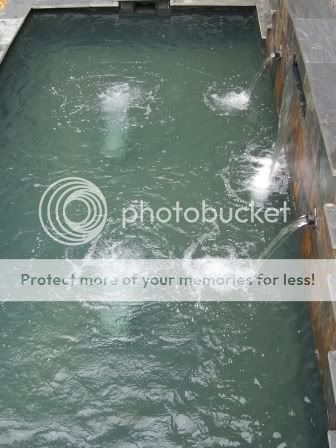
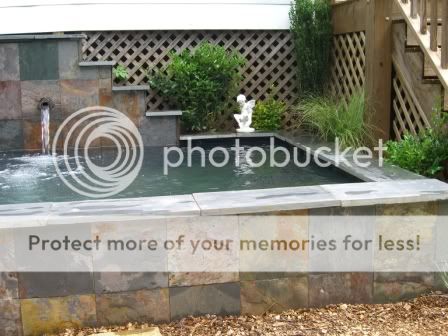
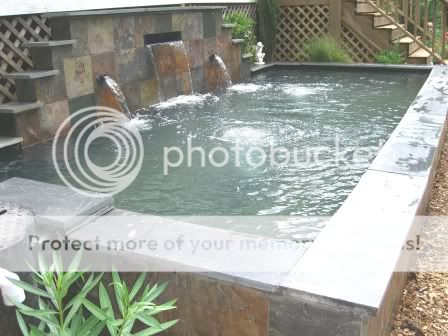
An update. Today we took off the 4 capstones on each of the corners and yanked up the liner that fell below water line. It was only that way on one corner, but I wanted to check the other 3 while we were at it and not have to risk having to do it again. Unfortunately, I had to separate my liner tape that I used to make my pretty corner fold and keep the nice crease in that one problem area. Needless to say with all the other capstones on top, it was impossible to now get that lovely fold I once had. So, it ain't as pretty, but it's functional and water tight. That's all that matters in the end. I'm letting the gobs and gobs of P&L roofing sealant harden over night. Tomorrow morning I'm getting in there with my Oase Pondvac and sucking up any debris that fell in. Then I get to filling again.

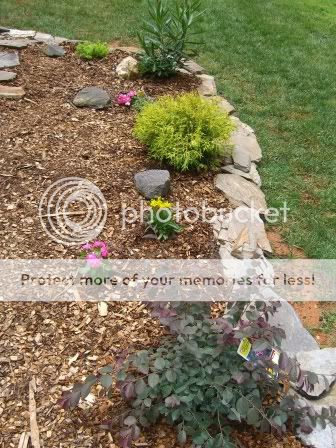
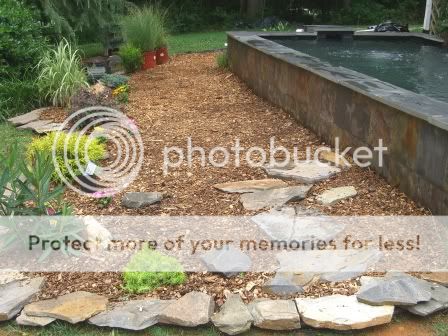
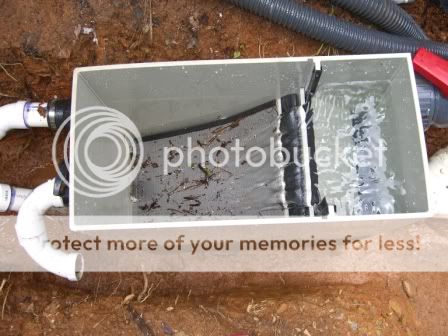
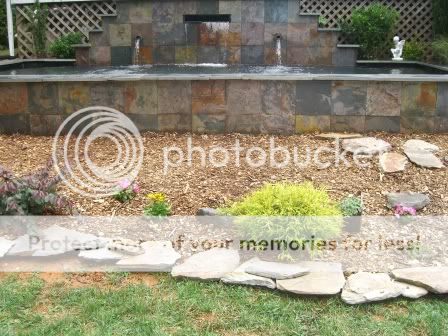
I'll start to put some lanscaping around the pond rim tomorrow, and then I need to devise some kinda cover for the filter and pump and put all the latice around the screen porch back on. Tomorrow, I guess the pond build is officially done.

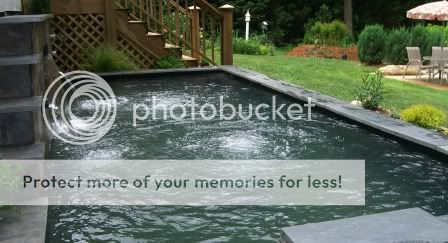
Hopefully, the next batch of photos I'll have are the finished product, or darn close to finish.
 
Joined
Jul 7, 2009
Messages
2,817
Reaction score
19
Location
North Carolina
Well, I am more or less done. I will have photos tomorrow. I am within 1" of having water to the top of the line and she appears to be holding (saying novenas now!).

I started mulching and putting some plants in for landscaping. Turned the filtration on and everything seems to be okey-dokey. Thank goodness for all my ball valves, as I ran around like a chicken ensuring that the inflow matched the outflow so there would be no overlflowing filter. Since my old pond had a gravity fed filter, I knew it would never overflow. This time around the filter is above ground, so I had to carefully measure everything to work without overflowing.

I will have some photos tomorrow if the rain will stay at bay, but I am pleased. Hope she holds water.

Have two new fish coming shortly Both are around 7.5" (I like to see my babies grow up).

The first is a standard fin kohaku with a nice even pattern:

kohaku.jpg


The next is a lemon yellow butterfly hariwake. I do not have any yellow koi, so I've been gunning for one for a while:

lemonhariwake2.jpg
 
Joined
May 1, 2010
Messages
130
Reaction score
0
Location
Whiting, IN
Very Nice Fish! Glad your liner problems are behind you. Congratulations!

I am all done building our Asian water garden too, but the beautiful waterfall the love of my life built had a minor lip, leak problem, as she built it using a copper flower box, cut the corners and folded down the front lip. It looked beautiful for a night and in the morning waterline was down 4 inches!:smile: I siliconed it, but may have to weld it. We'll see.

Good news is the waterline is holding except when the waterfall is on!

What kind of fish is the yellow one? How big will it get? It is my favorite Koi type so far.
 
Joined
Jul 7, 2009
Messages
2,817
Reaction score
19
Location
North Carolina
It appears my pond is holding water as of last night. Tried to get some landscaping done around it today, but the heavens opened up with a heavy dose of rain. It's supposed to be like this for the next 4 or 5 days. Spontaneous thunderstorming.

Linc, the yellow fish is a Hariwake, which are basically derived from Ogons. You can see the white underneath, with the yamabuki (yellow) overlay on top. They're a relatively simple fish, but I've never had a yellow koi before. I hope it holds it's yellow.
 
Joined
Jul 7, 2009
Messages
2,817
Reaction score
19
Location
North Carolina
Crazy weather today, but I managed to get more landscaping done.

Made a border around the whole pond with the slate stone that was formerly on my old upper pond. Just took it off and recycled it here. Went to the garden store and Lowe's and picked up a few plants and flowers:

CIMG2778.jpg


Here's how it looks at the front of the pond. I had all the mulch from a few trees we took down on the front part of the property last year, so thankfully that was free and waiting to be used. Just grabbed the pitchfork and a wheel barrel and laid it all out. Started to lay out a path of flat stones for a bit of a walkway, but the rain started again, so could not set them.

CIMG2771.jpg


Here's a shot of the pond from my upper deck. The bottom drains are cranking as are the spitters and waterfall:

CIMG2770.jpg


Here's the right side of the pond. I started putting some landscaping behind it. In the next year or two that should fill out nicely and cover the lattice more.

CIMG2772.jpg
 
Joined
Jul 7, 2009
Messages
2,817
Reaction score
19
Location
North Carolina
Here's a shot from the leftmost corner standing behind the skimmer. I'm not in love with the waterfall. I think I need to make the opening smaller. I will make a little strip of small slate tiles and figure out a way to rig it across the mouth of the falls to make it appear less wide. I also need to tweak the way the water comes out of the falls--it's a little crooked--the water falls more thickly on the right side than on the left. It's a lovely sound from my screen porch above the pond though. Hopefully in a few seasons that Oleander by the skimmer below will cover it up a bit more.

CIMG2775.jpg


Here's a pic of my divine Ultima III Midi sieve. It is working like a charm and catching any crud that the bottom drains let in. All this muck is not sitting inside the water column. Just hanging out waiting for me to scoop it up. This was the best investment I made, and so far has been worth every crazy penny I paid for it. On the lower part you can see those two 90's backtracking to where my waste/sump barrel will be. I've not yet connected that hose. You can also see clay mud on the ground. I have not yet bought my gravel to put on my filter pit floor here.

CIMG2776.jpg


Here's another shot from the left side. That huge mound of red dirt in the distance is what I will use to fill in my old pond when I close it down in the next couple of weeks. I will start introducing the fish in about a week. Don't want to rush this part. I've added some bacteria to the filtration and will put in some of the existing media from the old pond to seed the new filter. My new Emperor UV has not yet been plugged in to allow the new bacteria to flourish. I will toy with that next week and slide the bulb in.

CIMG2777.jpg


Here's a head on shot while I'm standing on the pool deck:

CIMG2773.jpg
 
Joined
Jul 7, 2009
Messages
2,817
Reaction score
19
Location
North Carolina
Overall I'm very pleased with the way it all turned out. The only thing I would have done differently is to have allowed the existing tile to come further down on the waterfall mouth to make it appear smaller. Luckily, this has a fix, so it's just a minor issue.

I still need to add landscape lighting, which I will just repurpose from the lights on my old pond. Am really trying to re-use as much as I can to save some costs (and justify the sieve cost. LOL!). I will continue to use much of the old stone from the old pond. I still need to mulch the left side of the pond where all the equipment sits, and I need to build some kind of cover for my 150g bio stock tank. So, still lots of little things to do, but the overall project is essentially complete.

I need to get one larger piece of statuary. My little stone fairy sat near my old pond, and it reminds me of my oldest son, Michael, who you can see at the beginning of this thread. Same wavy hair. Since our house and property are a bit in the style of an English farmhouse, and the pond is formal in style, I will continue to use a fairy (albeit a larger one) in the far corner. I saw this one online that is sitting and has a foot that hangs down. I think that would look cool hanging in the water.

11618239.jpg
 
Joined
May 10, 2010
Messages
268
Reaction score
3
Location
Waxhaw, NC
WOW! That is awesome! Can't wait to see it up close. I am thinking about the cover for the stock tank and have an idea. I don't remember if yours is in full view or not, but I'm thinking a wooden one that is lined with acrylic. Some holes drilled in it and screen placed between the acrylic and wood. Just a rough idea for now that can be modified. Another opton is to buy the 50G that is the same size except for the deph and hinge it to the top.
 
Joined
Jul 7, 2009
Messages
2,817
Reaction score
19
Location
North Carolina
I'm thinking of a 2x4 frame box around the filter. Then I'm thinking of doing a top out of the that corrugated roofing material sheeting. I figure I'll make a frame for the top out of 2x4's and then screw the sheets of roofing on it. Then I'll put a few hinges on back to be able to life the lid. It's waterproof, and the sheets are big enough to cover it.
 
Joined
May 1, 2010
Messages
130
Reaction score
0
Location
Whiting, IN
WOW! Spectacular! Those are going to be very happy Koi. You should be very proud of yourself! :smile::fish::fish::fish: (plus one extra fish.) I give it a 5 fish rating.
 

Ask a Question

Want to reply to this thread or ask your own question?

You'll need to choose a username for the site, which only take a couple of moments. After that, you can post your question and our members will help you out.

Ask a Question

Members online

Forum statistics

Threads
30,780
Messages
508,556
Members
13,042
Latest member
lucaryan

Latest Threads

Top